


This tutorial aims to explain how to process SeeStar images with Siril. The tutorial was inspired by this post on CloudyNights.
By default, the SeeStar app automatically stacks the images it takes and only stores the stacked result. In order to be able to follow this tutorial, the SeeStar needs to store all individual frames. To do that:


To copy the frames to your harddisk, connect the SeeStar via a USB cable to your PC/laptop.
The SeeStar will appear as a new disk letter in Explorer.
In this case it is E: but it could be any other letter.
Open the new drive ( 1 ) and then open the MyWorks folder ( 2 ).
You will see folders with the name of the object that you imaged as well as folders with the same name and
with the _sub suffix ( 3 ).
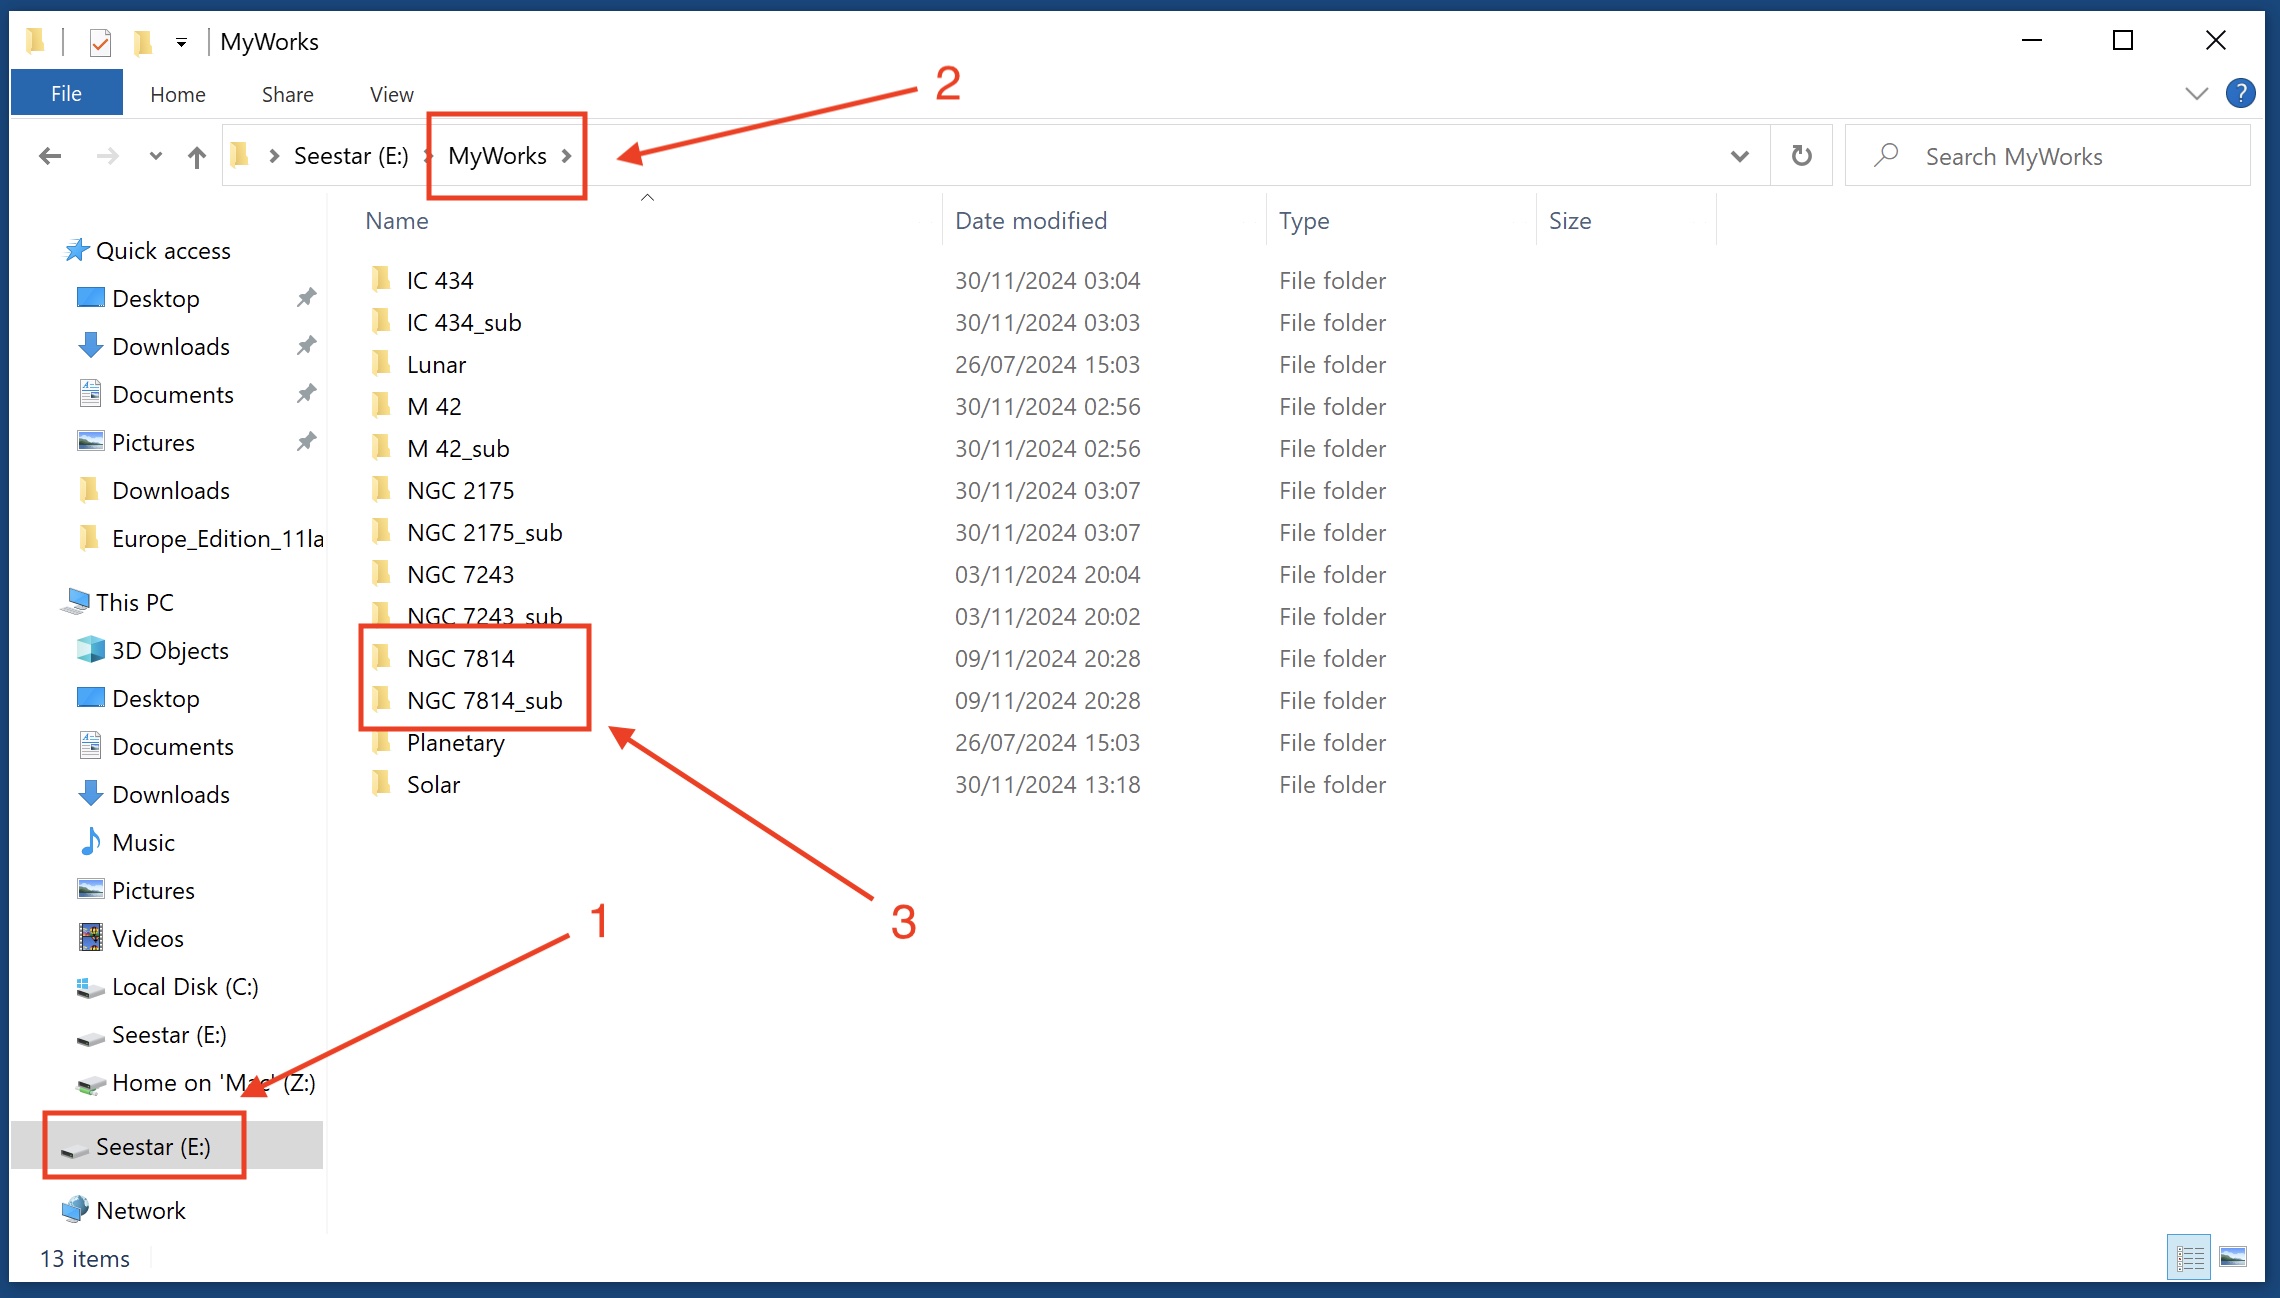
Open the _sub folder ( 4 ).
You will see both FIT files and JPG files.
You only need the FIT files.
In order to be able to select them all at once, click View -> Details -> Group By -> Type ( 5 ).
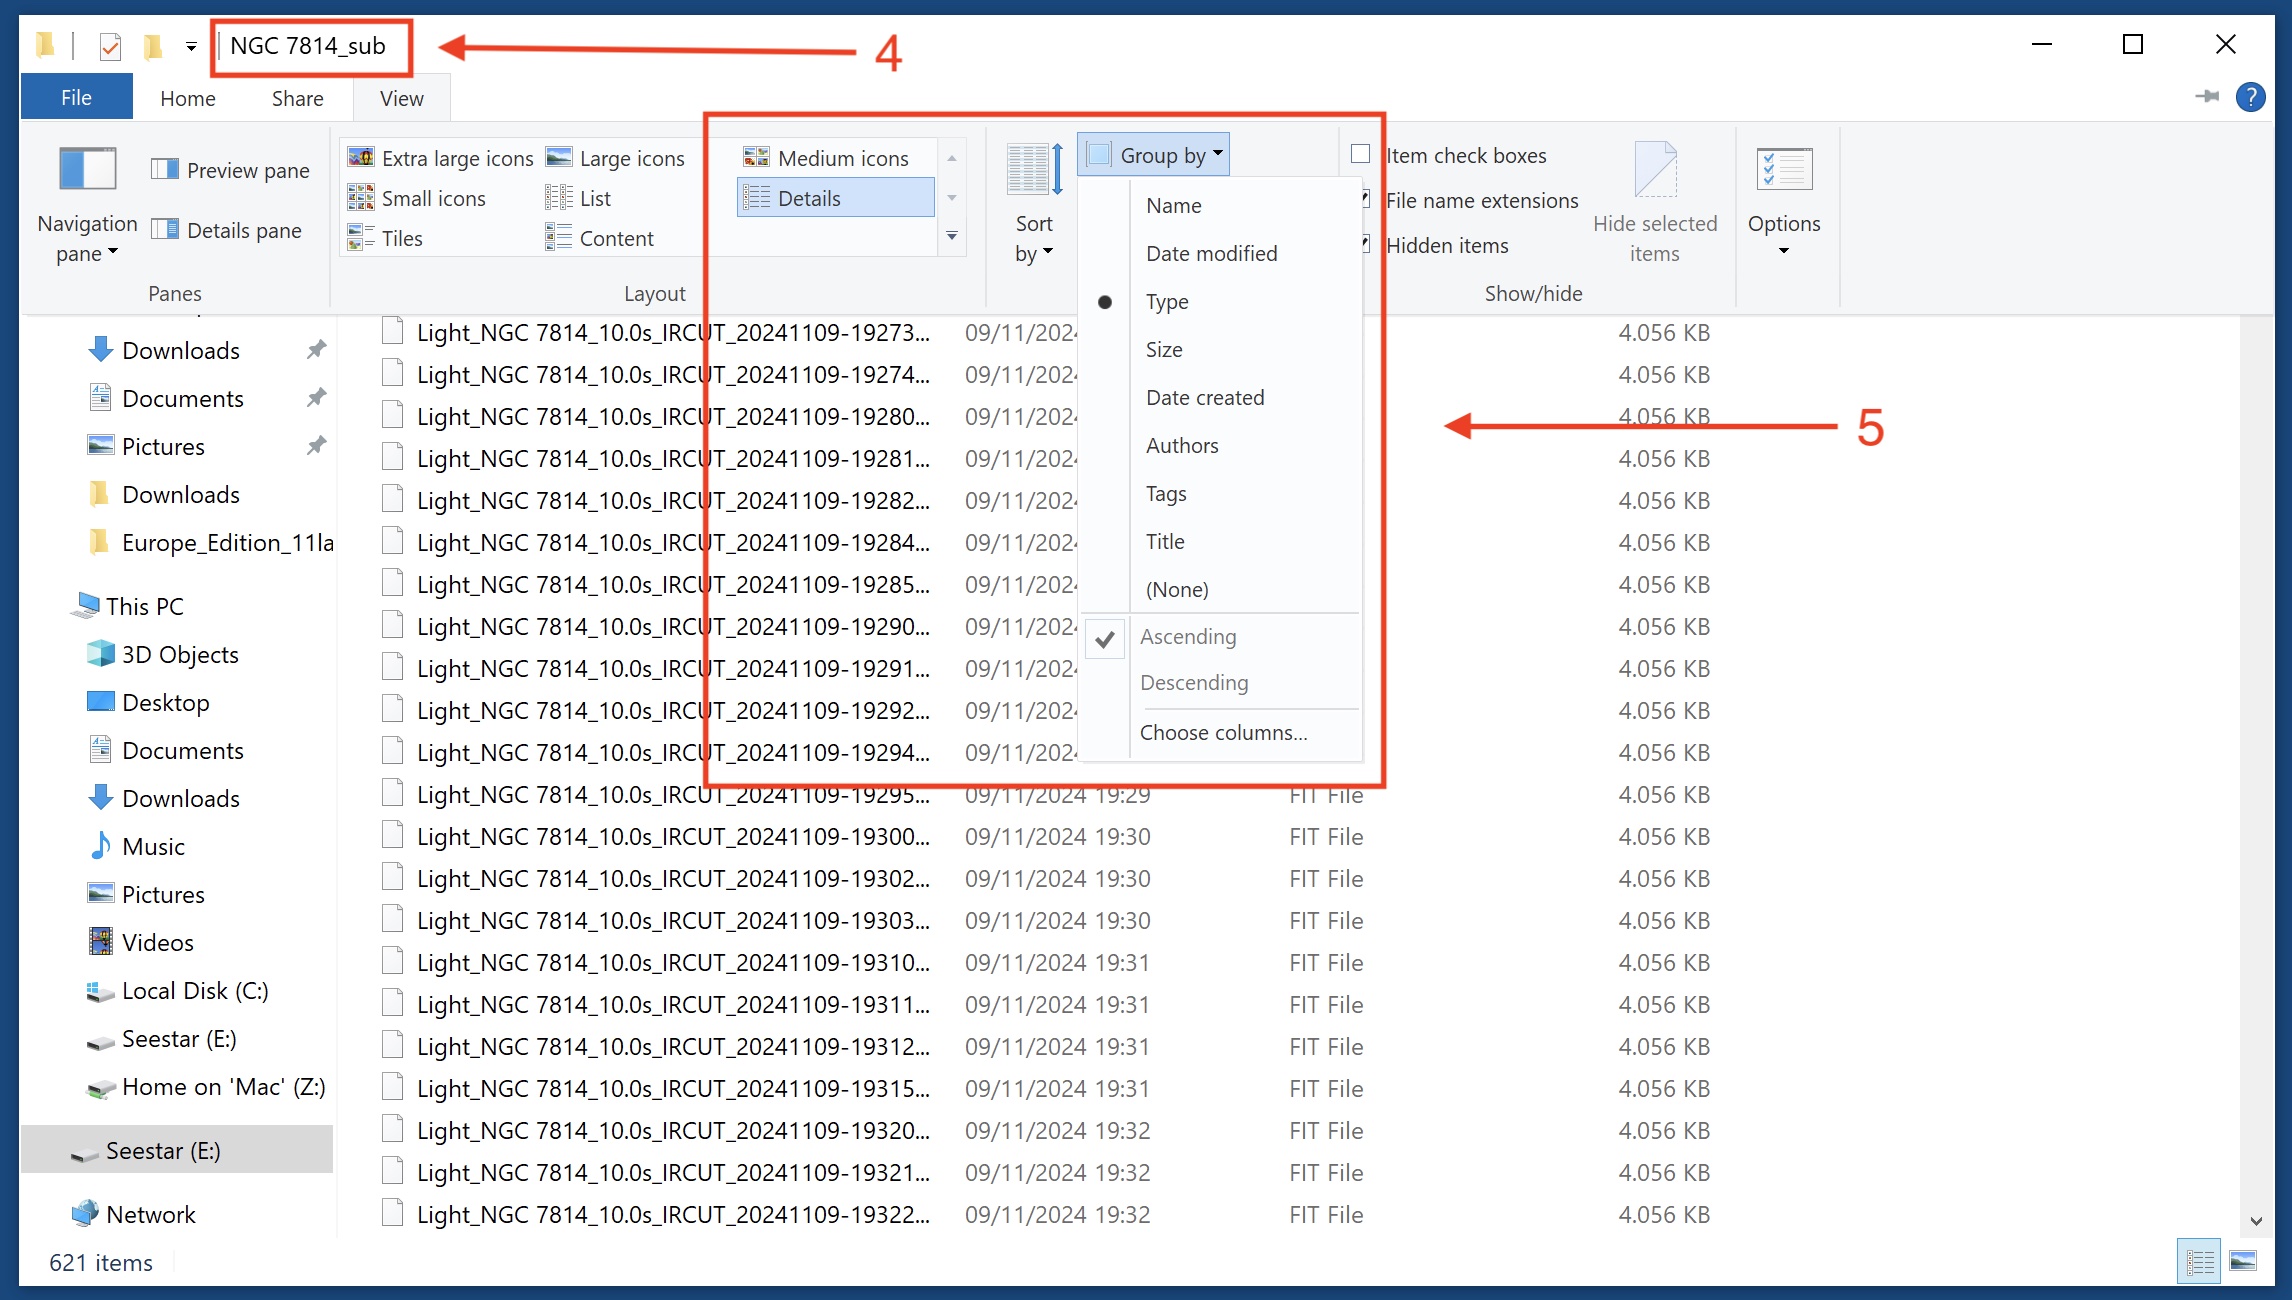
Select all FIT files and copy them to your harddisk.
For this tutorial Siril 1.2.5 is used. Note that Siril is a very powerful image processing application that has many different options. This tutorial shows the basics for propcessing SeeStar images. That means the following:
In case of deep sky imaging, the SeeStar app takes care of calibrating the lights with darks. The FIT files downloaded from the SeeStar device therefore already have been calibrated with darks. The SeeStar app calls that image enhancing. In general no flats are taken with a SeeStar. Therefore, no calibration step is included in this tutorial.
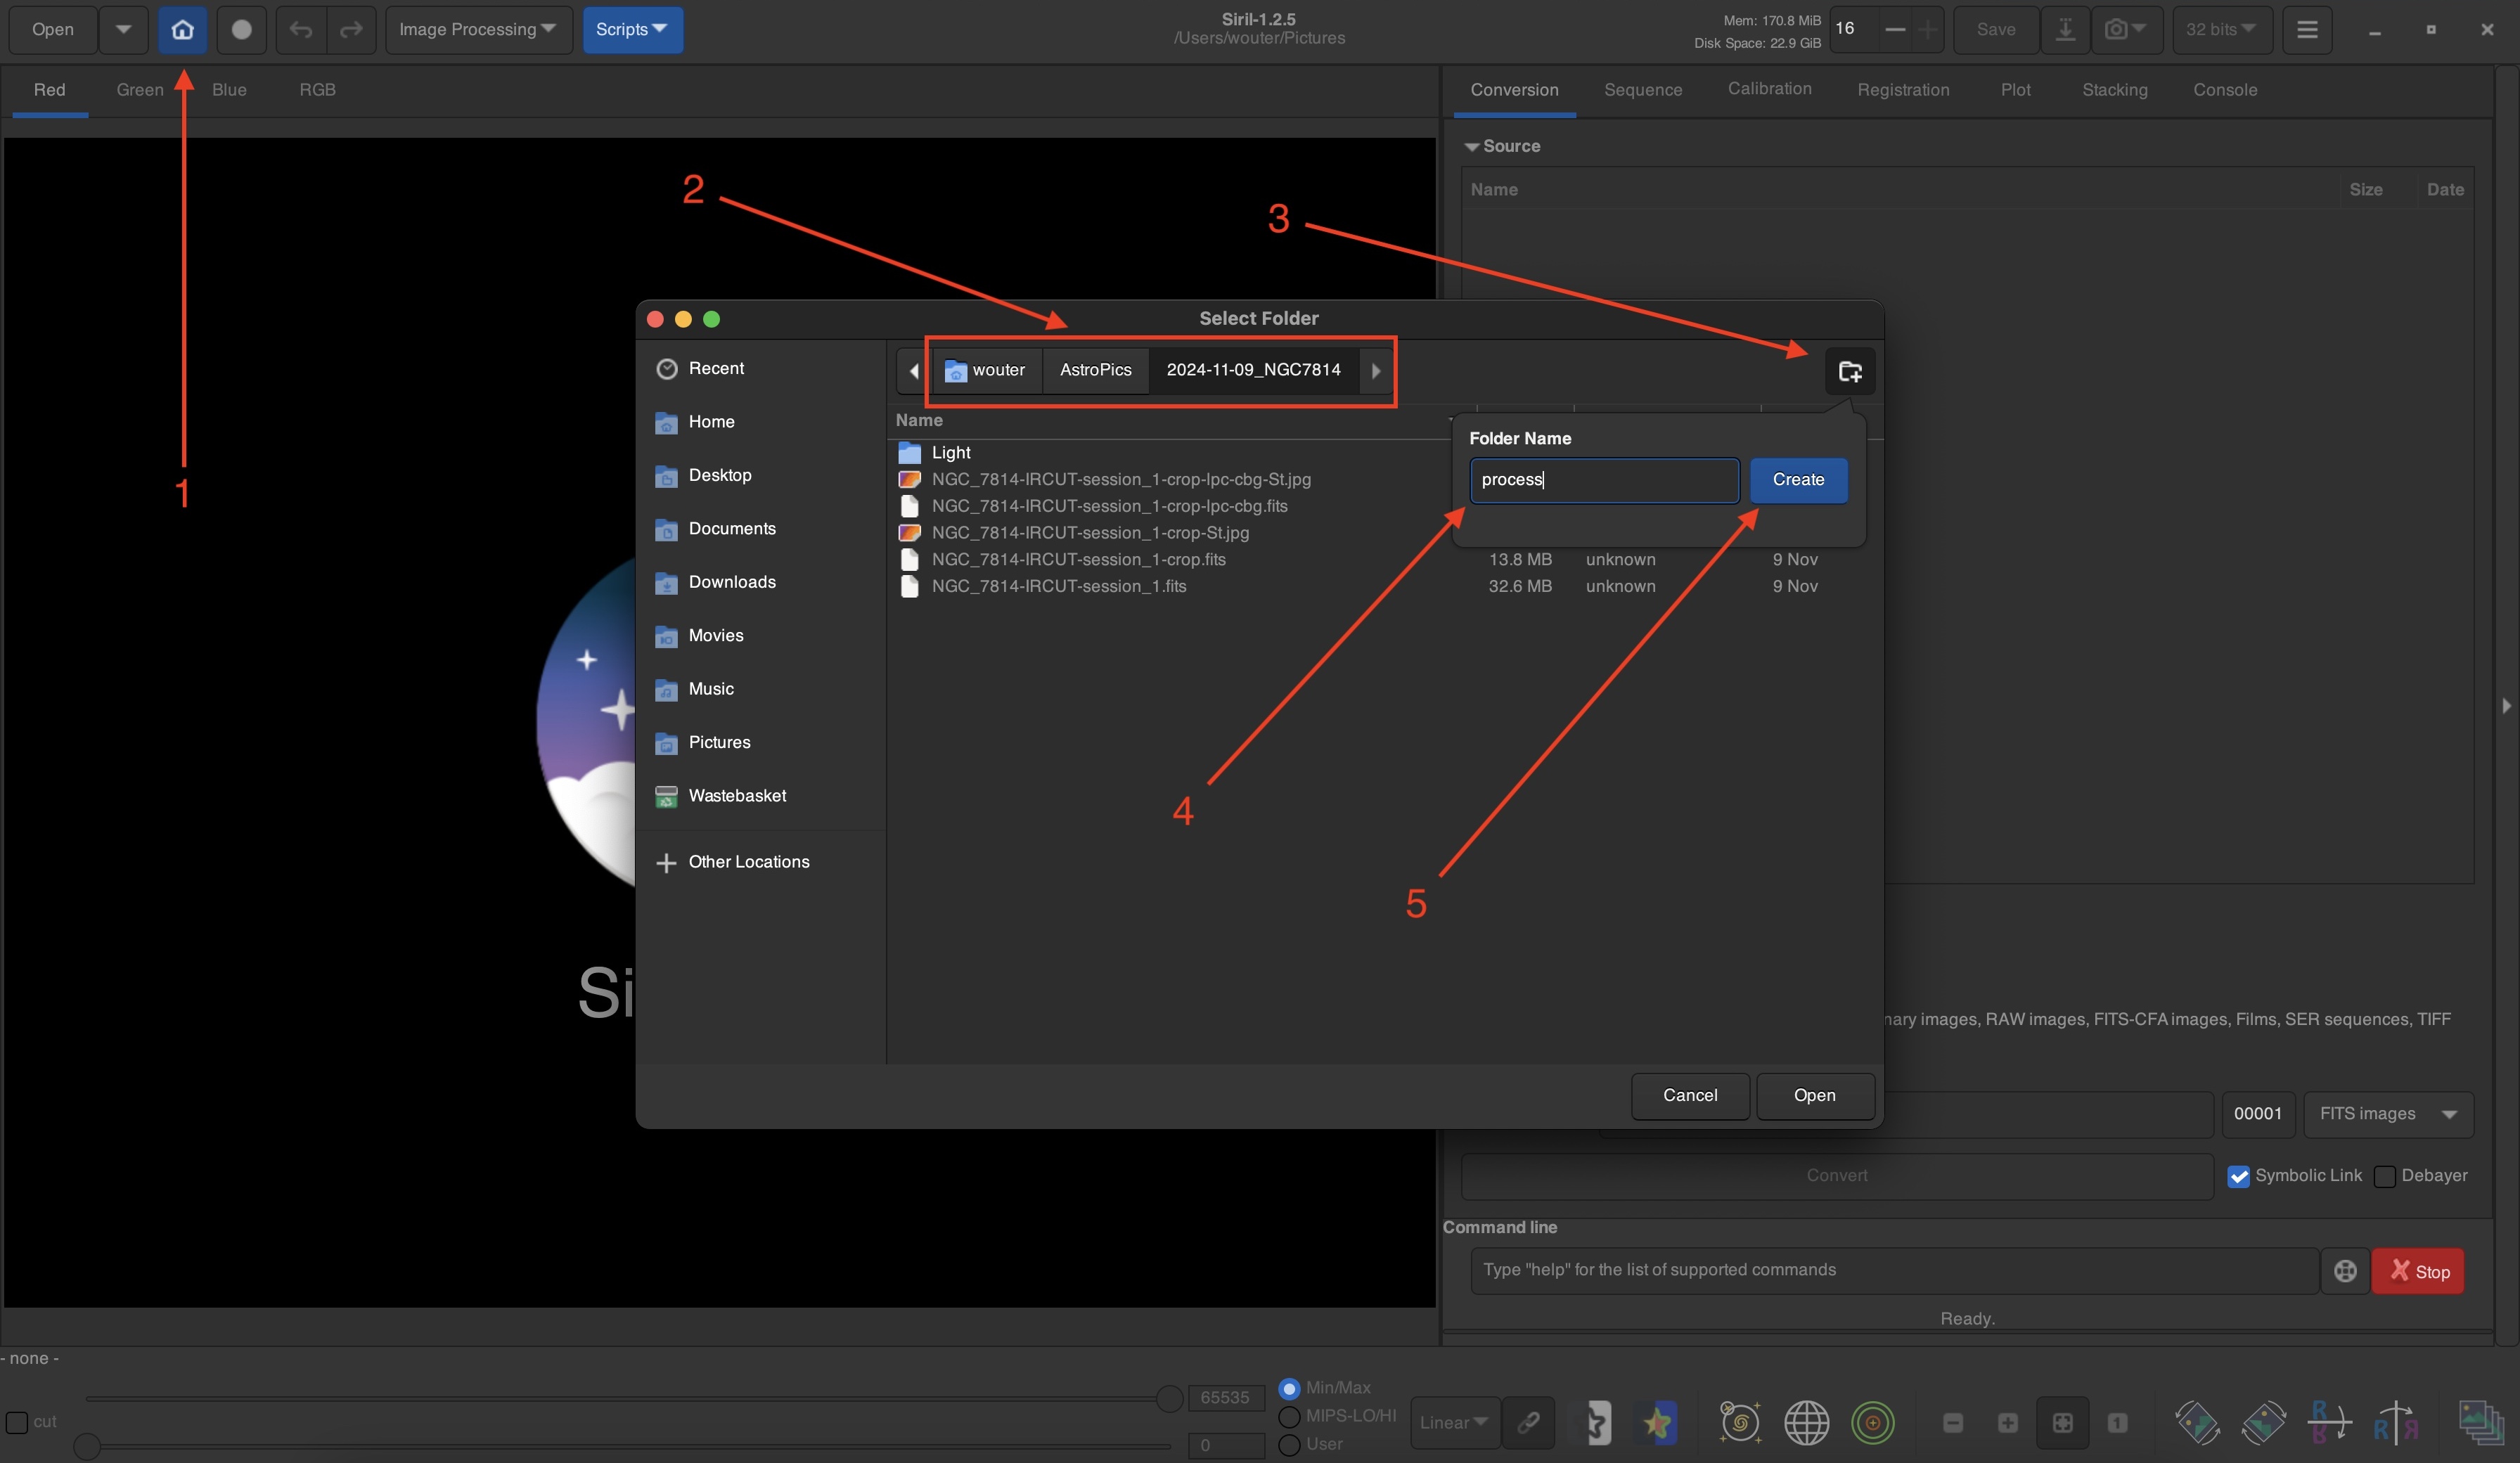
After opening Siril, click the home button ( 1 ).
Select the folder where you placed the FIT files ( 2 ).
Click the Create Folder button ( 3 ).
Type a new folder name (in this case I used process but you can choose any name) ( 4 ).
Click the Create button ( 5 ).
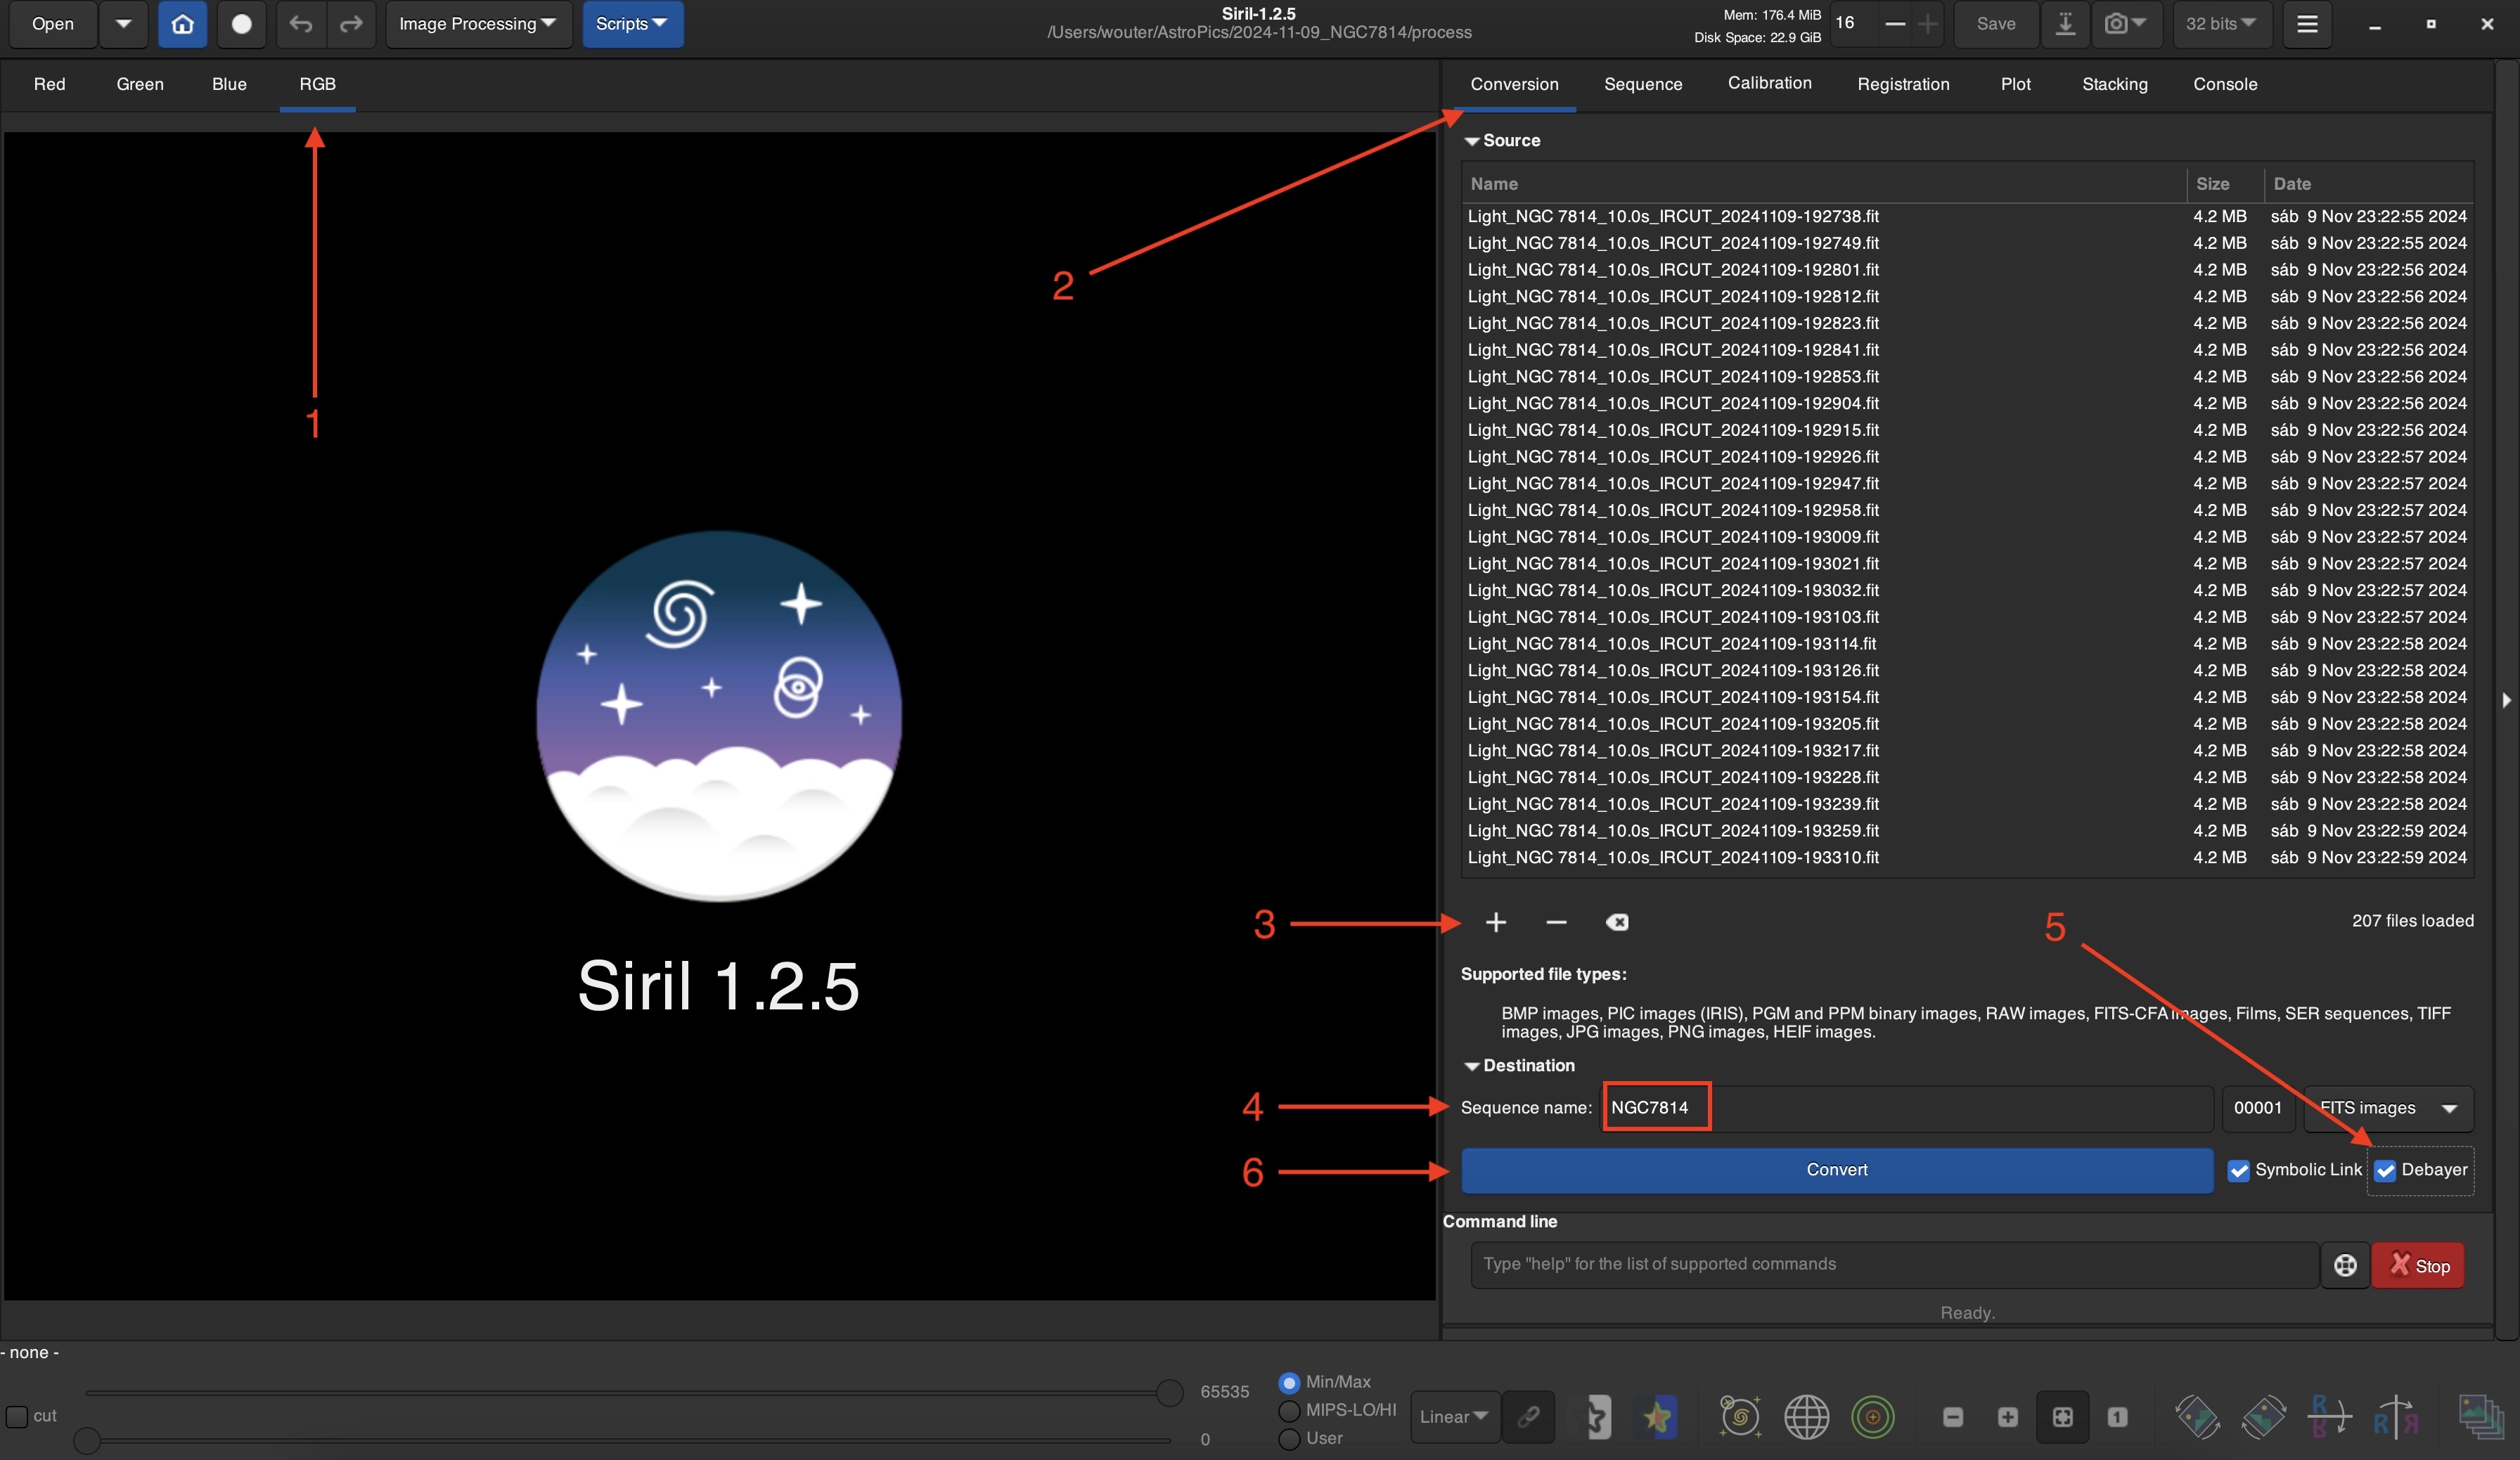
Siril uses sequences, which are collections of files, for it's processing. This section shows how to create a sequence in Siril.
Select the RGB mode ( 1 ).
Select the Conversion tab ( 2 ) and add all the FIT files ( 3 ).
Add a sequence name (I chose the name of the object but again this can be any name) ( 4 ).
Enable Debayer ( 5 ) and click the Convert button ( 6 ).
By default Siril displays images in linear mode. Since the intensity of the objects imaged is very low, the image appears very dark. To make the object visible, the image needs to be stretch to be non-linear. This section explains how to do that.
Click the Linear drop-down ( 1 ).
Select the AutoStretch ( 2 ).
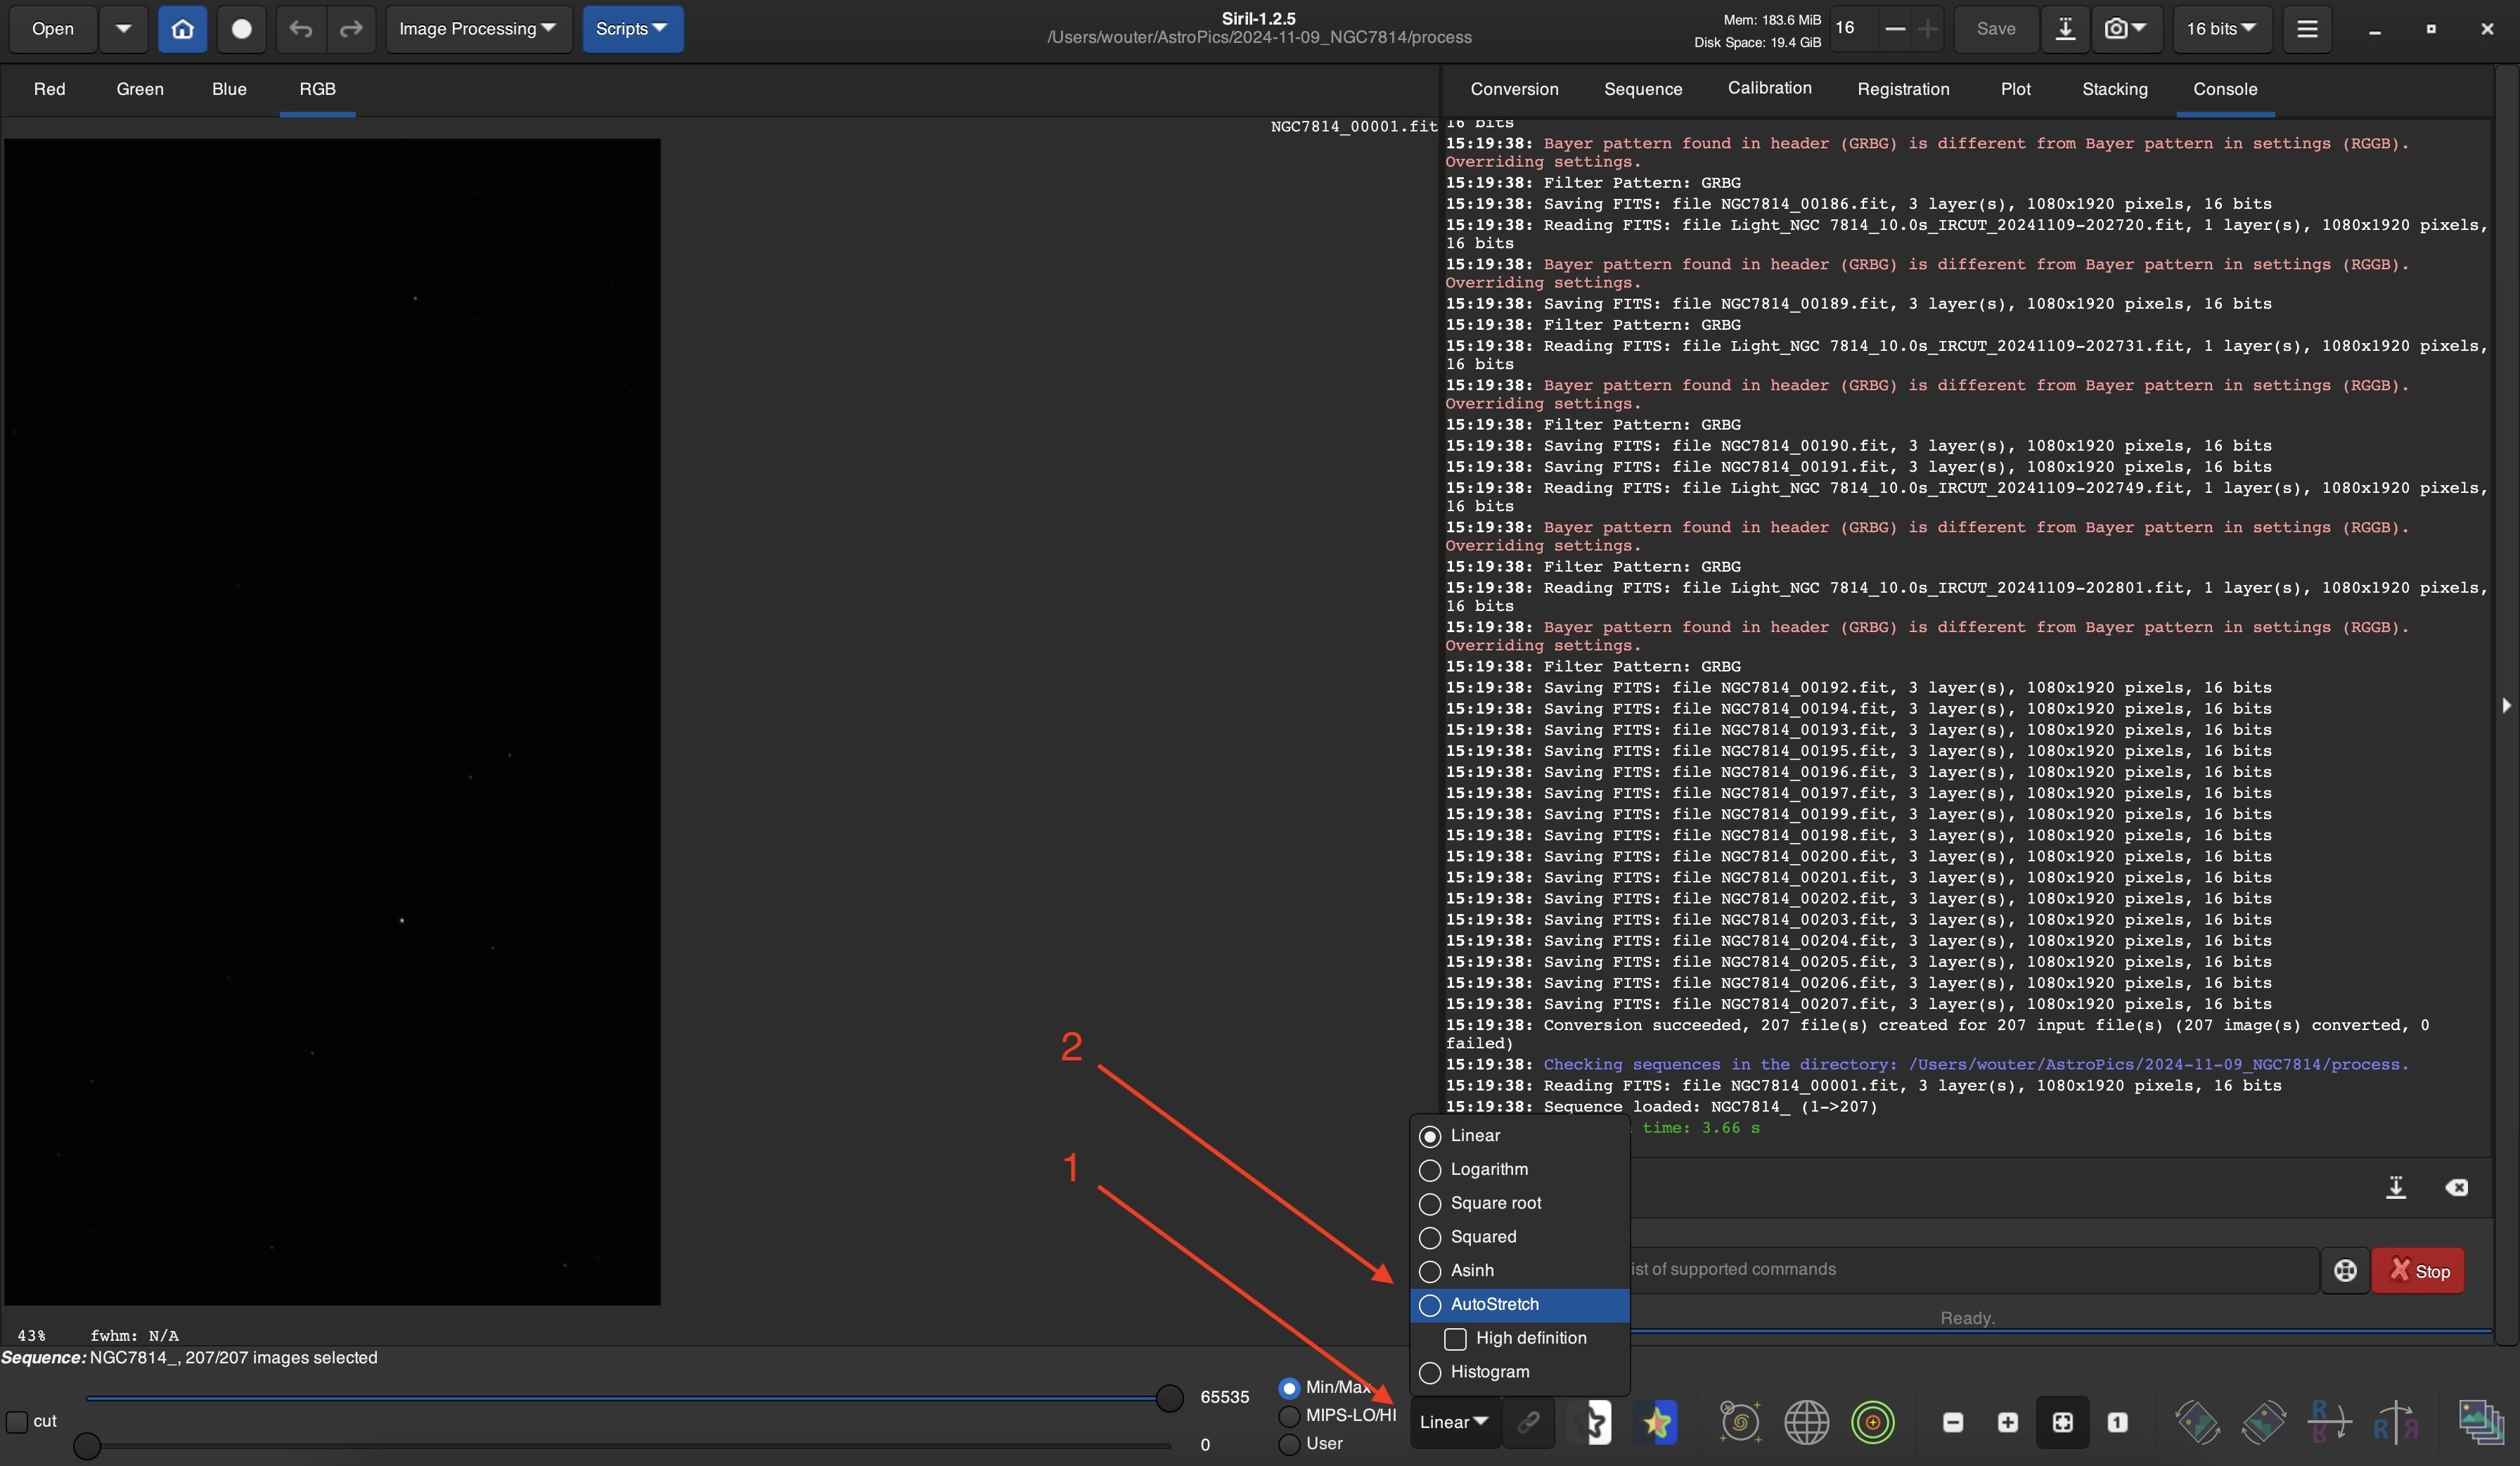
The result is seen by the fact that the object becomes visible.
The image is very green due to the fact that there are twice as many green pixels as red or blue.
We will fix that in one of the following steps.

When the conversion is done, select the Sequence tab ( 1 ) and make sure that your sequence is
selected ( 2 ).
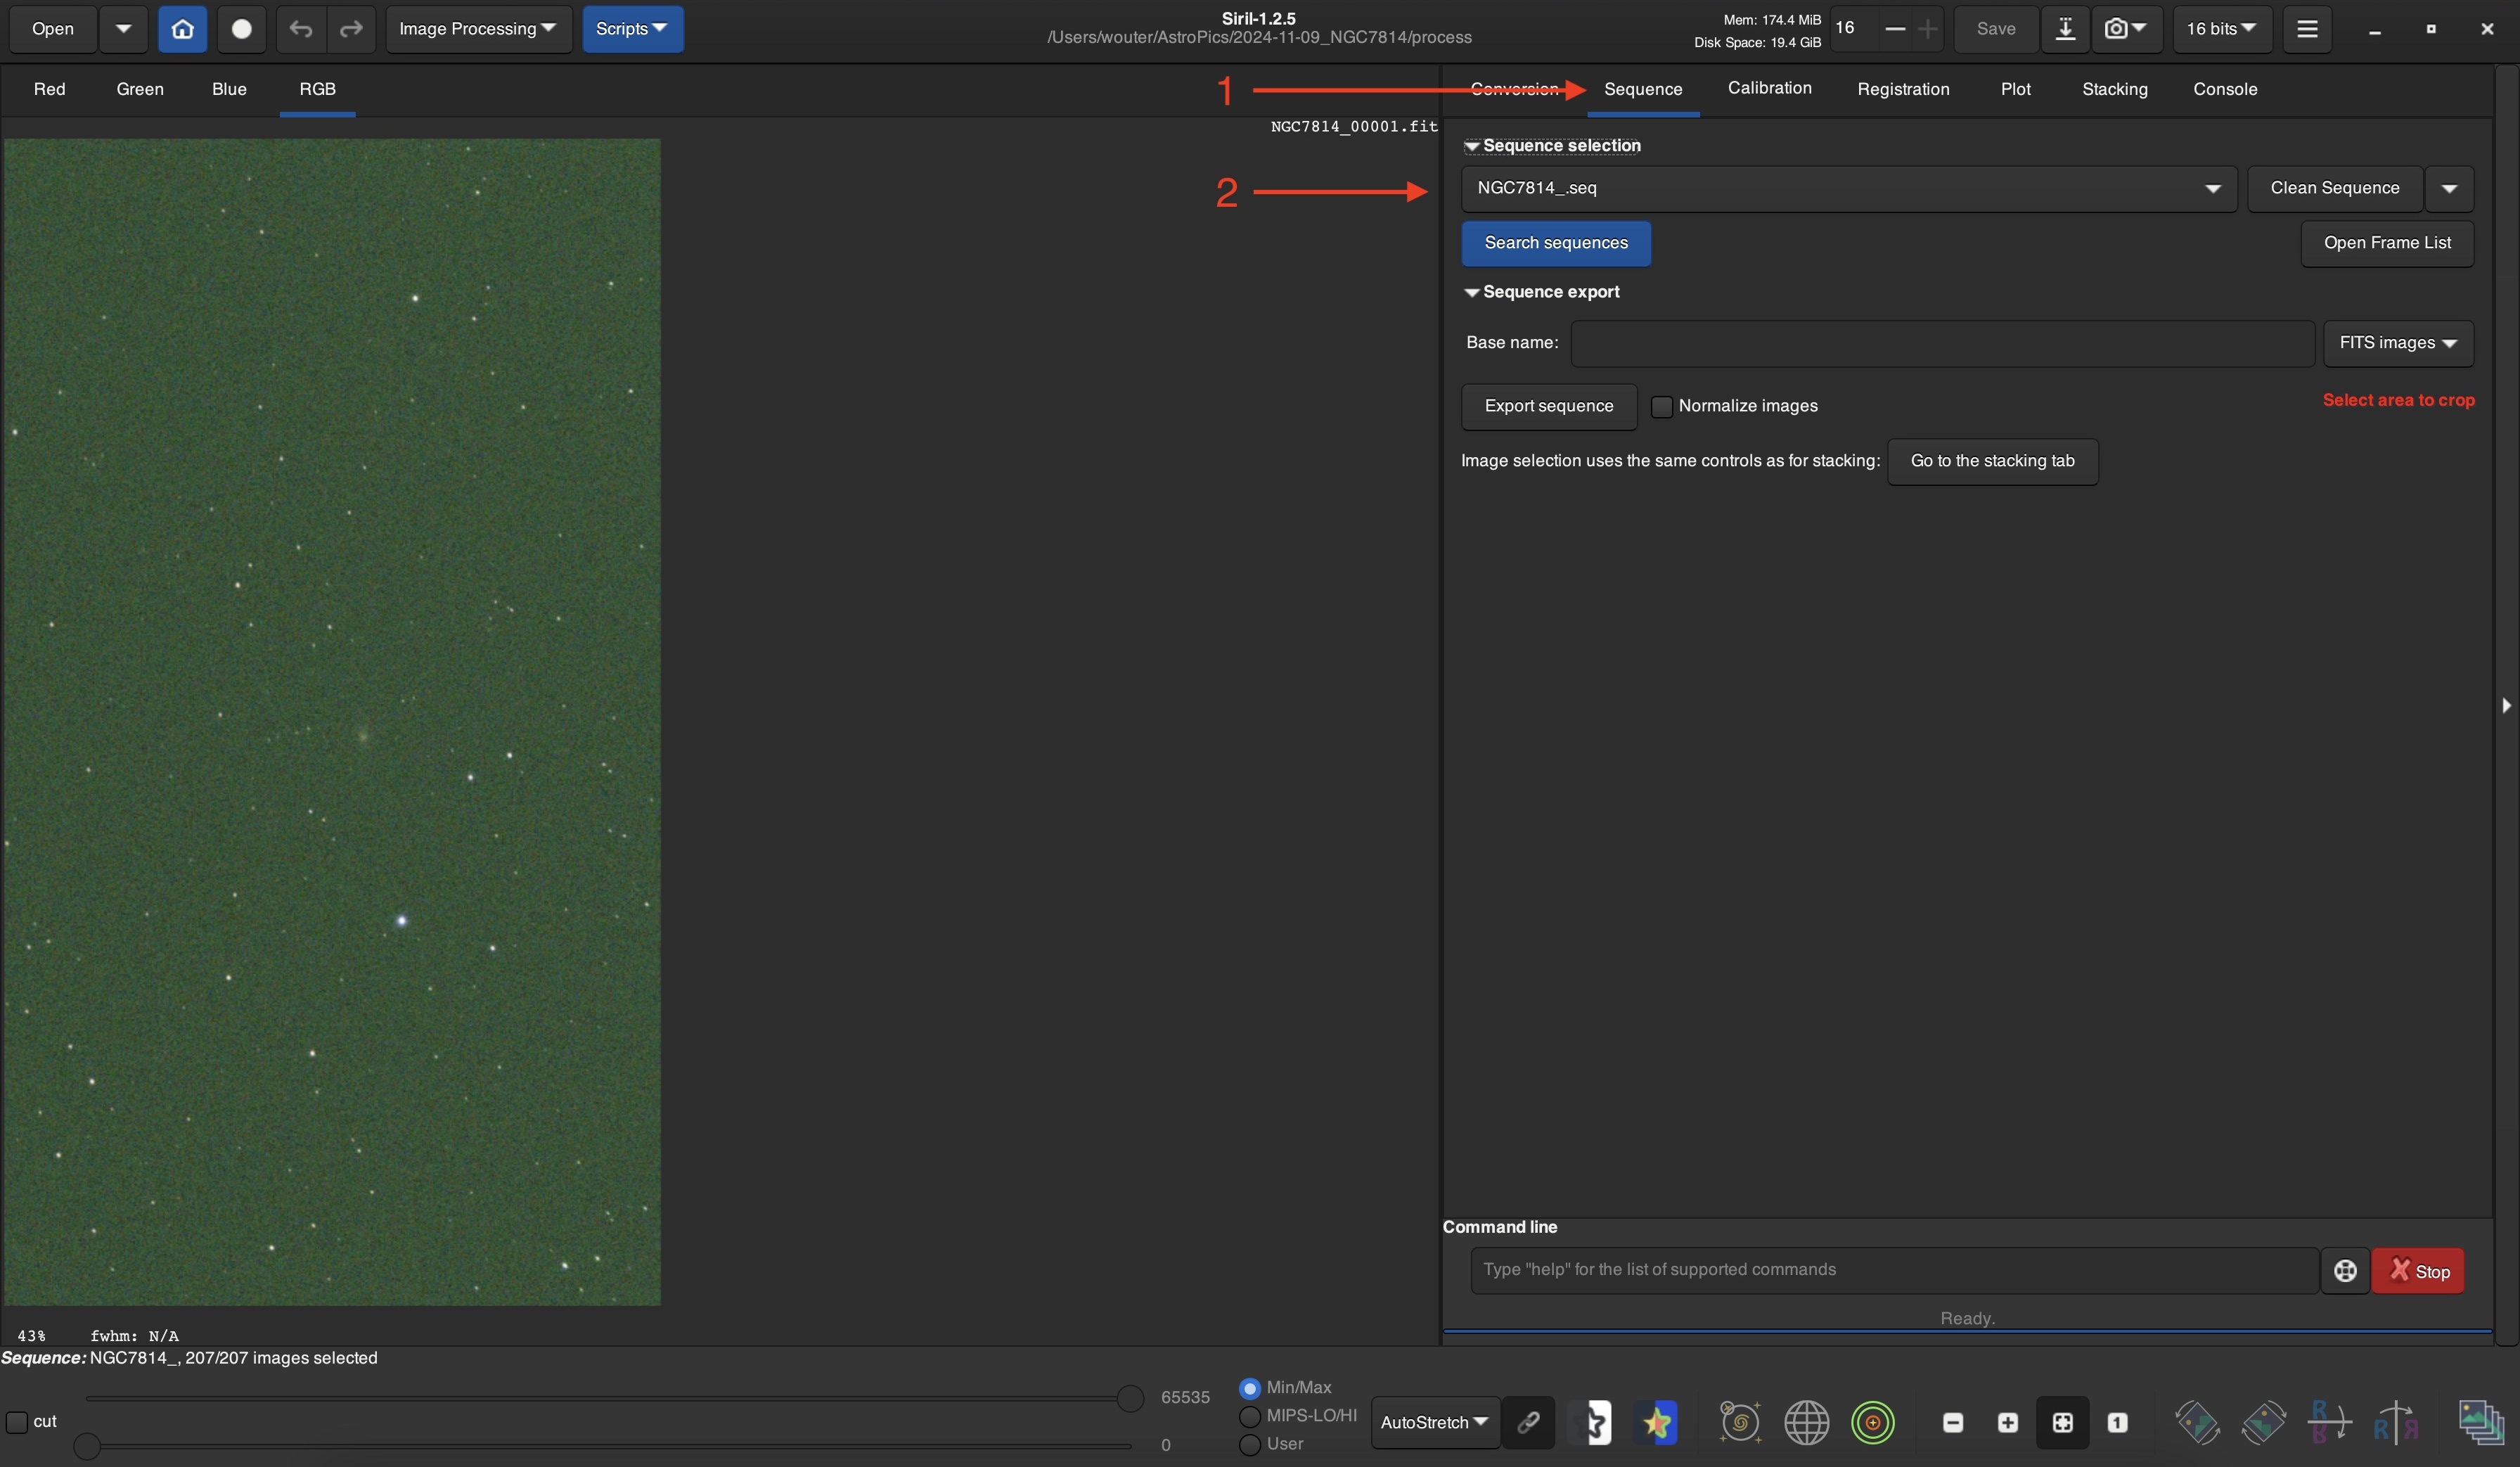
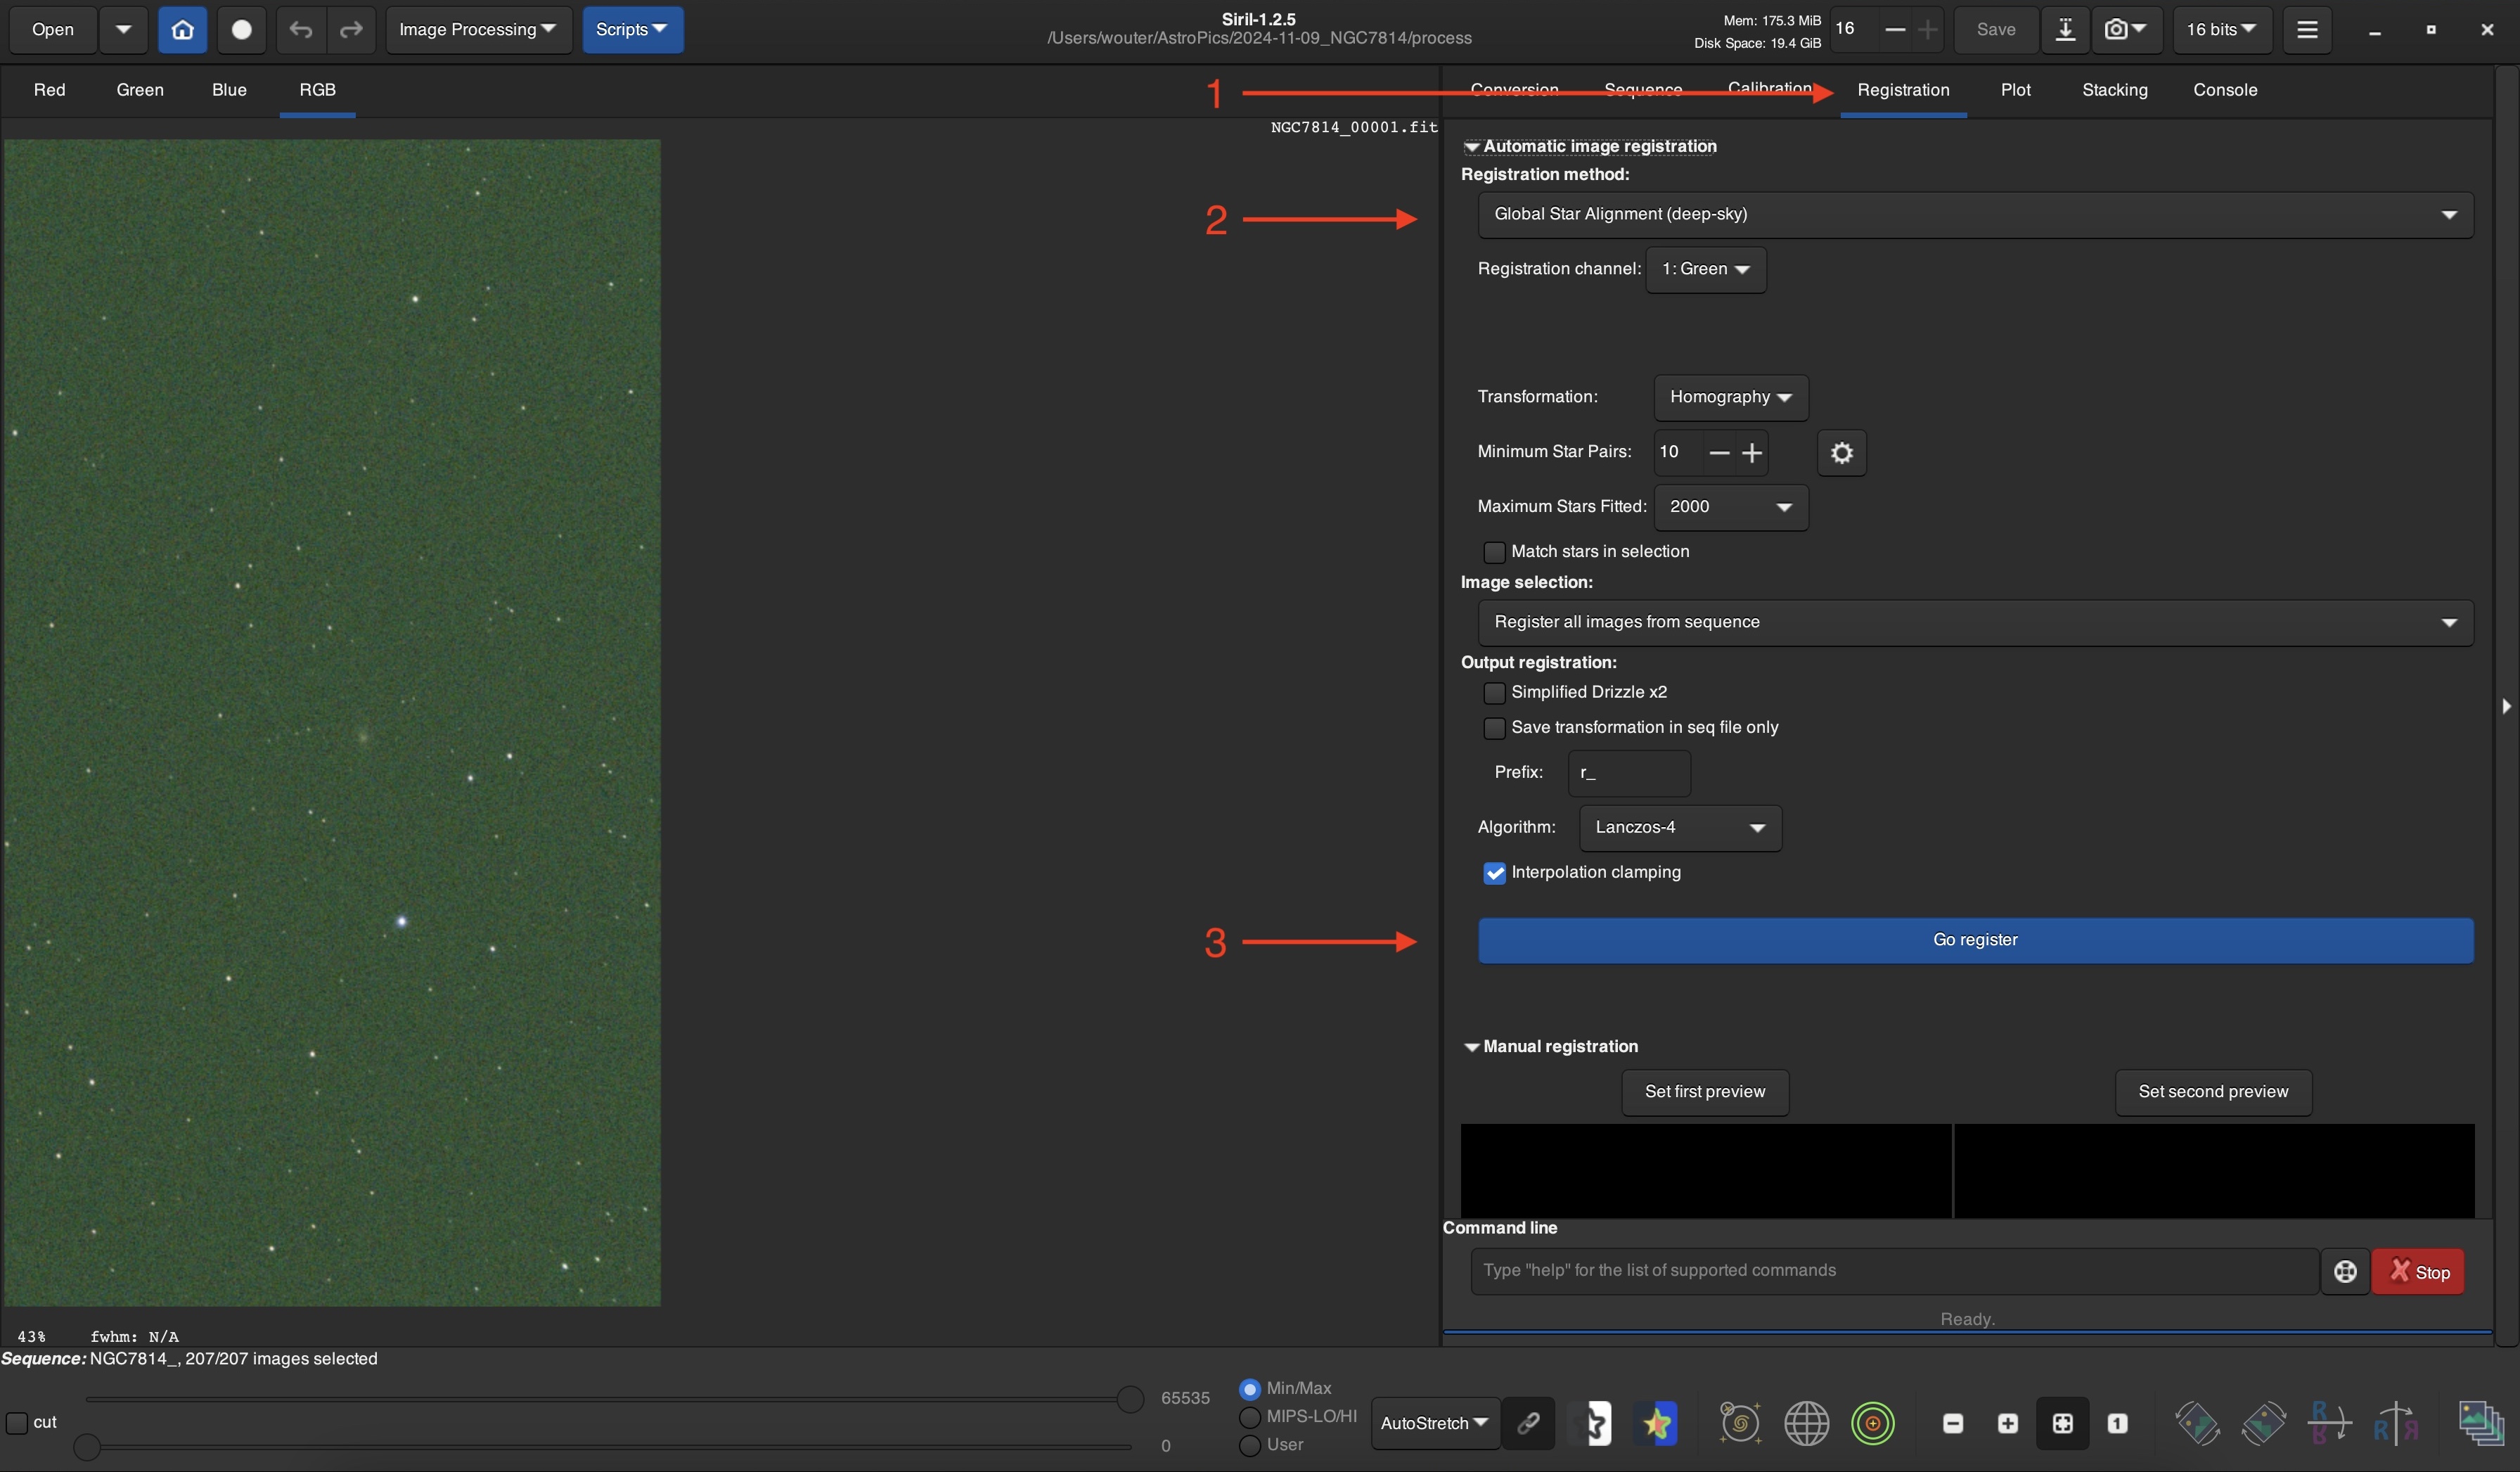
Image registration is the process of identifying the stars in each image and determining how much each image has been shifted and/or rotated with respect to the others.
Select the Registration tab ( 1 ).
Under Registration method select Global Star Alignment (deep-sky) ( 2 ).
Click the Go register button ( 3 ).
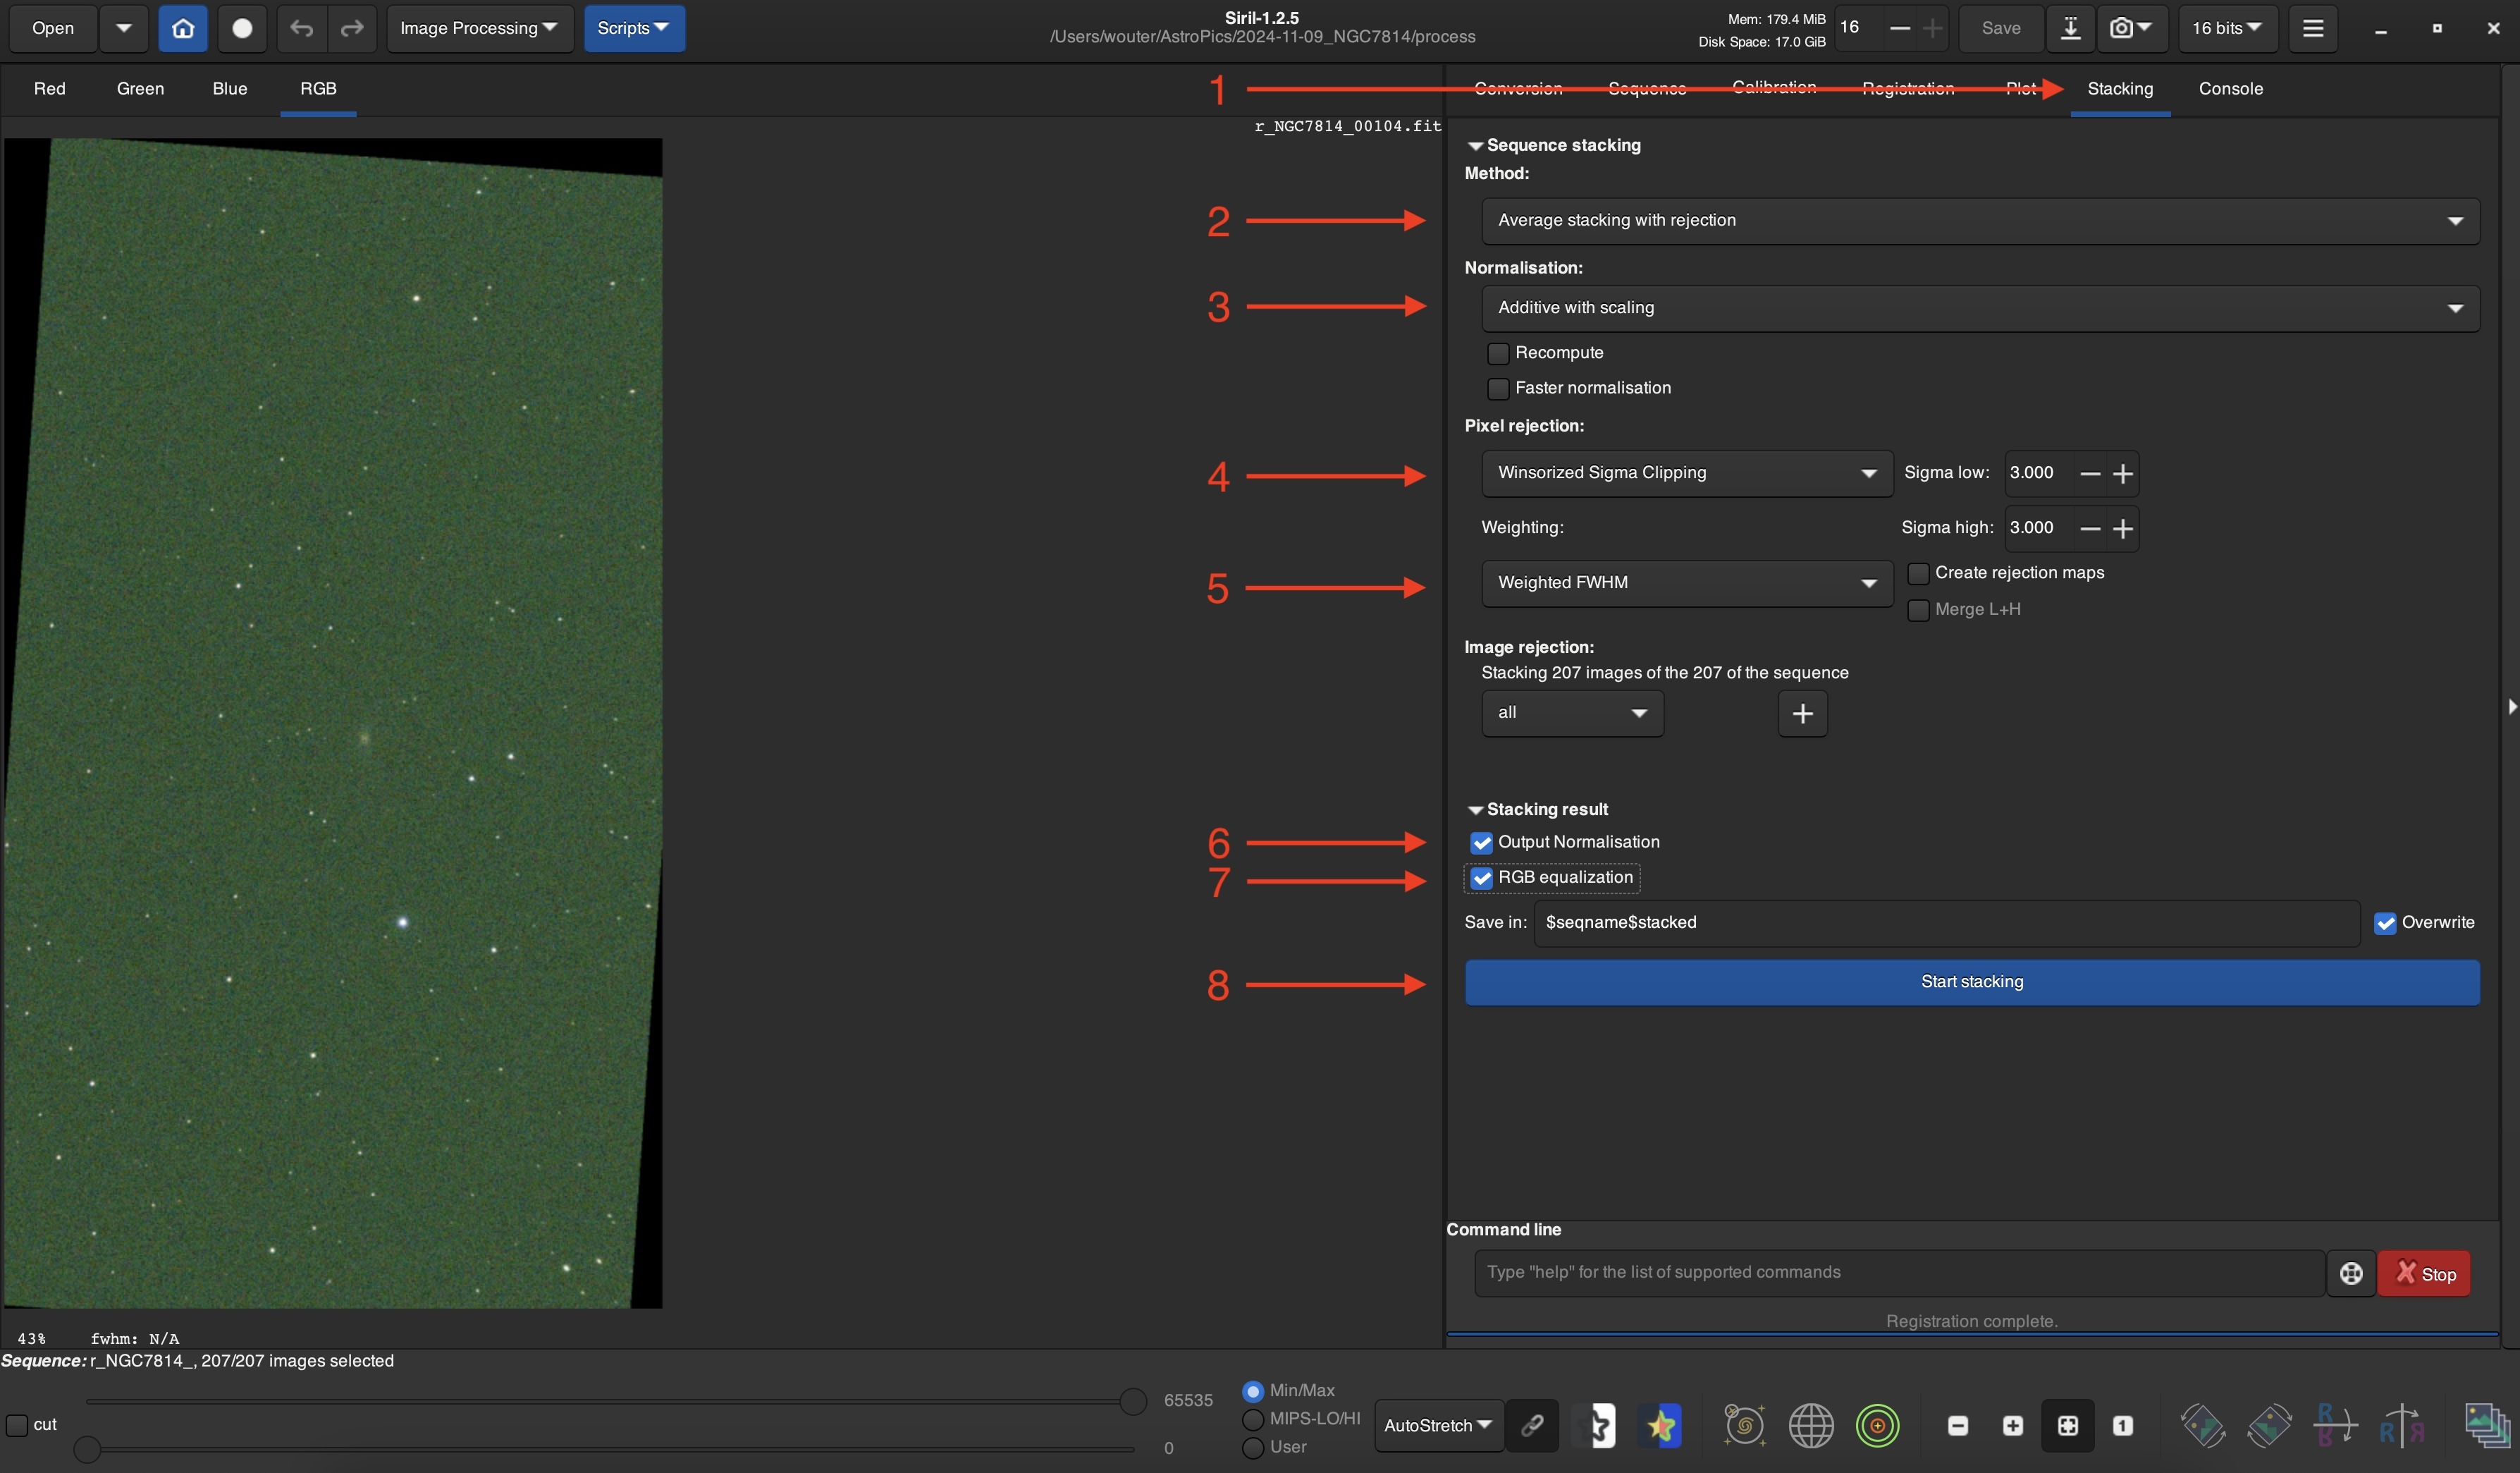
Now the images can be stacked to produce the raw, combined image. In this step we also take care of the green hue in the images by enabling RGB equalization.
Select the stacking tab ( 1 ).
Under Method select Average stacking with rejection ( 2 ).
Under Normalisation select Additive with scaling ( 3 ).
Under Pixel rejection select Winsorized Sigma Clipping ( 4 ).
Under Weighting select Weighted FWHM ( 5 ).
Under Stacking result enable Output Normalisation ( 6 ) and RGB equalization ( 7 ).
Click the Start stacking button ( 8 ).
Once stacking is done, the result is shown in the image viewer.
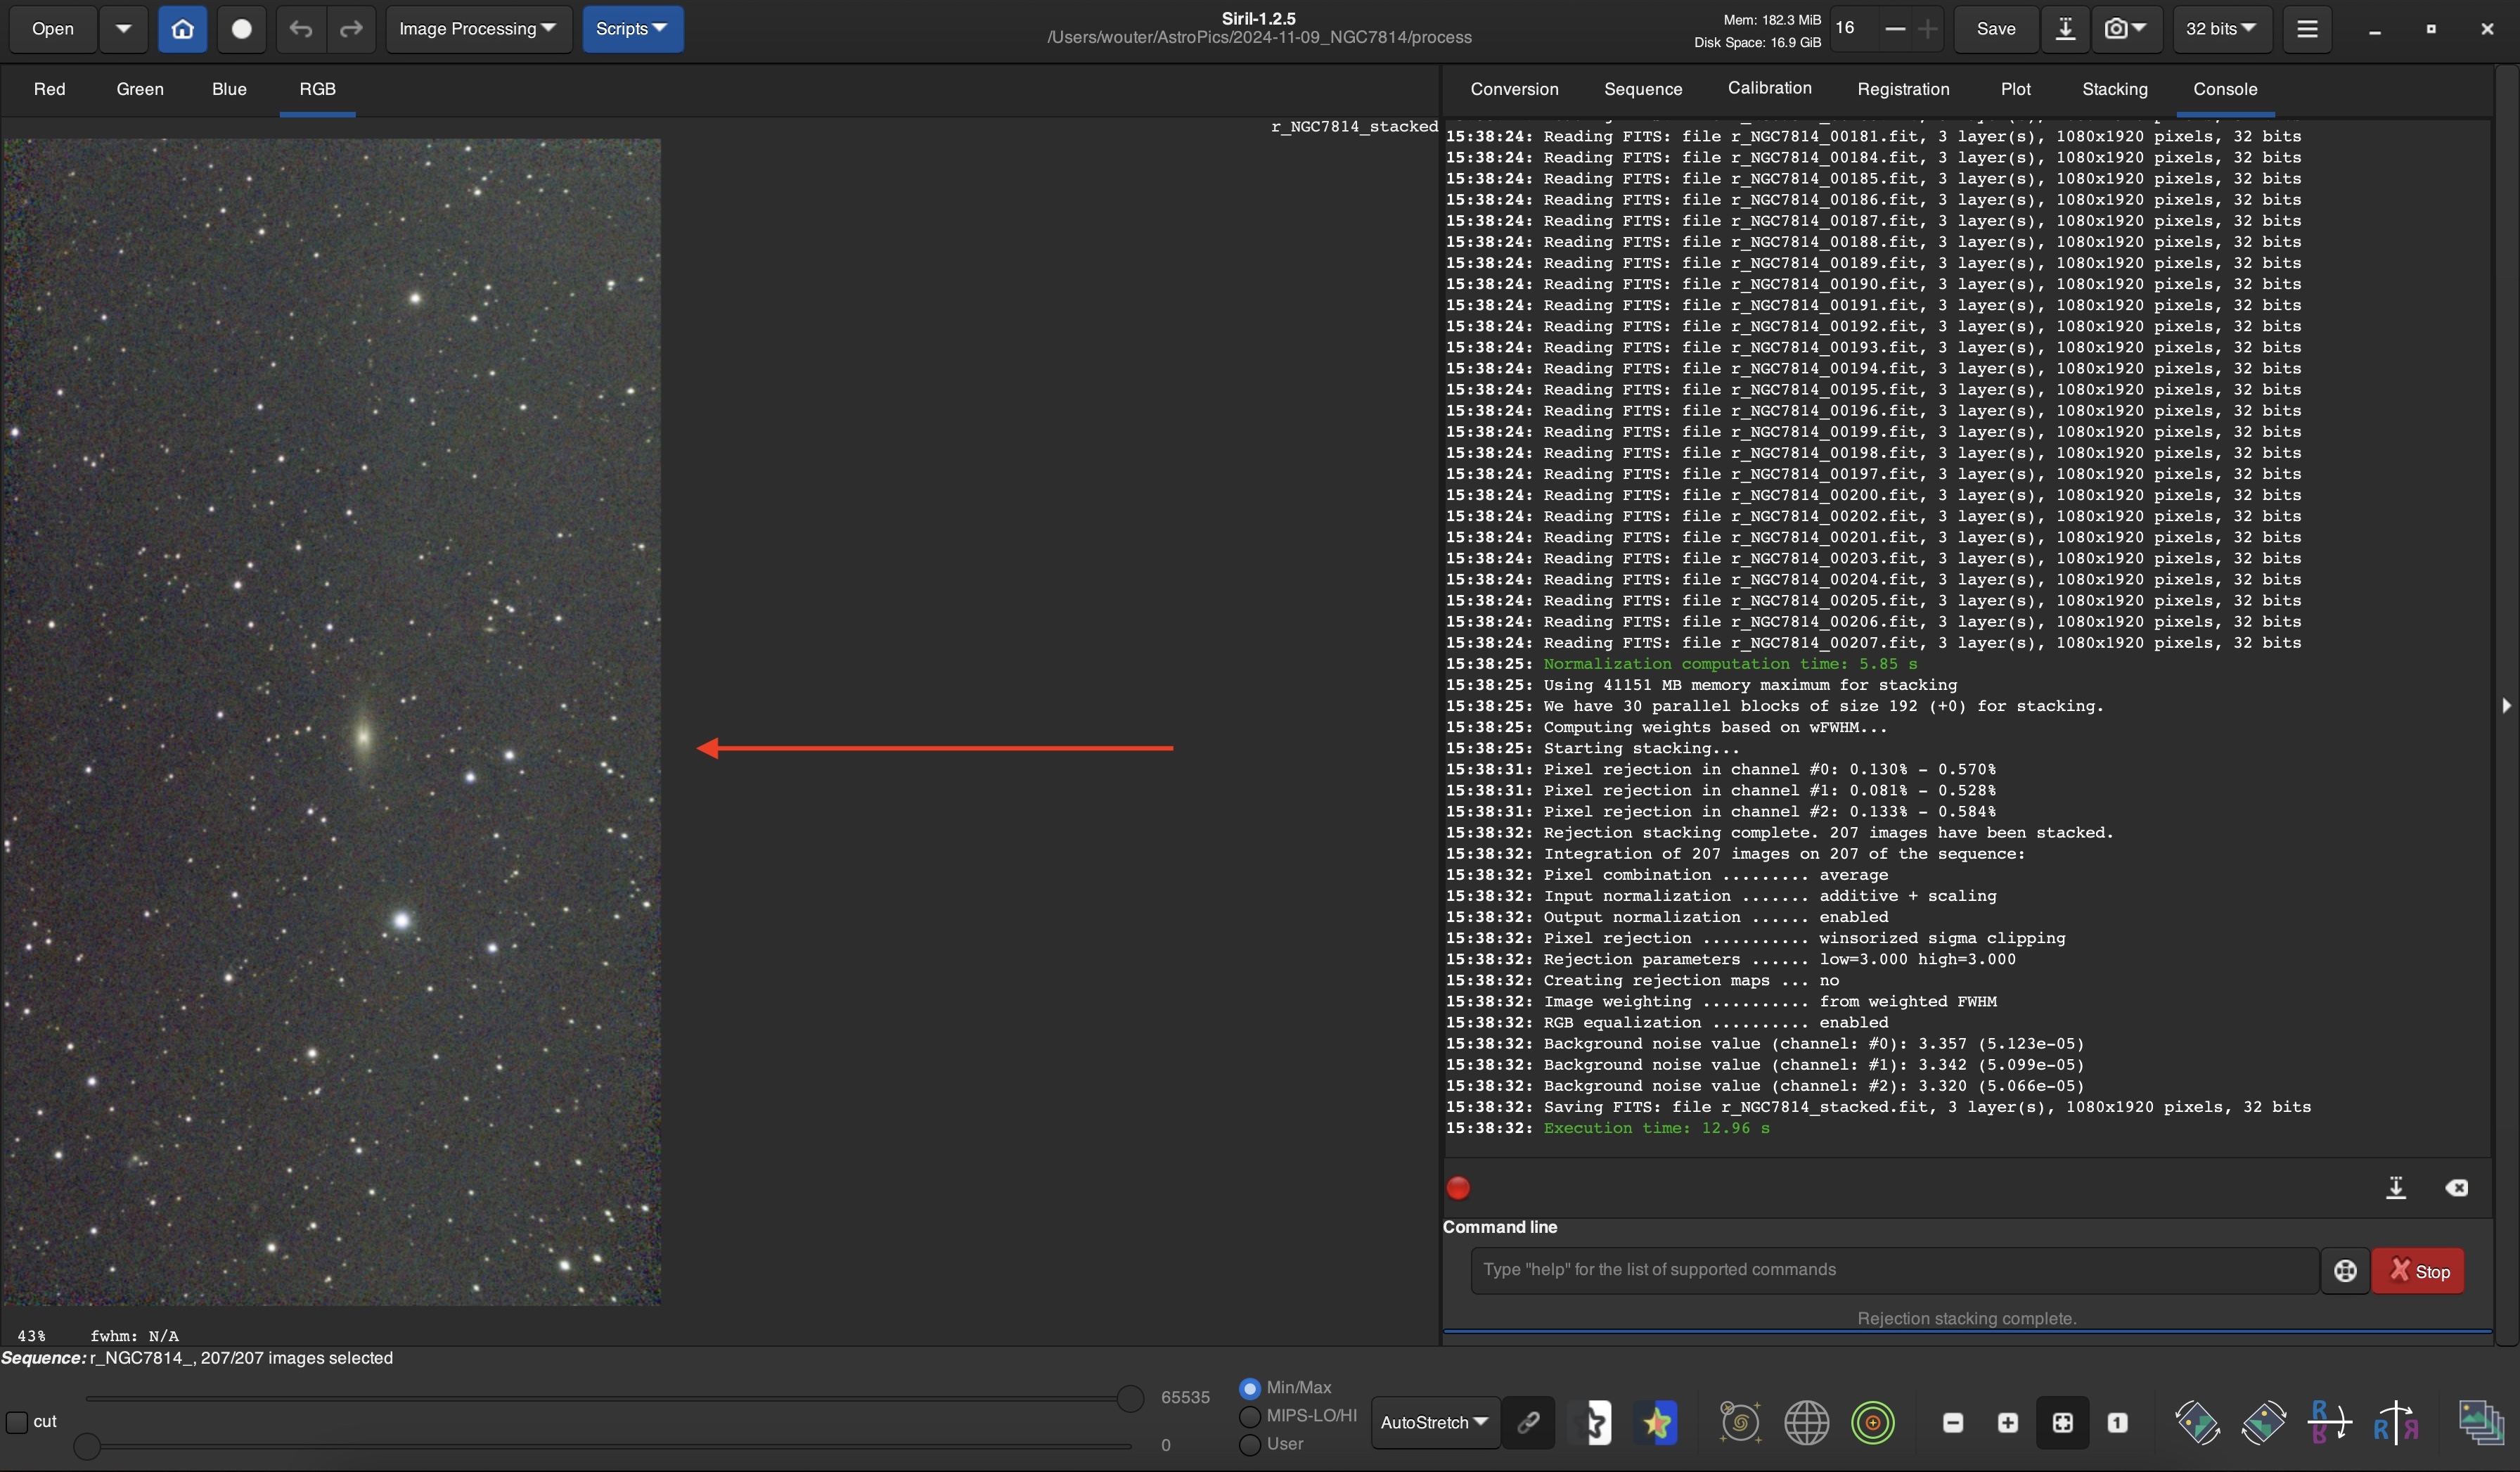
Due to the fact that the SeeStar has an AltAz mount, some image rotation will happen whole taking images.
This leads to loss of signal in the corners which is visible in the marked corners.
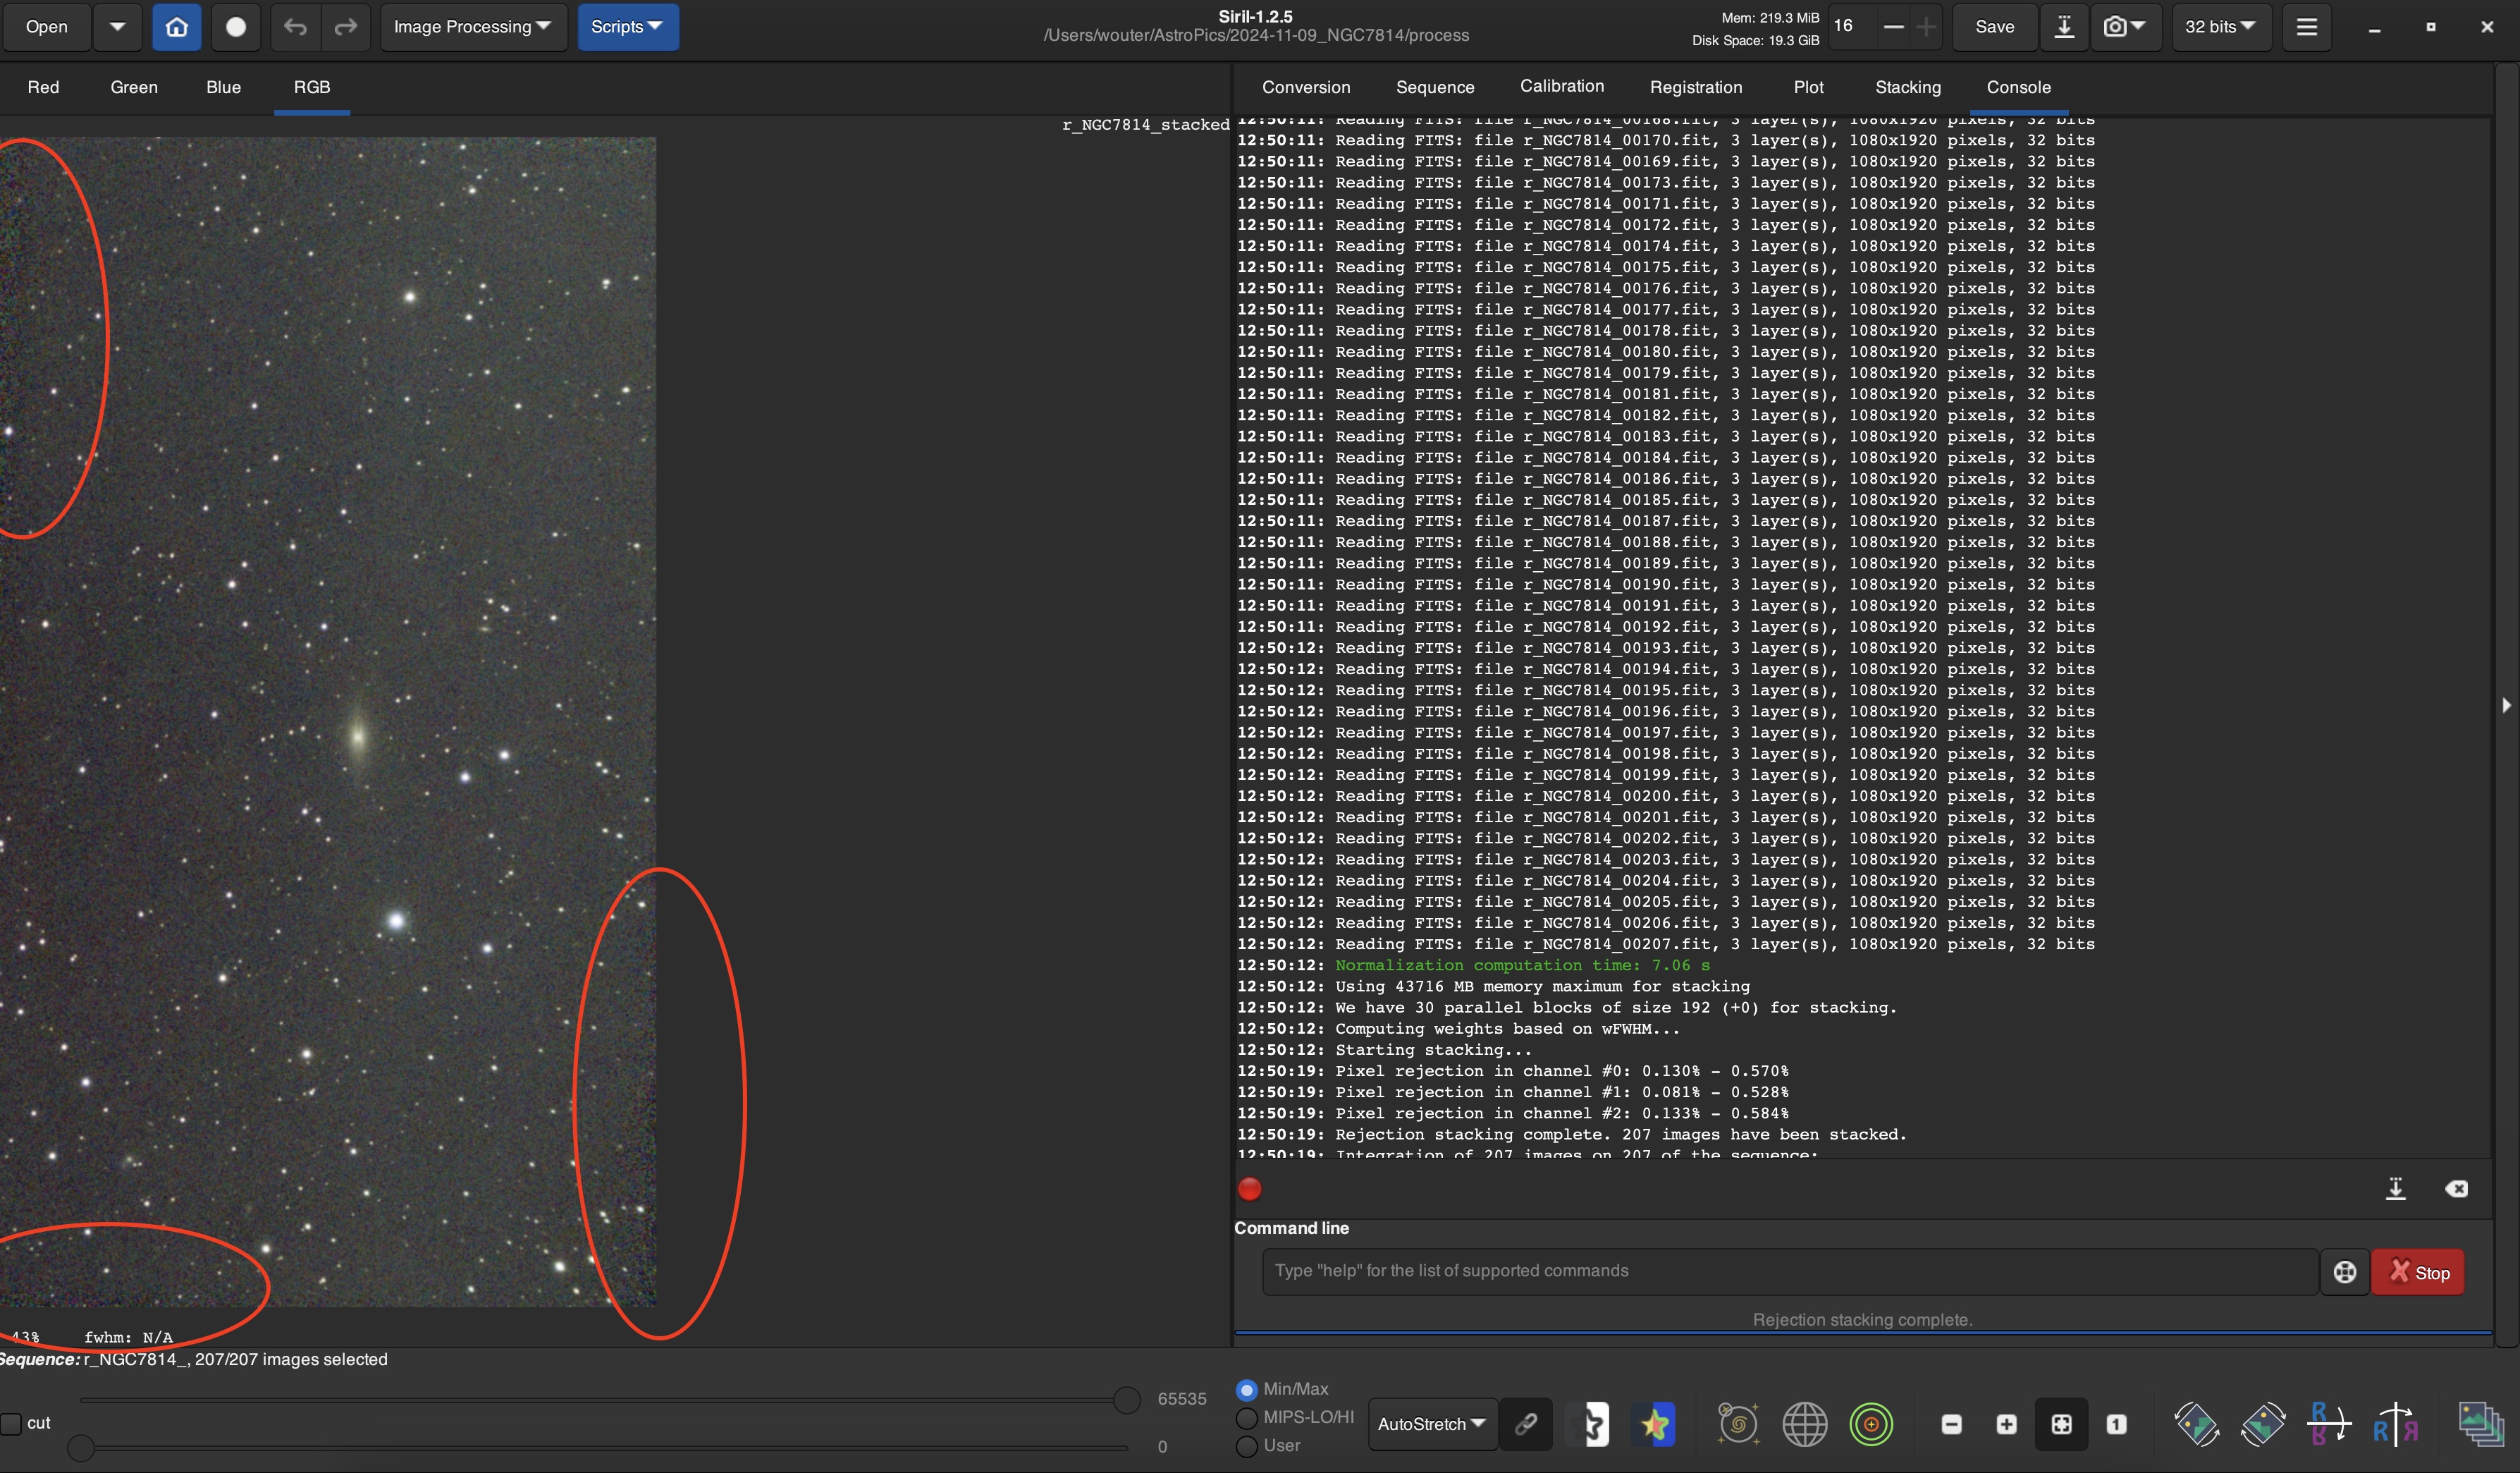
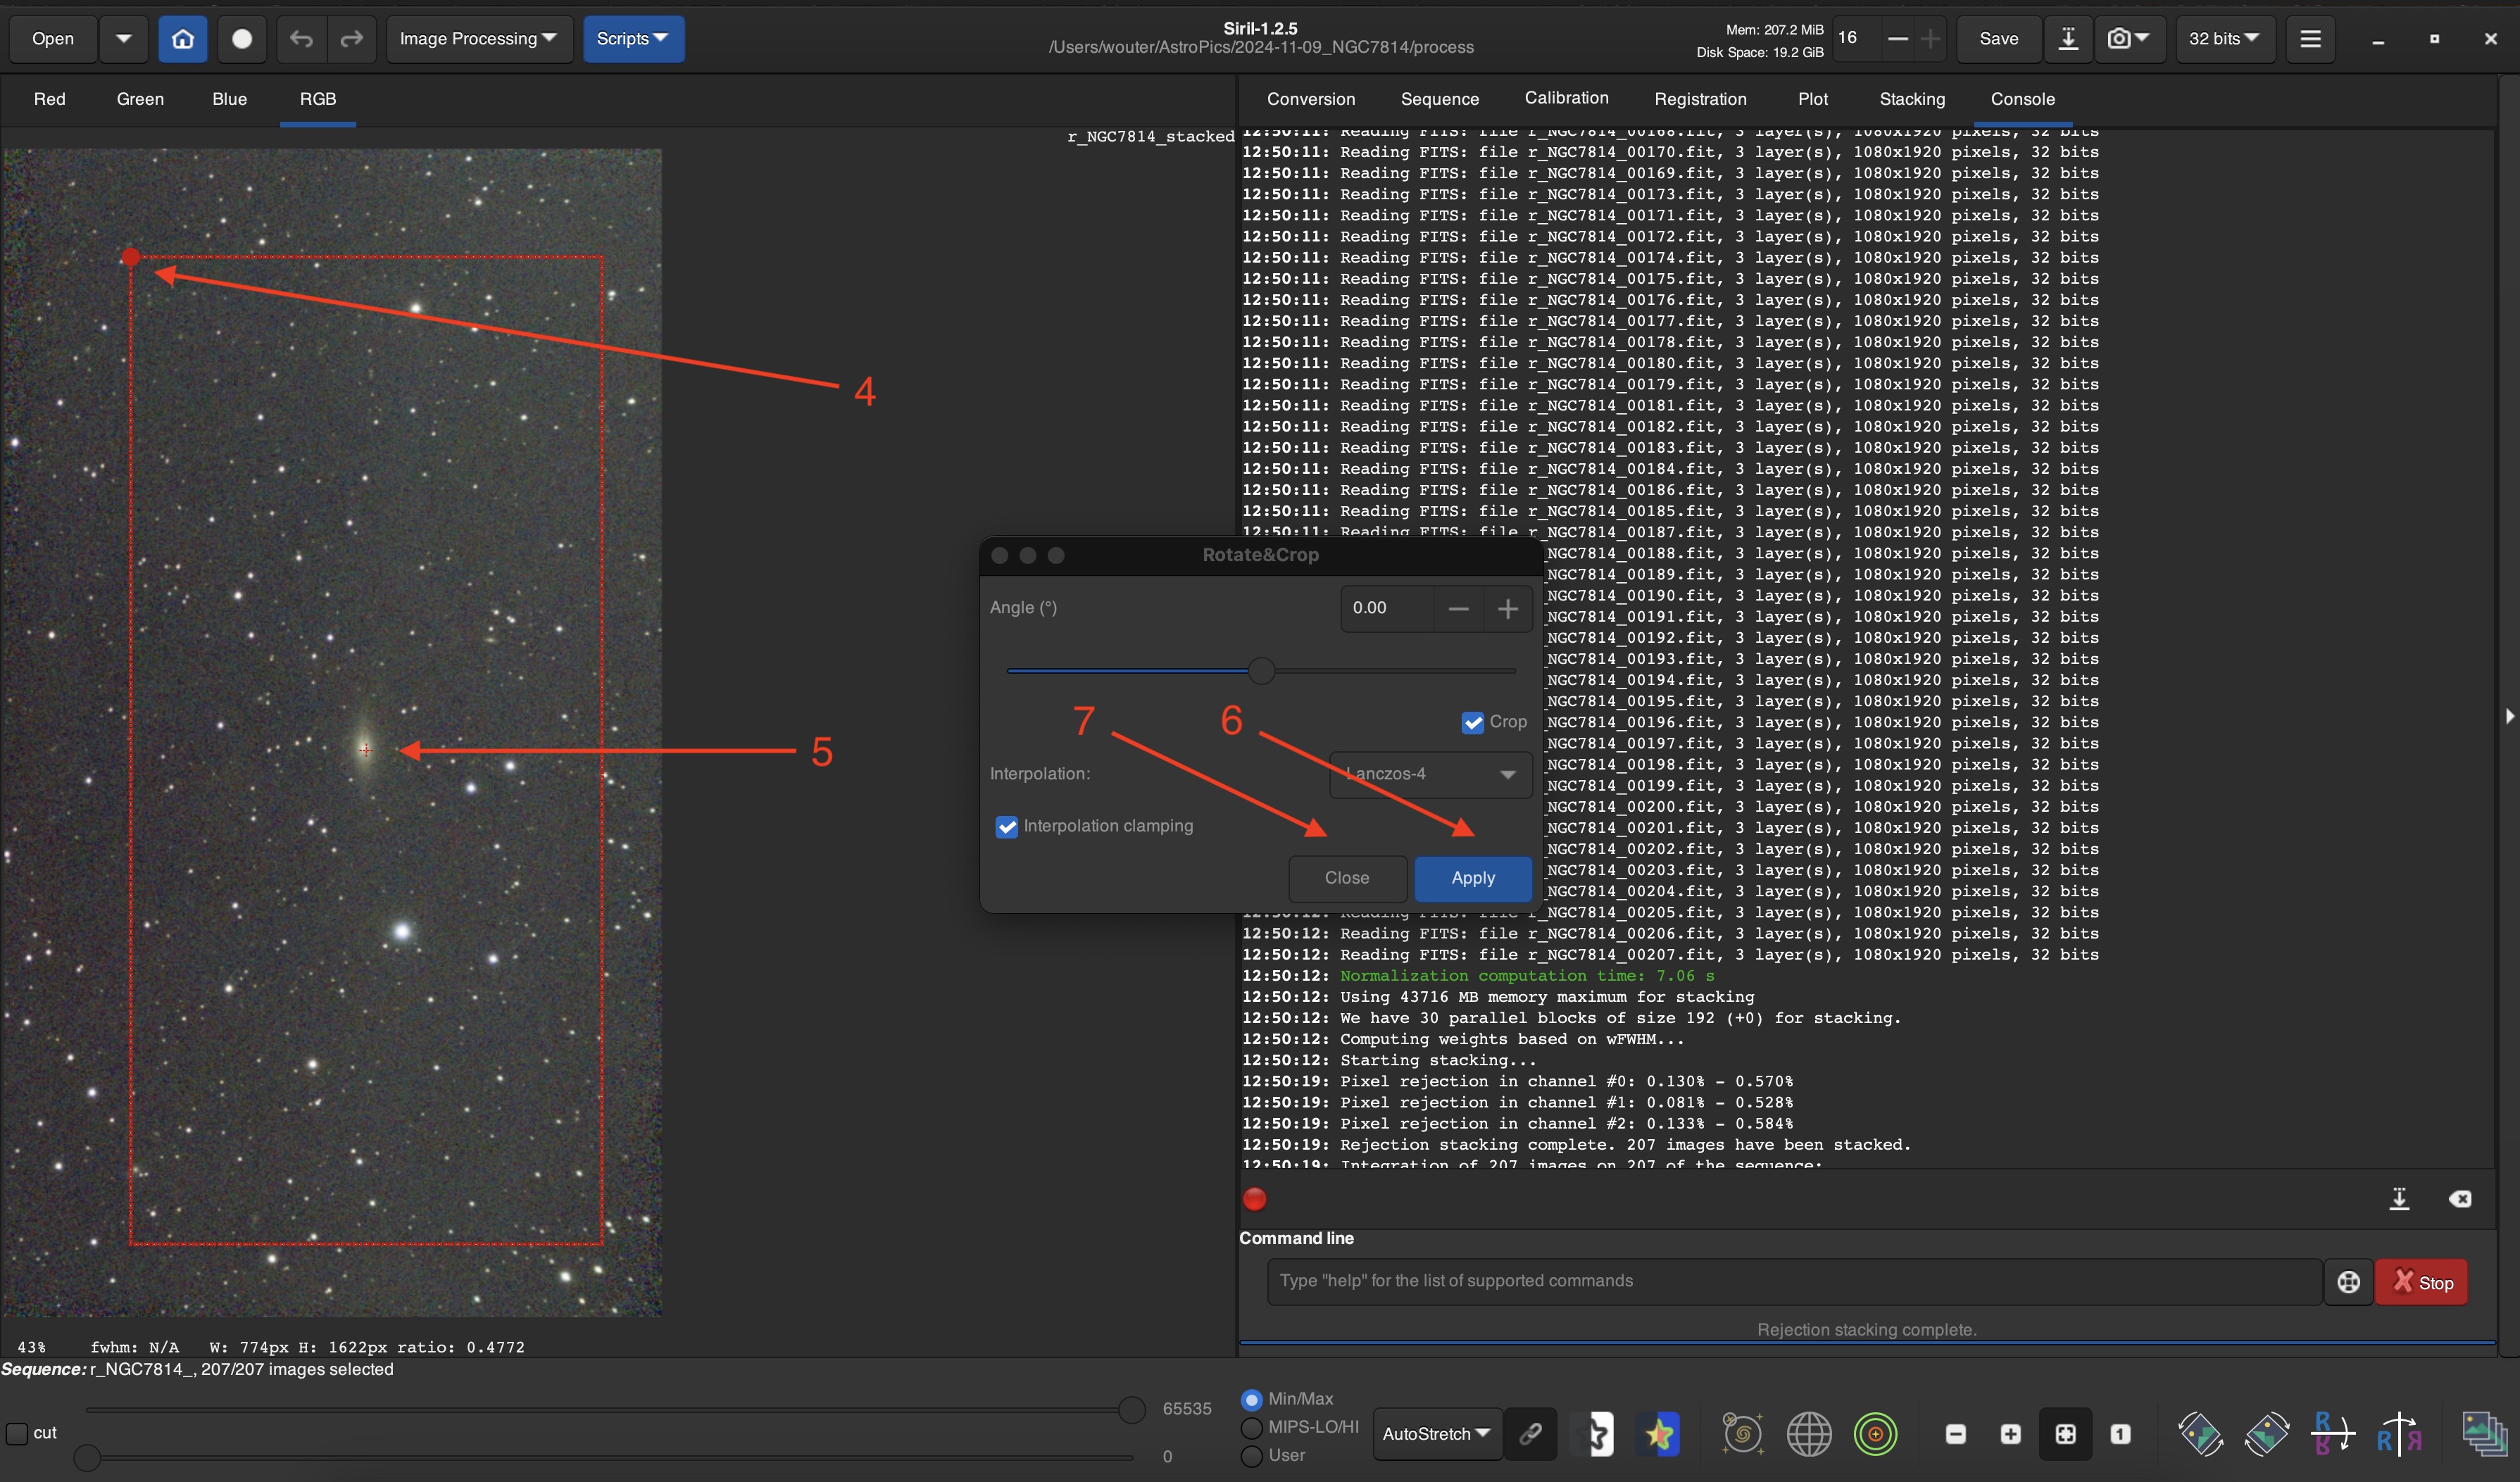
These corners need to be cropped off.
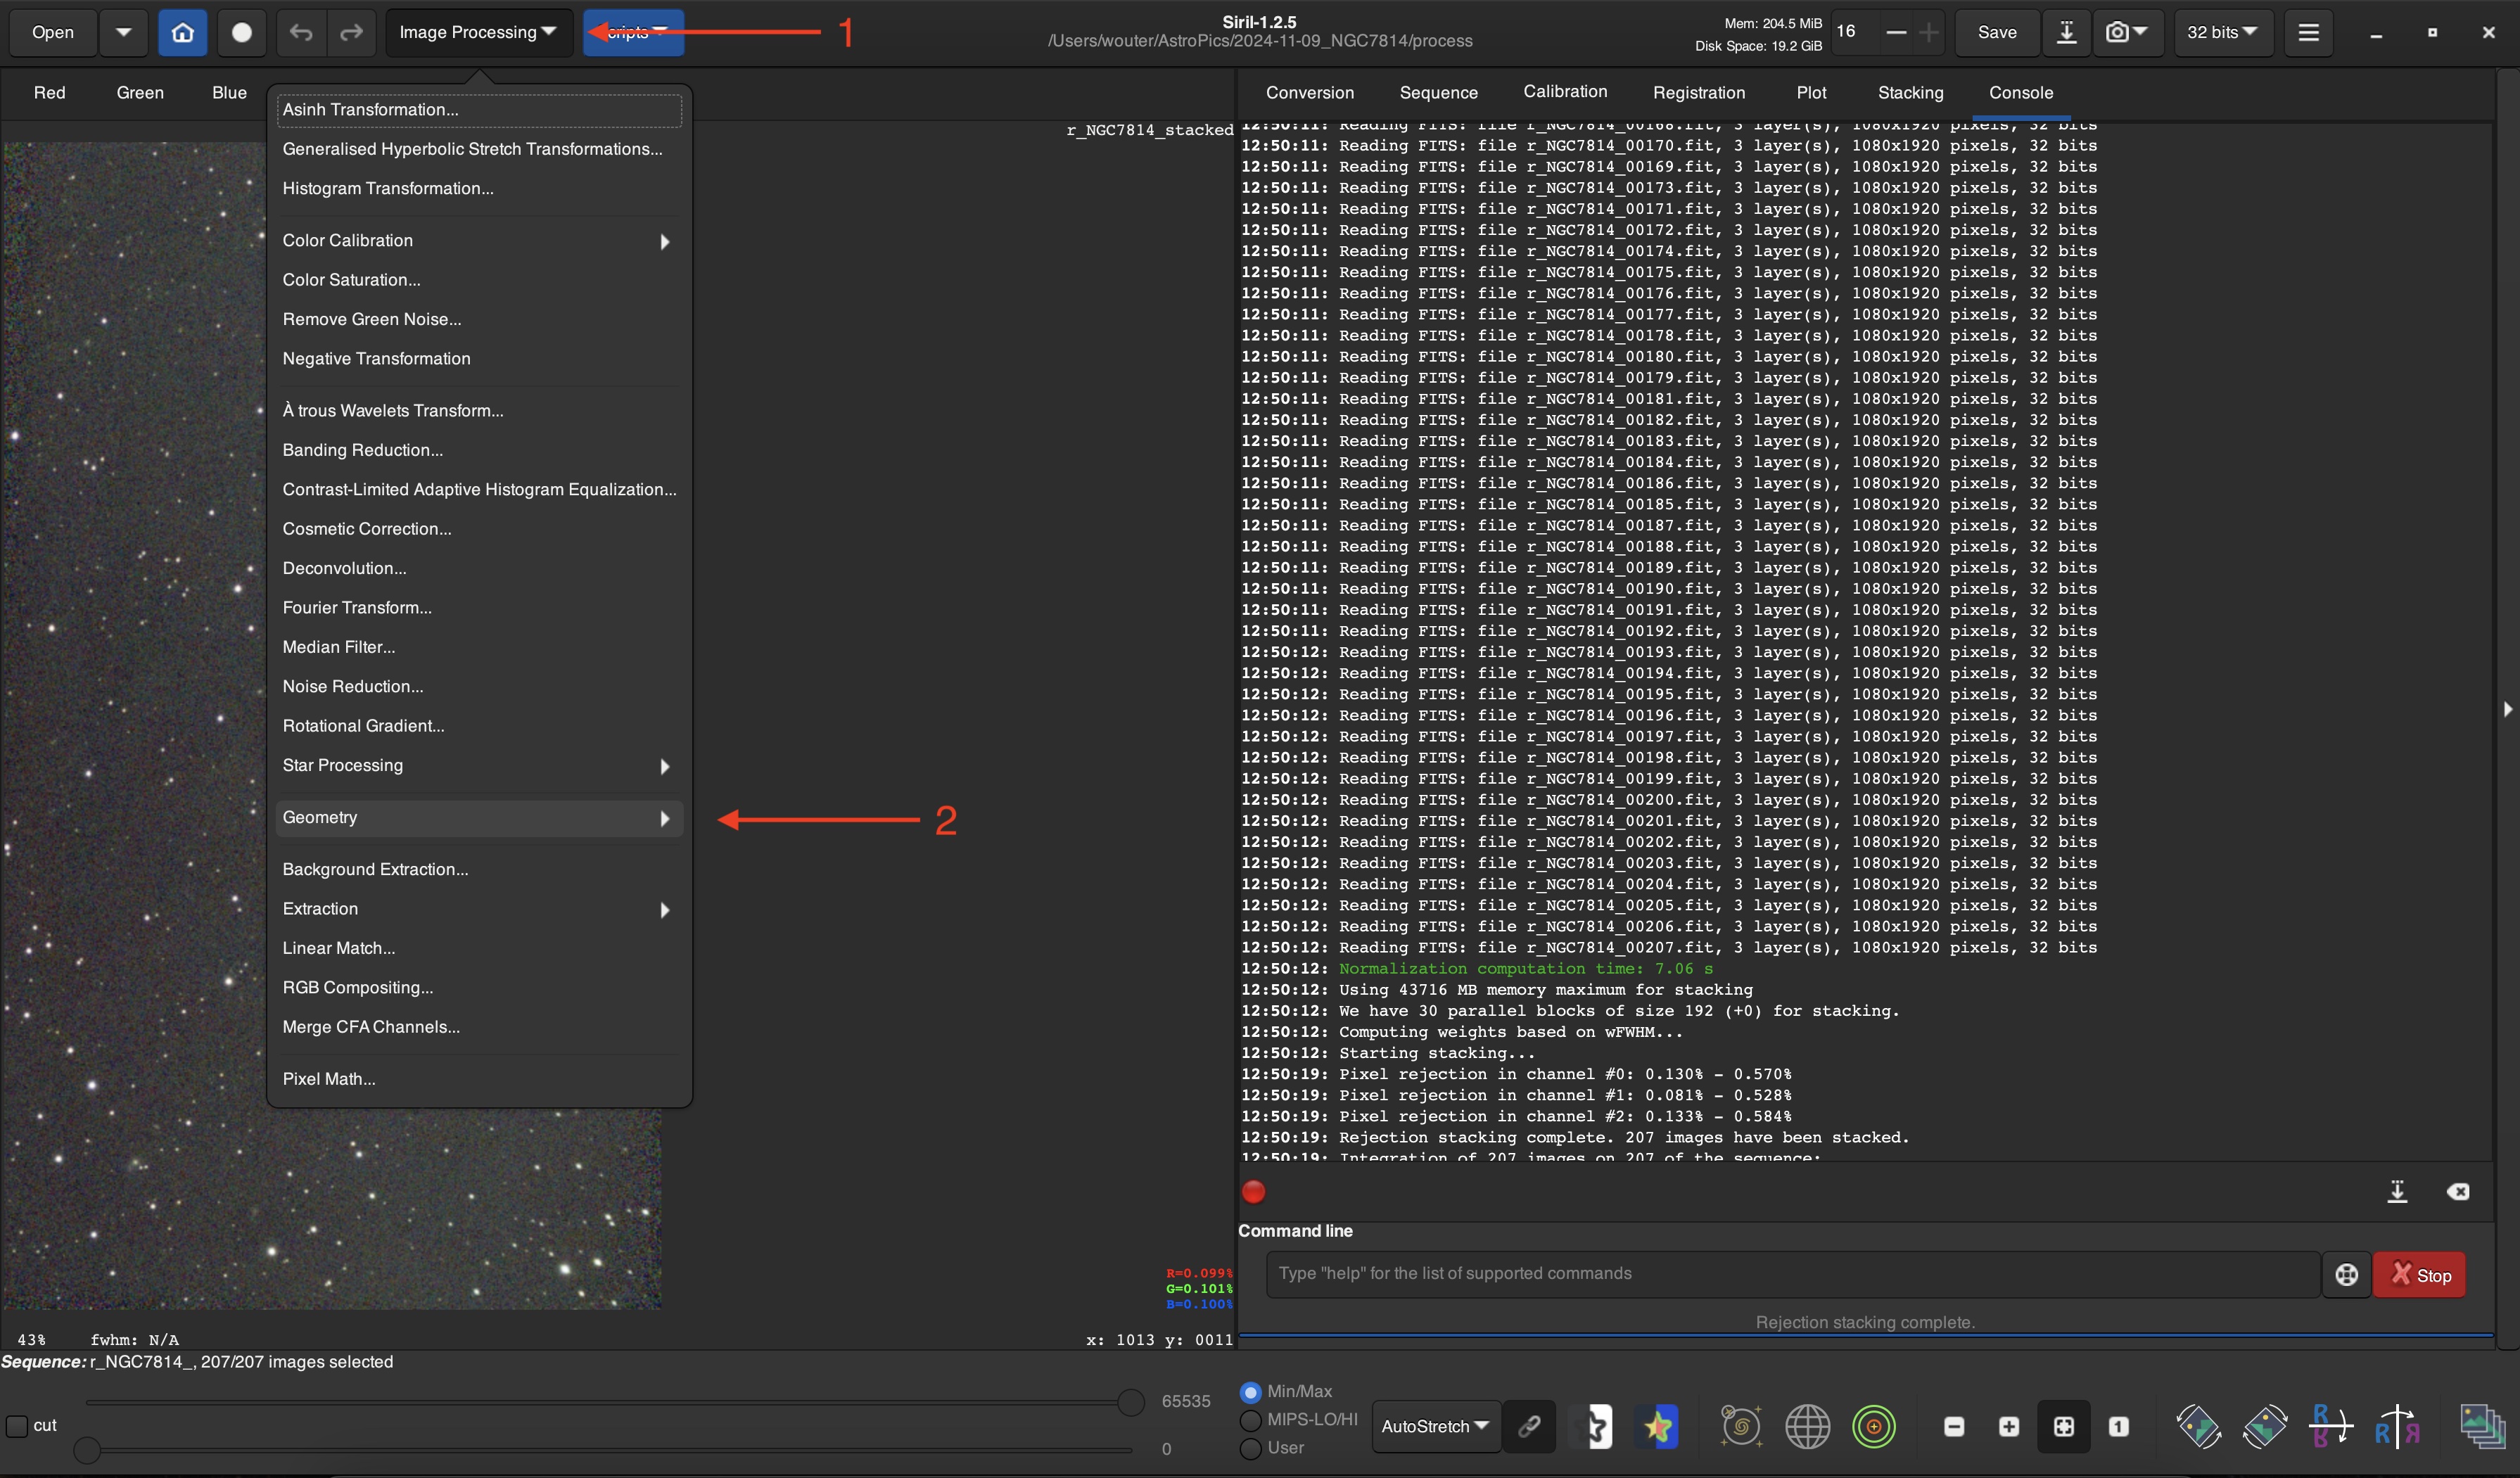
To do so, click the Image Processing drop-down ( 1 ) and then Geometry ( 2 ).
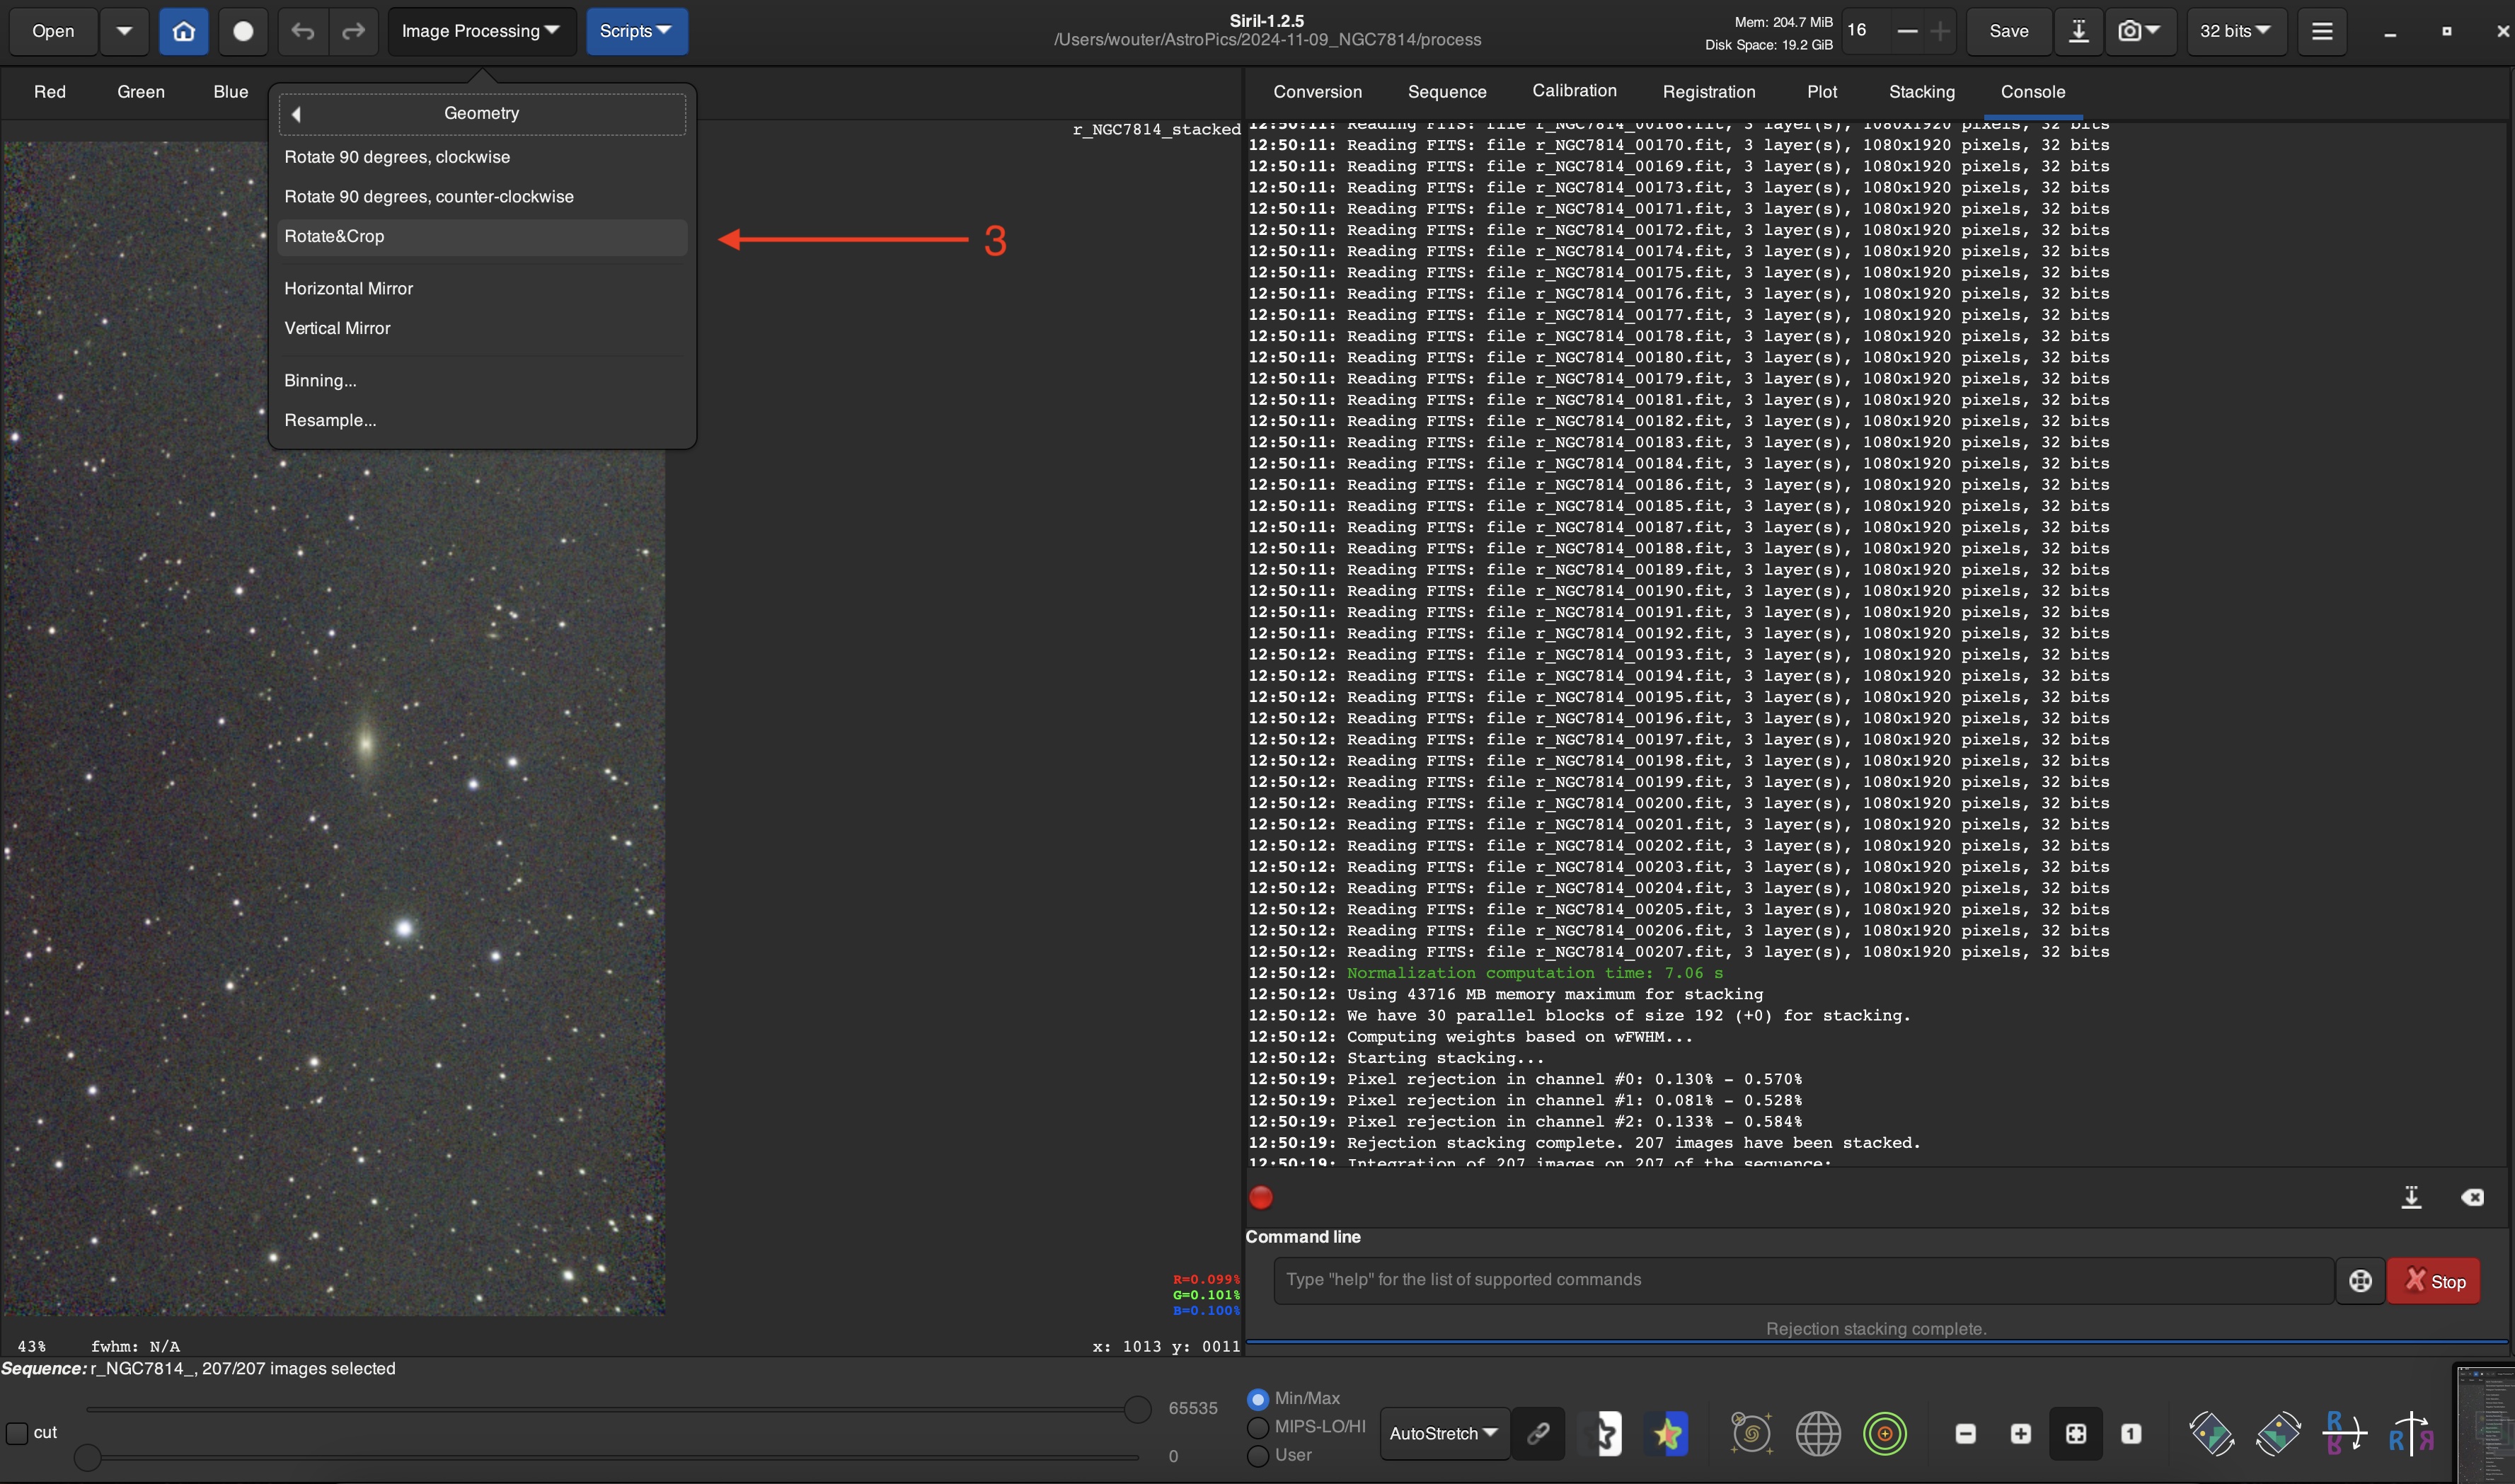
Then select Rotate&Crop ( 3 ).
Use your mouse to drag the corners of the red rectangle ( 4 ) such that the part of the image, that you
want to keep, is selected.
Note the red + in the center of the rectangle ( 5 ).
Once you're happy, click the Apply button ( 6 ) and then the Close button ( 7 ).
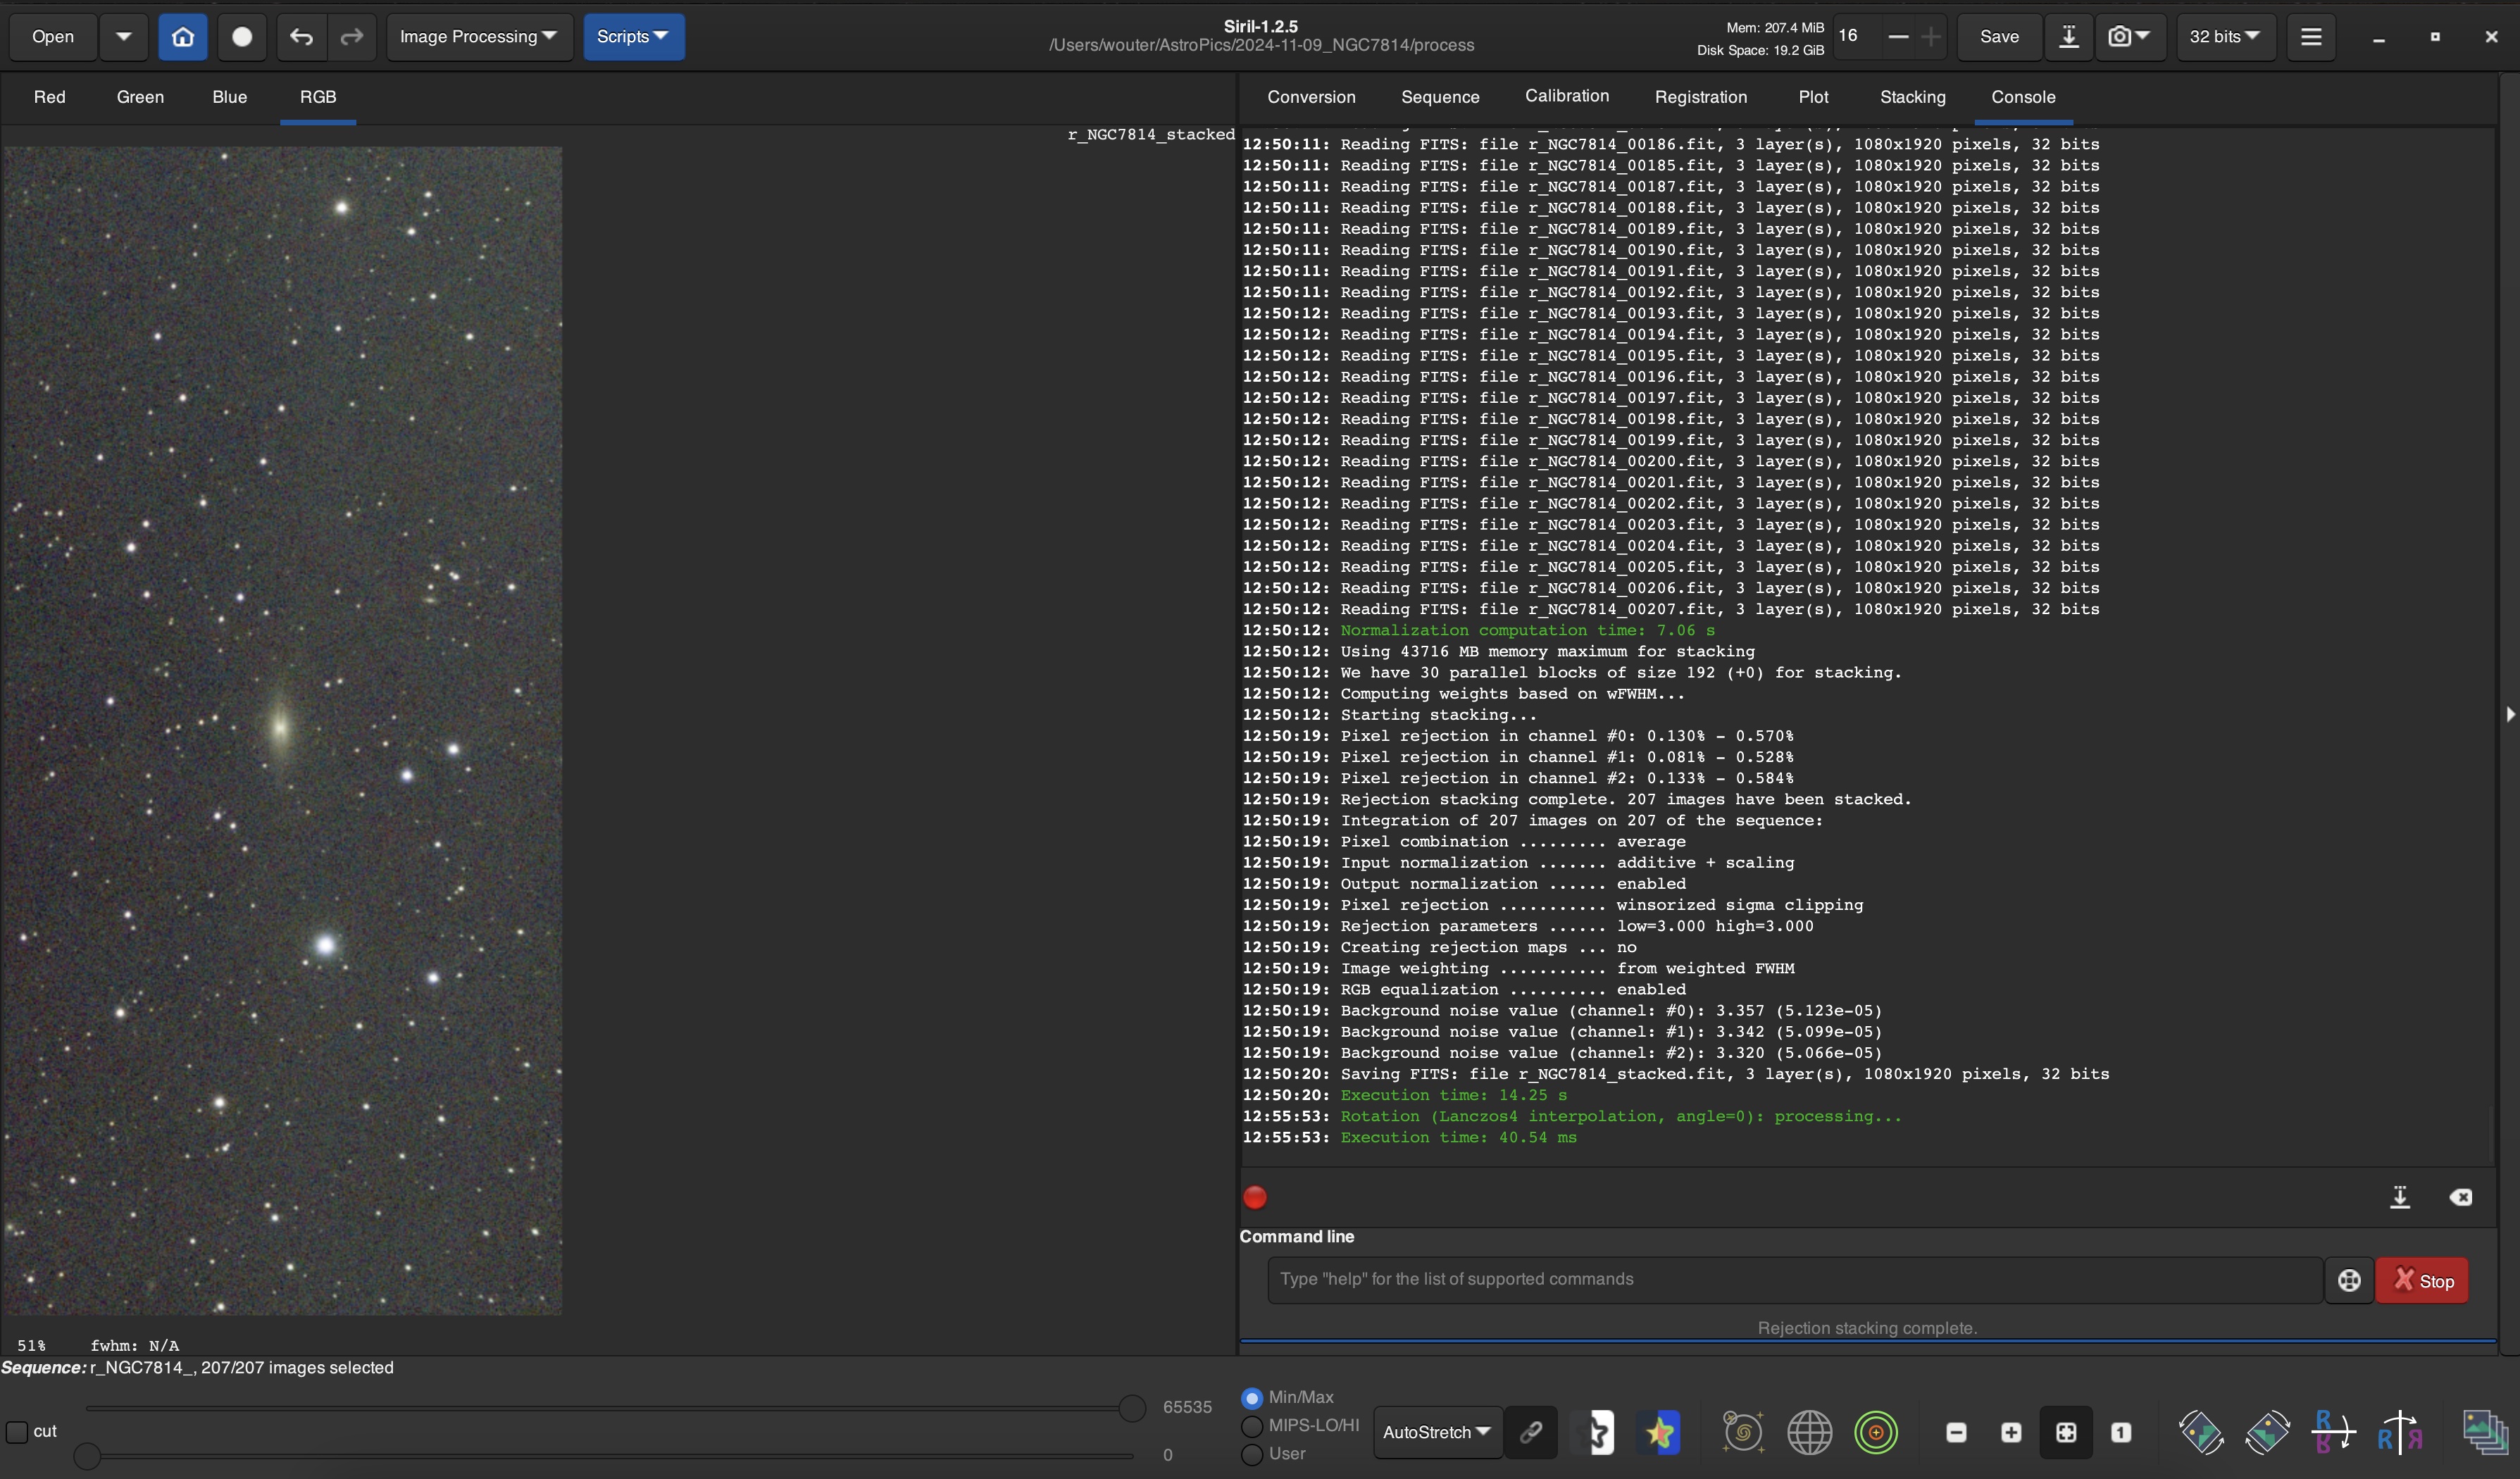
The image in the image viewer will be cropped and reloaded.
If you're image has a gradient due to light pollution or the Moon,like mine, then you can remove the
gradient.
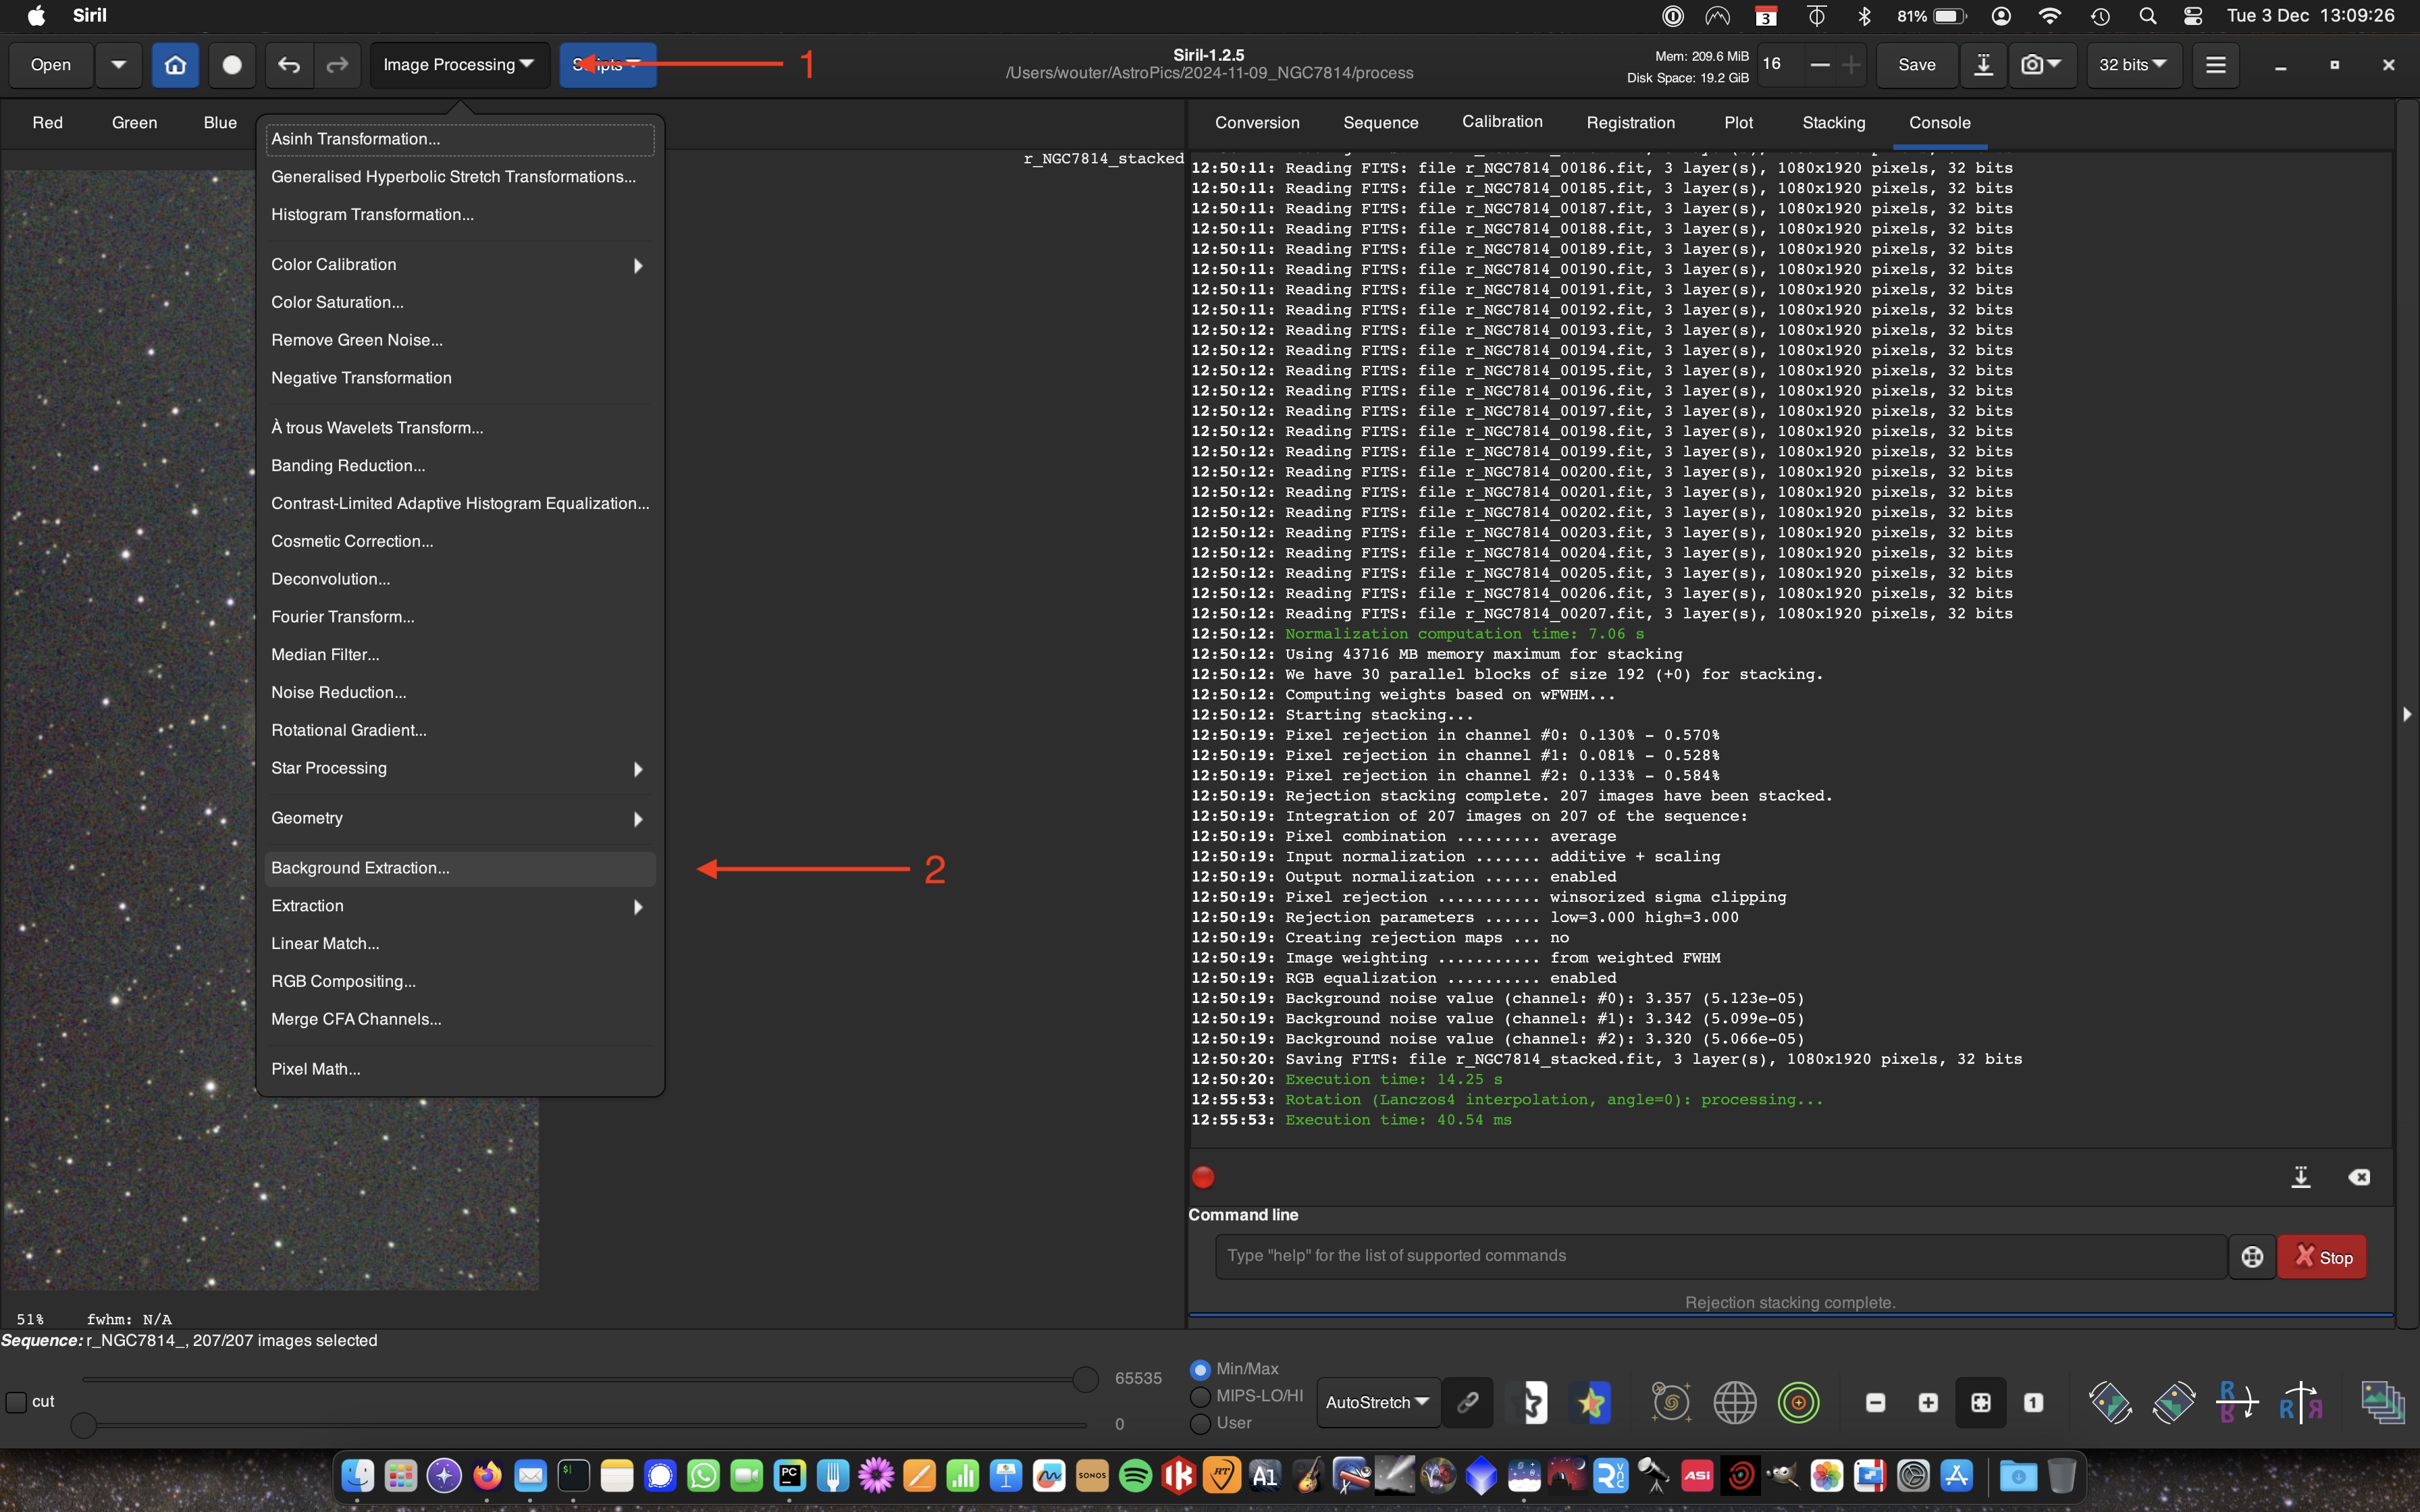
Again, click the Image Processing drop-down ( 1 ) and then Background Extraction... ( 2 ).
This is a very powerful tool with lots of possibilities.
However, for this tutorial we will use it in a very basic way.
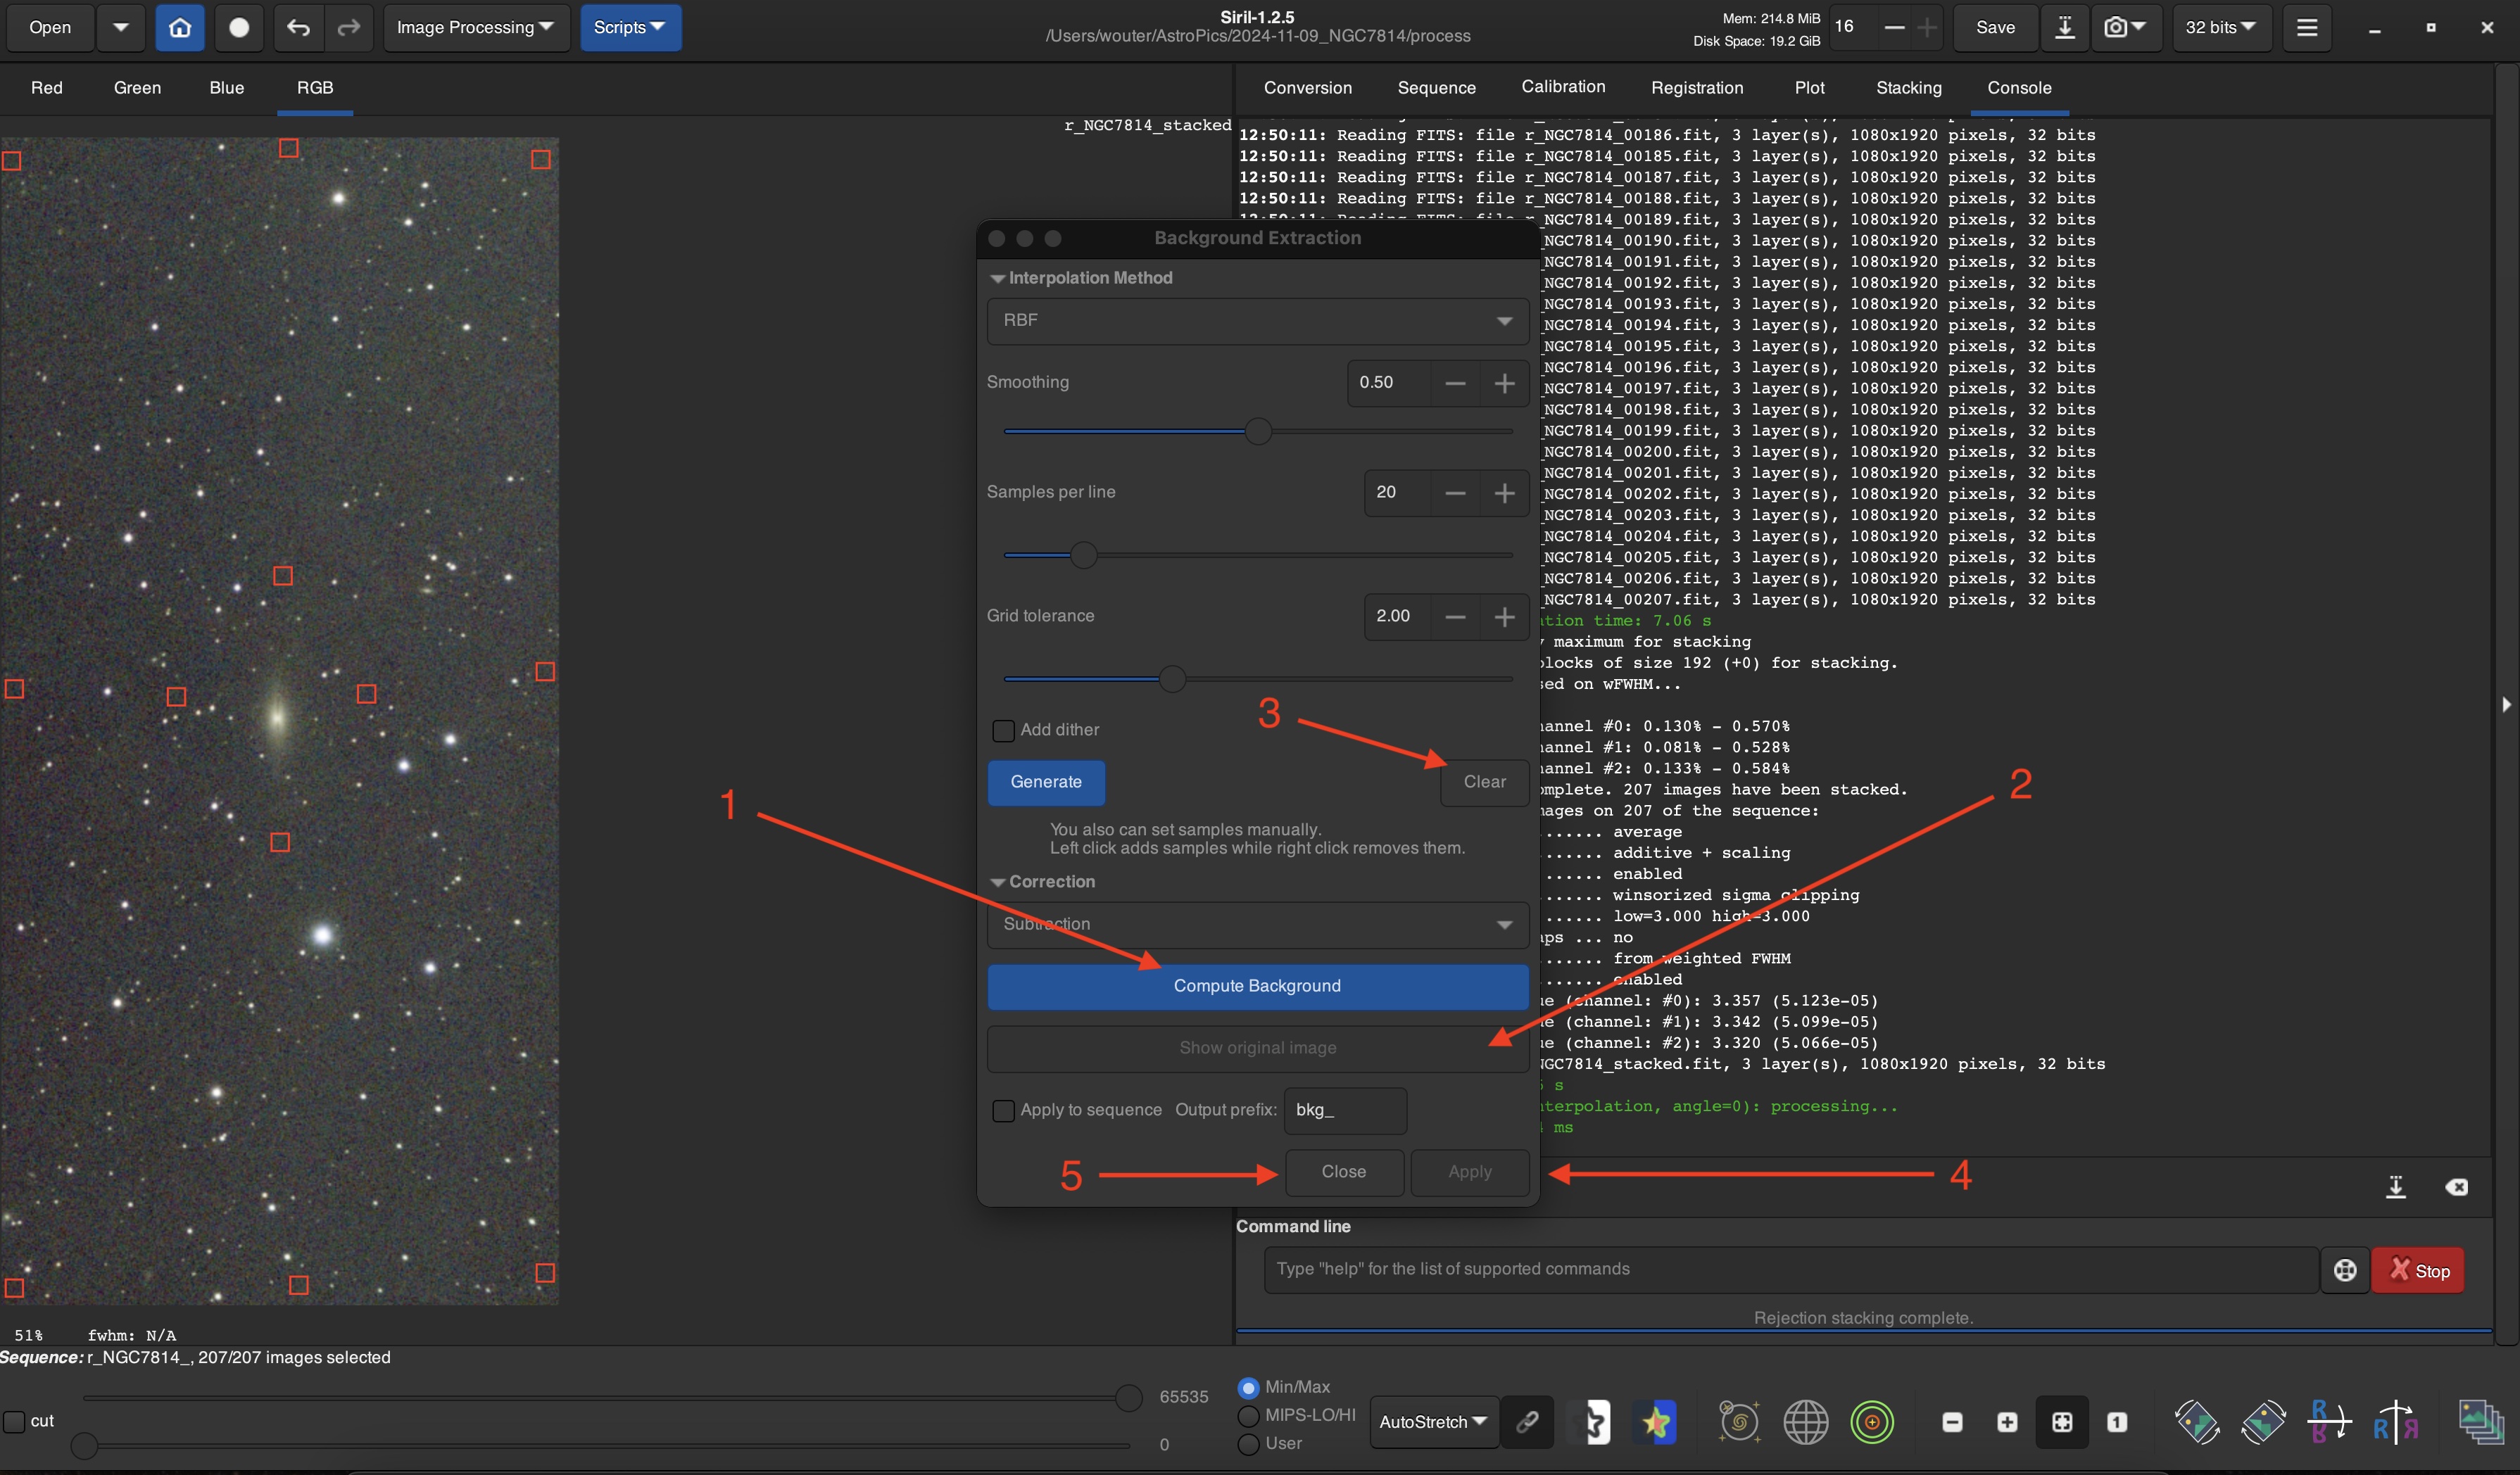
Click in the image to place small, red rectangles.
Avoid stars and avoid nebulosity.
I usually try to place rectangles in all corners, at the edges about halfway between the corners and
around the center of the image.
But it very much depends on the image whether that is possible or not.
If your image contains a lot of nebulosity then it may be hard to find places where to click.
In that case, aim for darker patches within the nebula.
Once you're happy, click the Compute Background button ( 1 ) and see if you like the result.
You can click and hold the Show original image button ( 2 ) to see the difference.
If you're unhappy, you can click the Clear button ( 3 ) to remove all red rectangles and start
over.
Once you're happy, click the Apply button ( 4 ) and then the Close button ( 5 ).
The result will be shown in the image viewer.
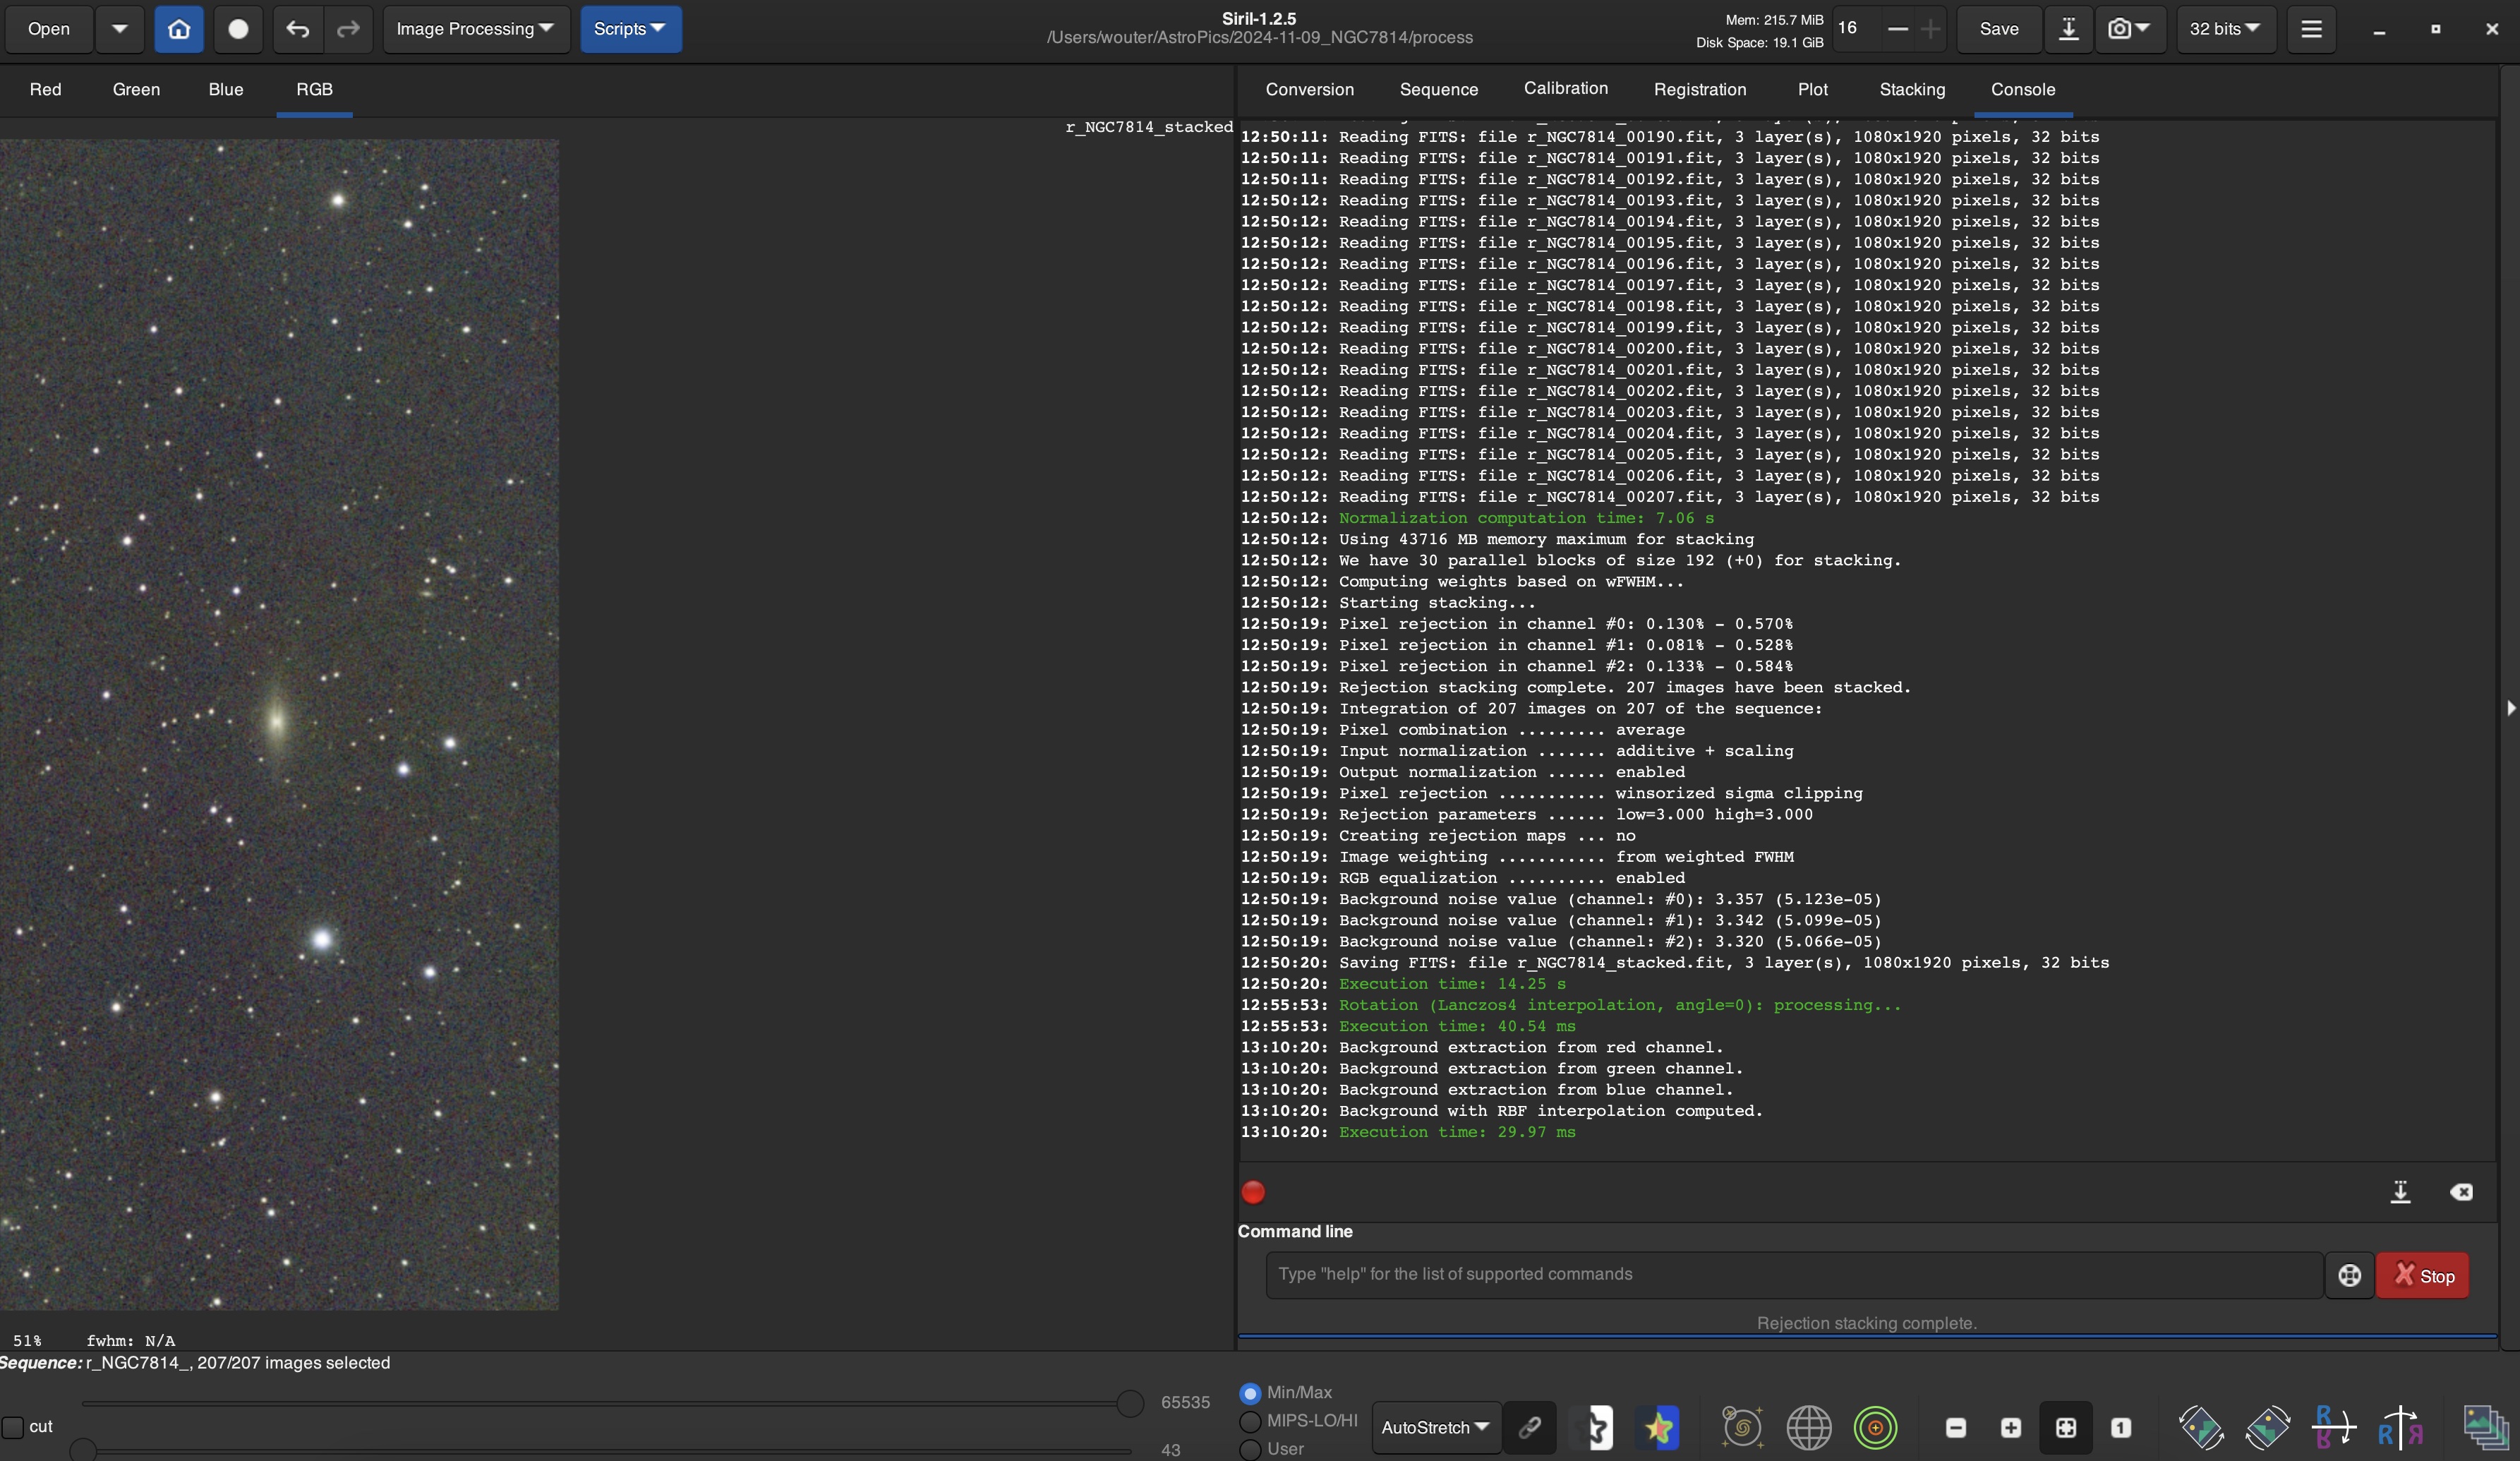
So far the image still is linear even though we display it as non-linear.
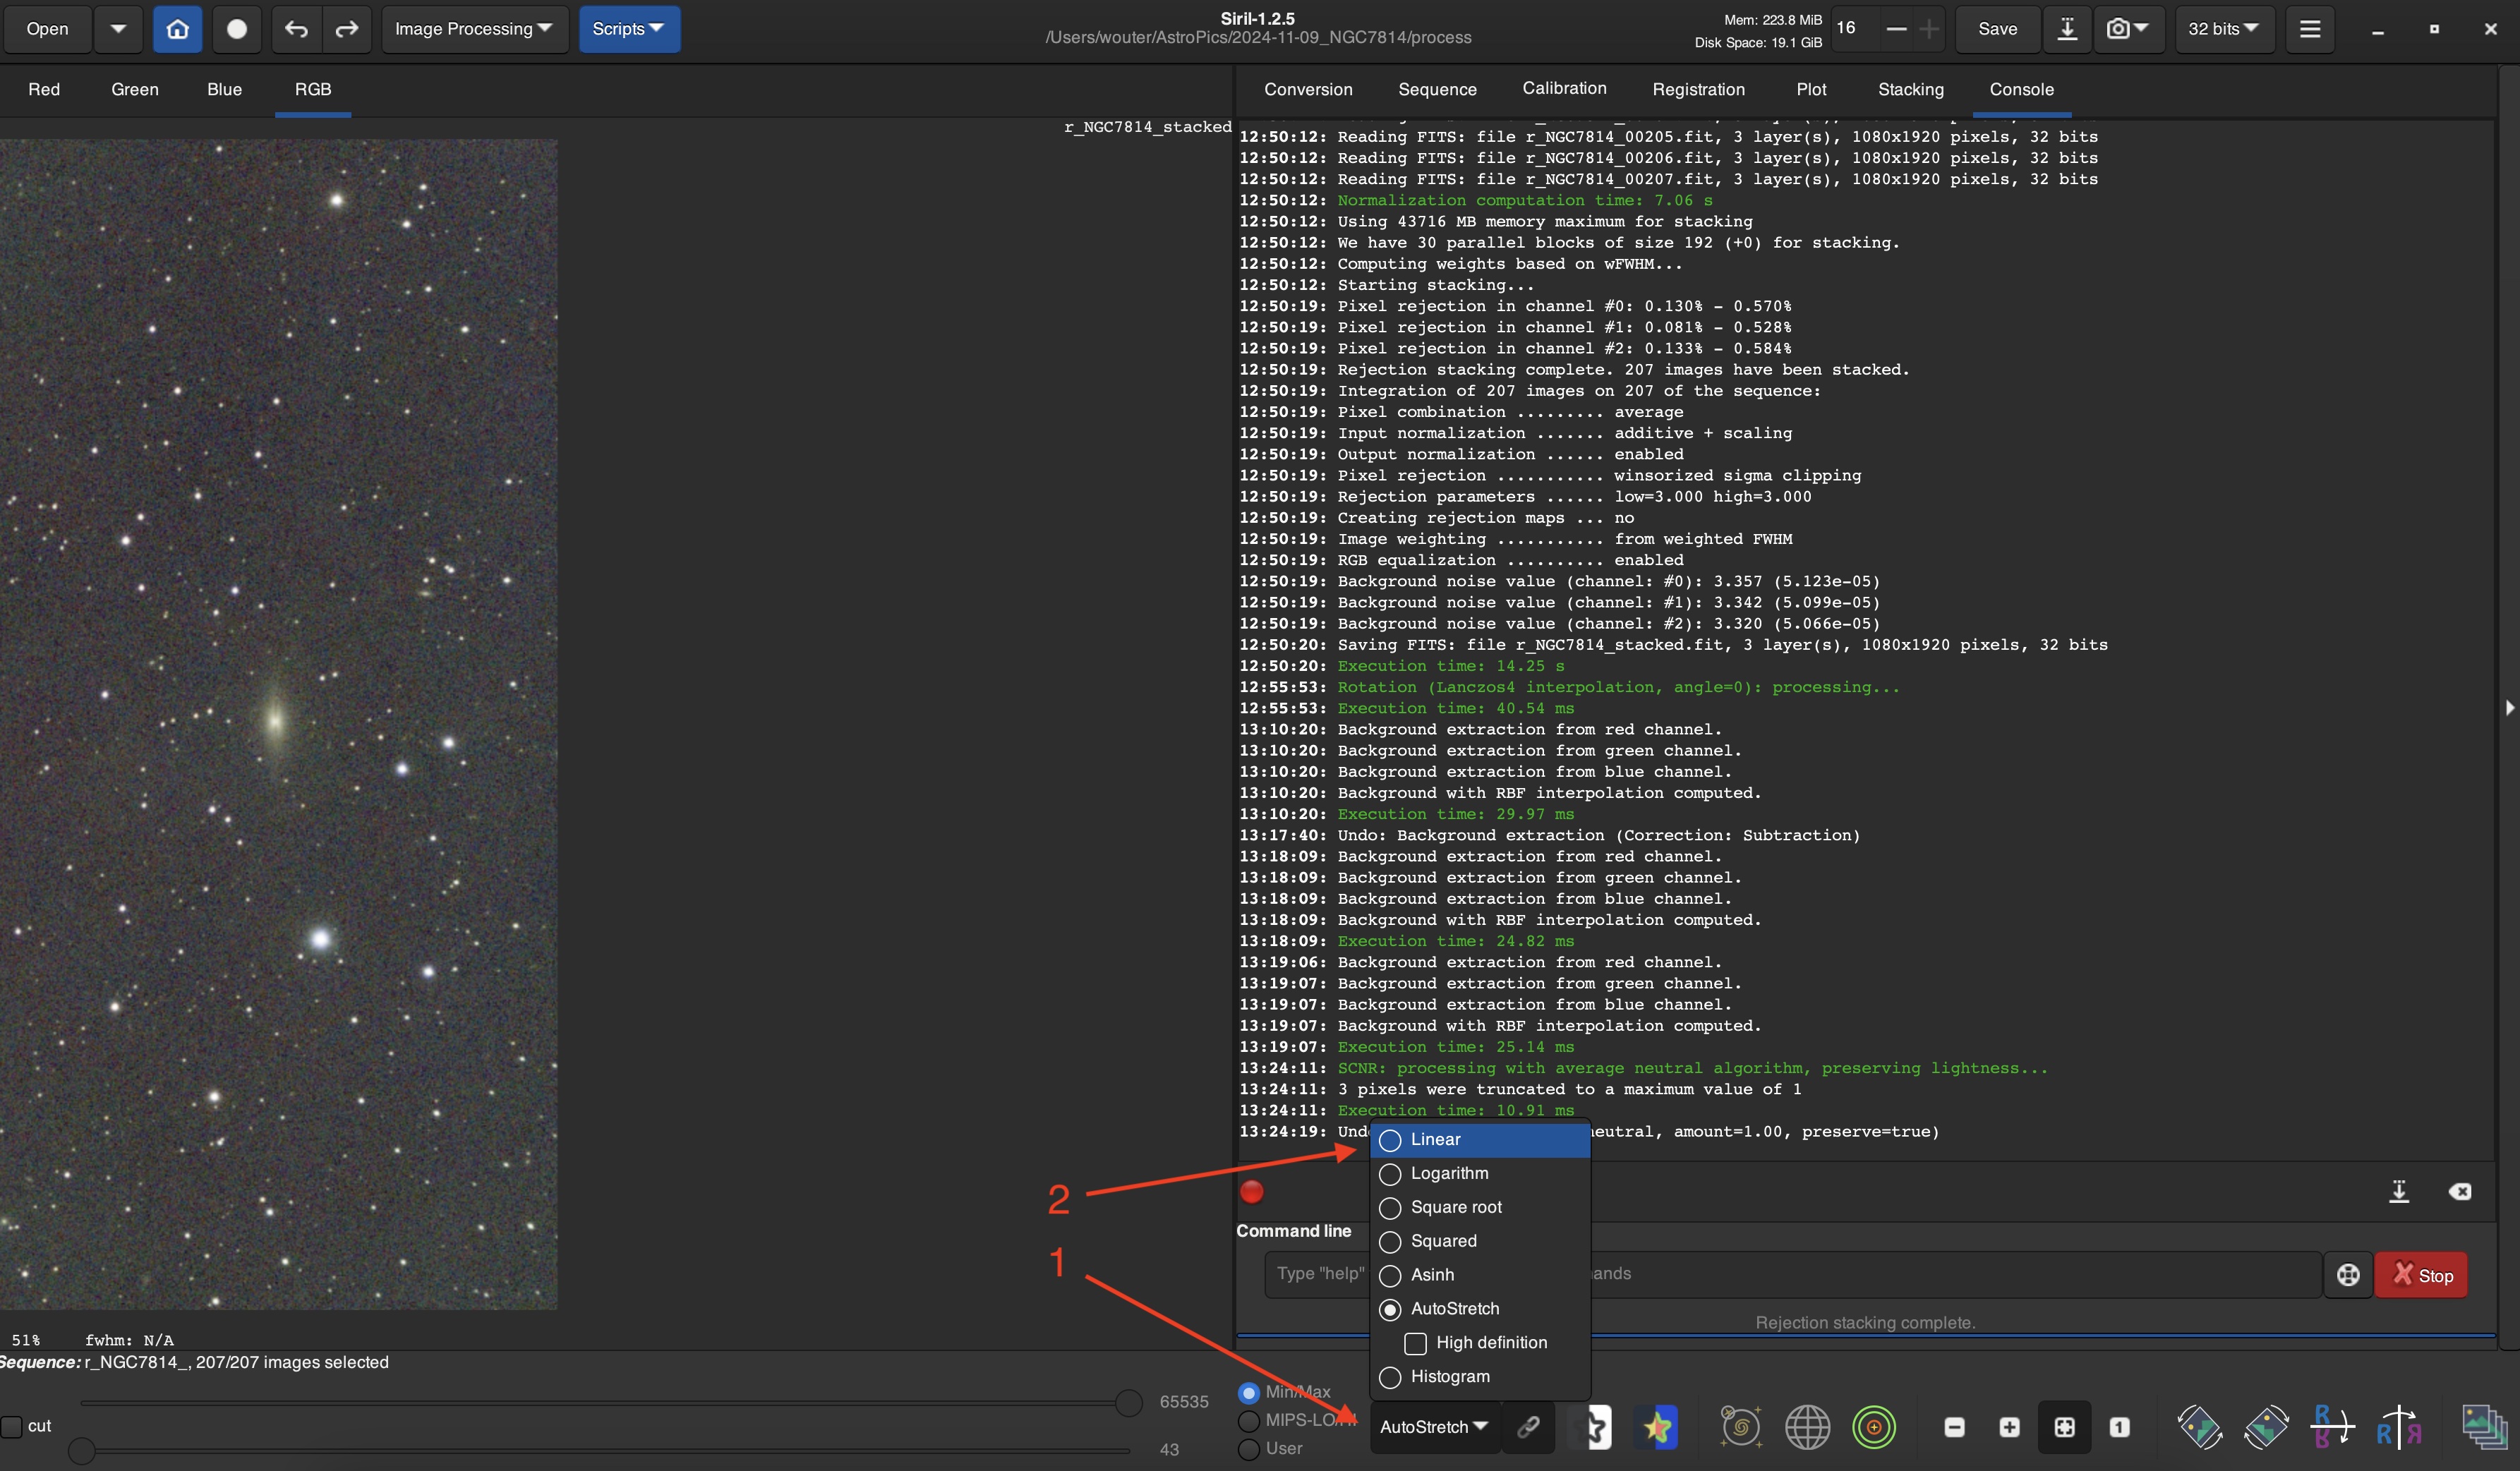
Click the AutoStretch drop-down ( 1 ) and select Linear ( 2 ).
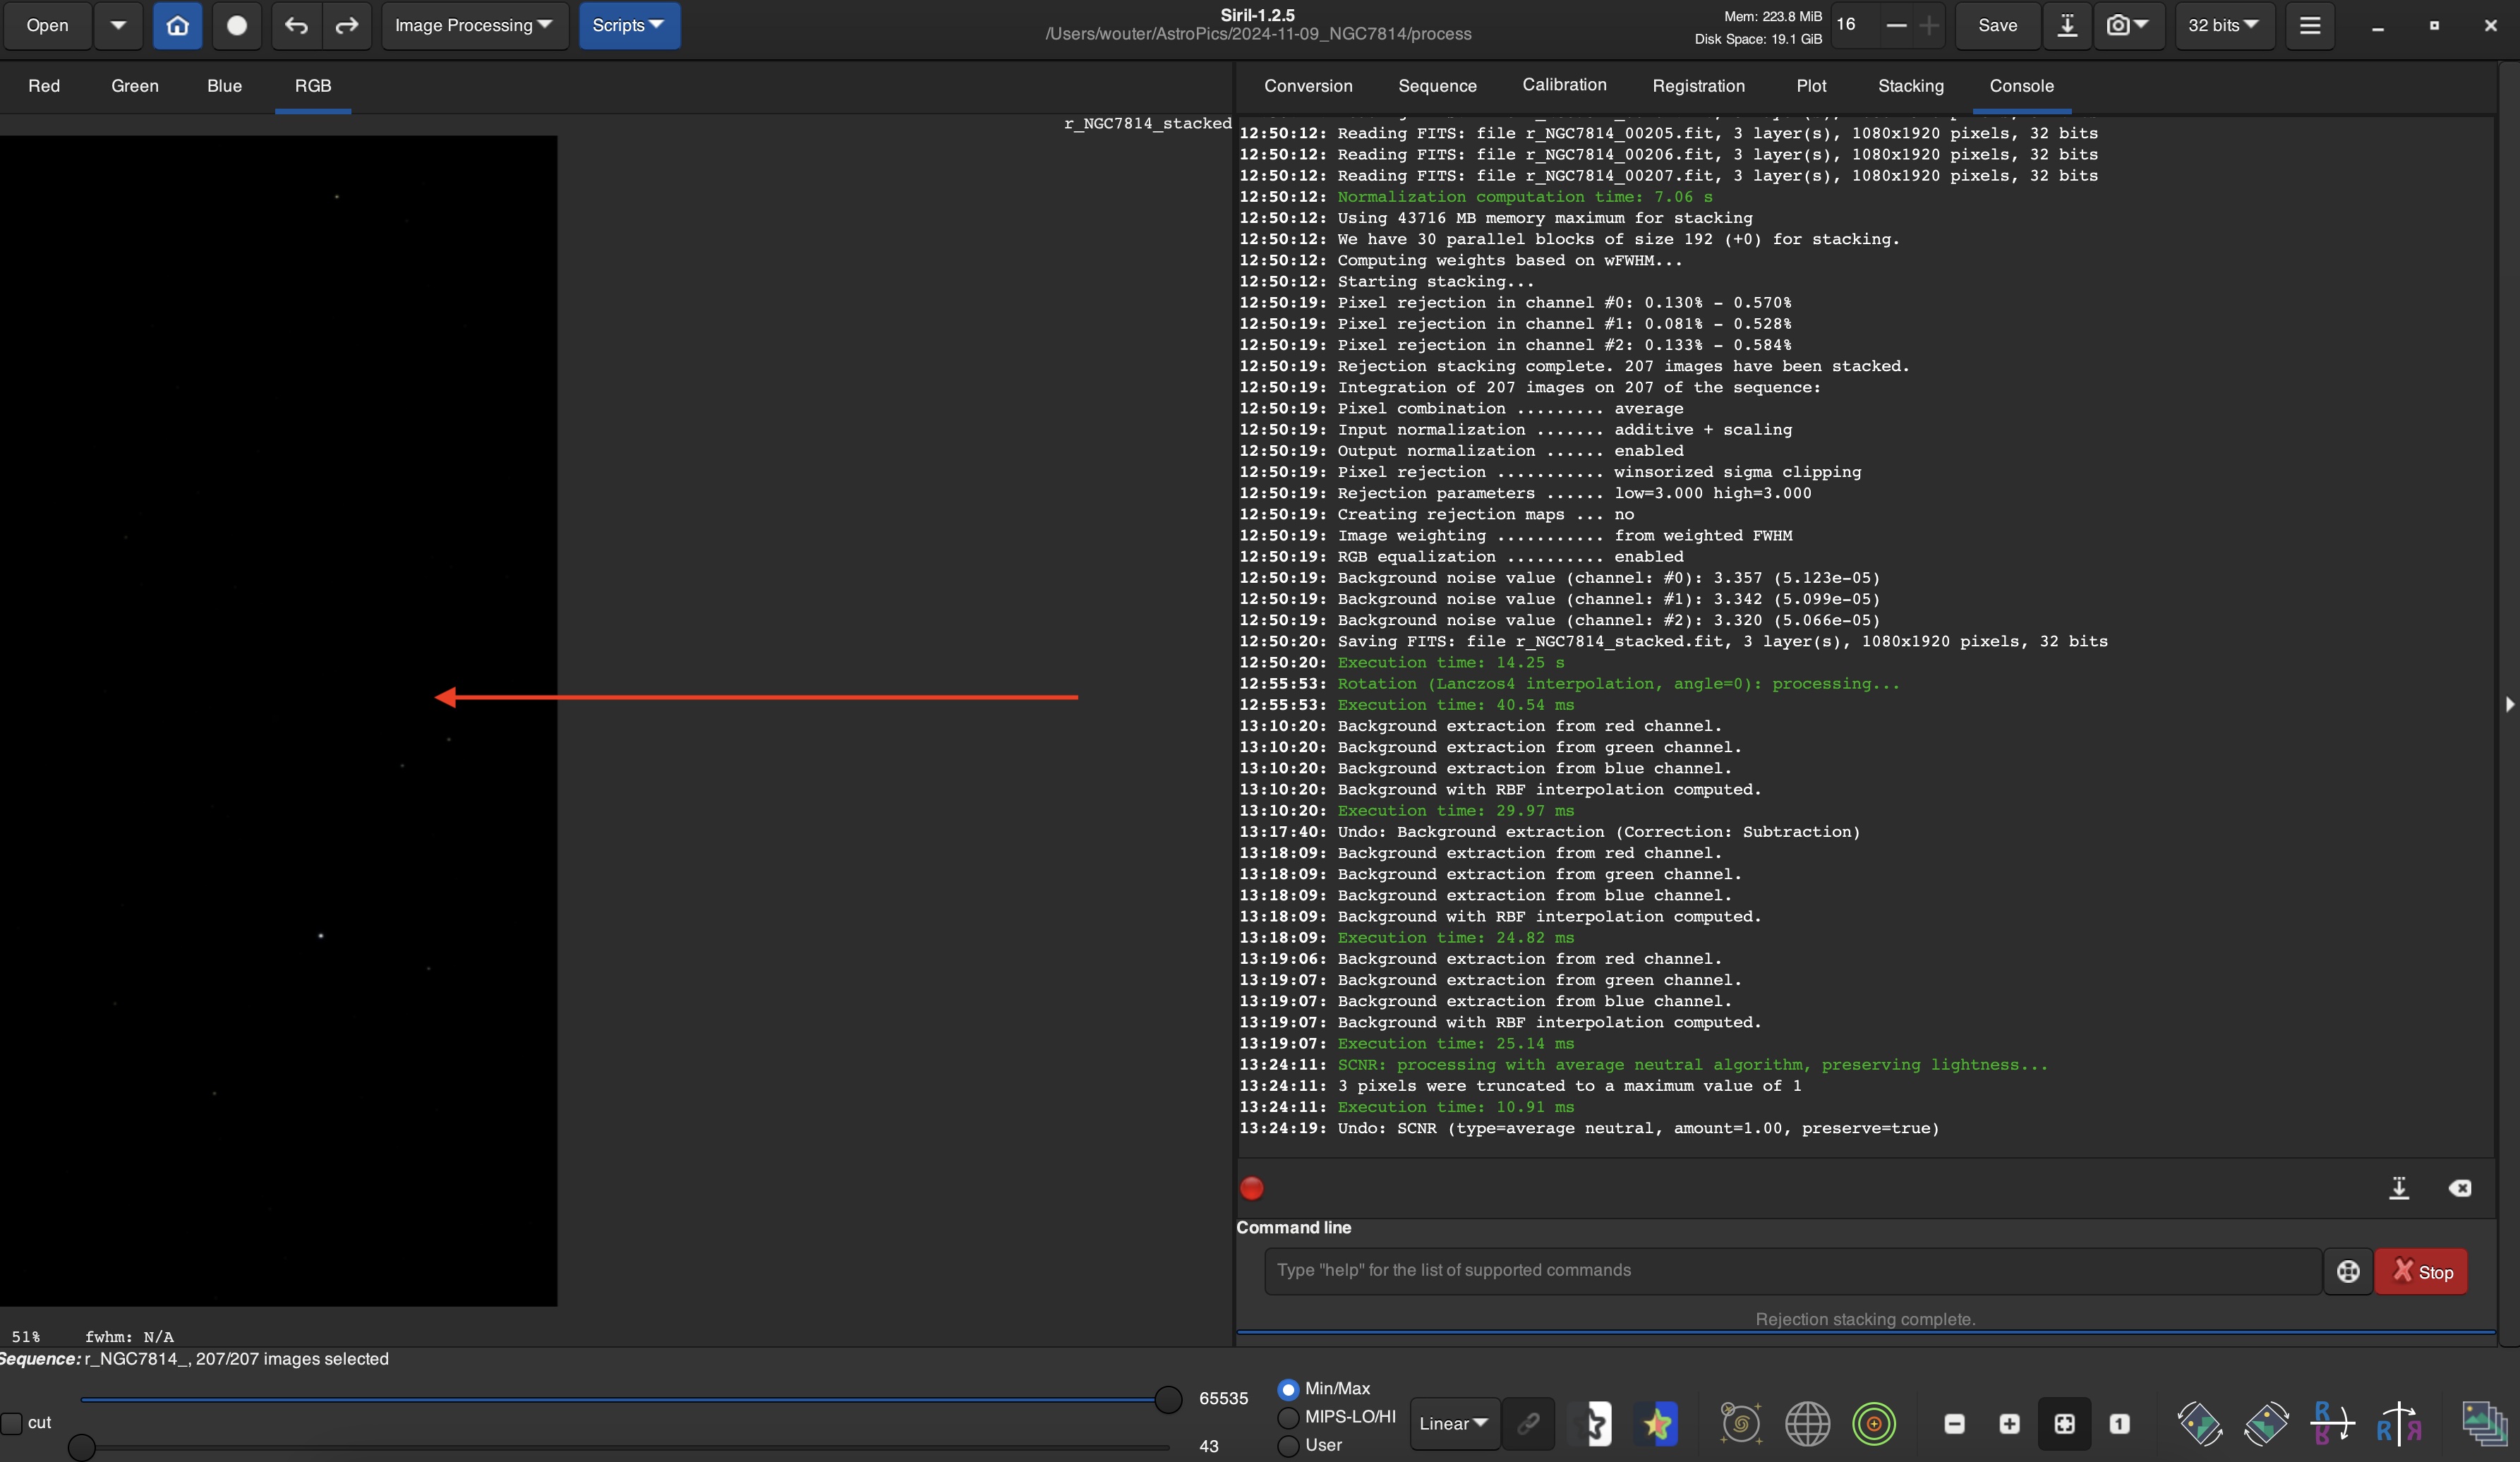
The image viewer will become (nearly) dark again.
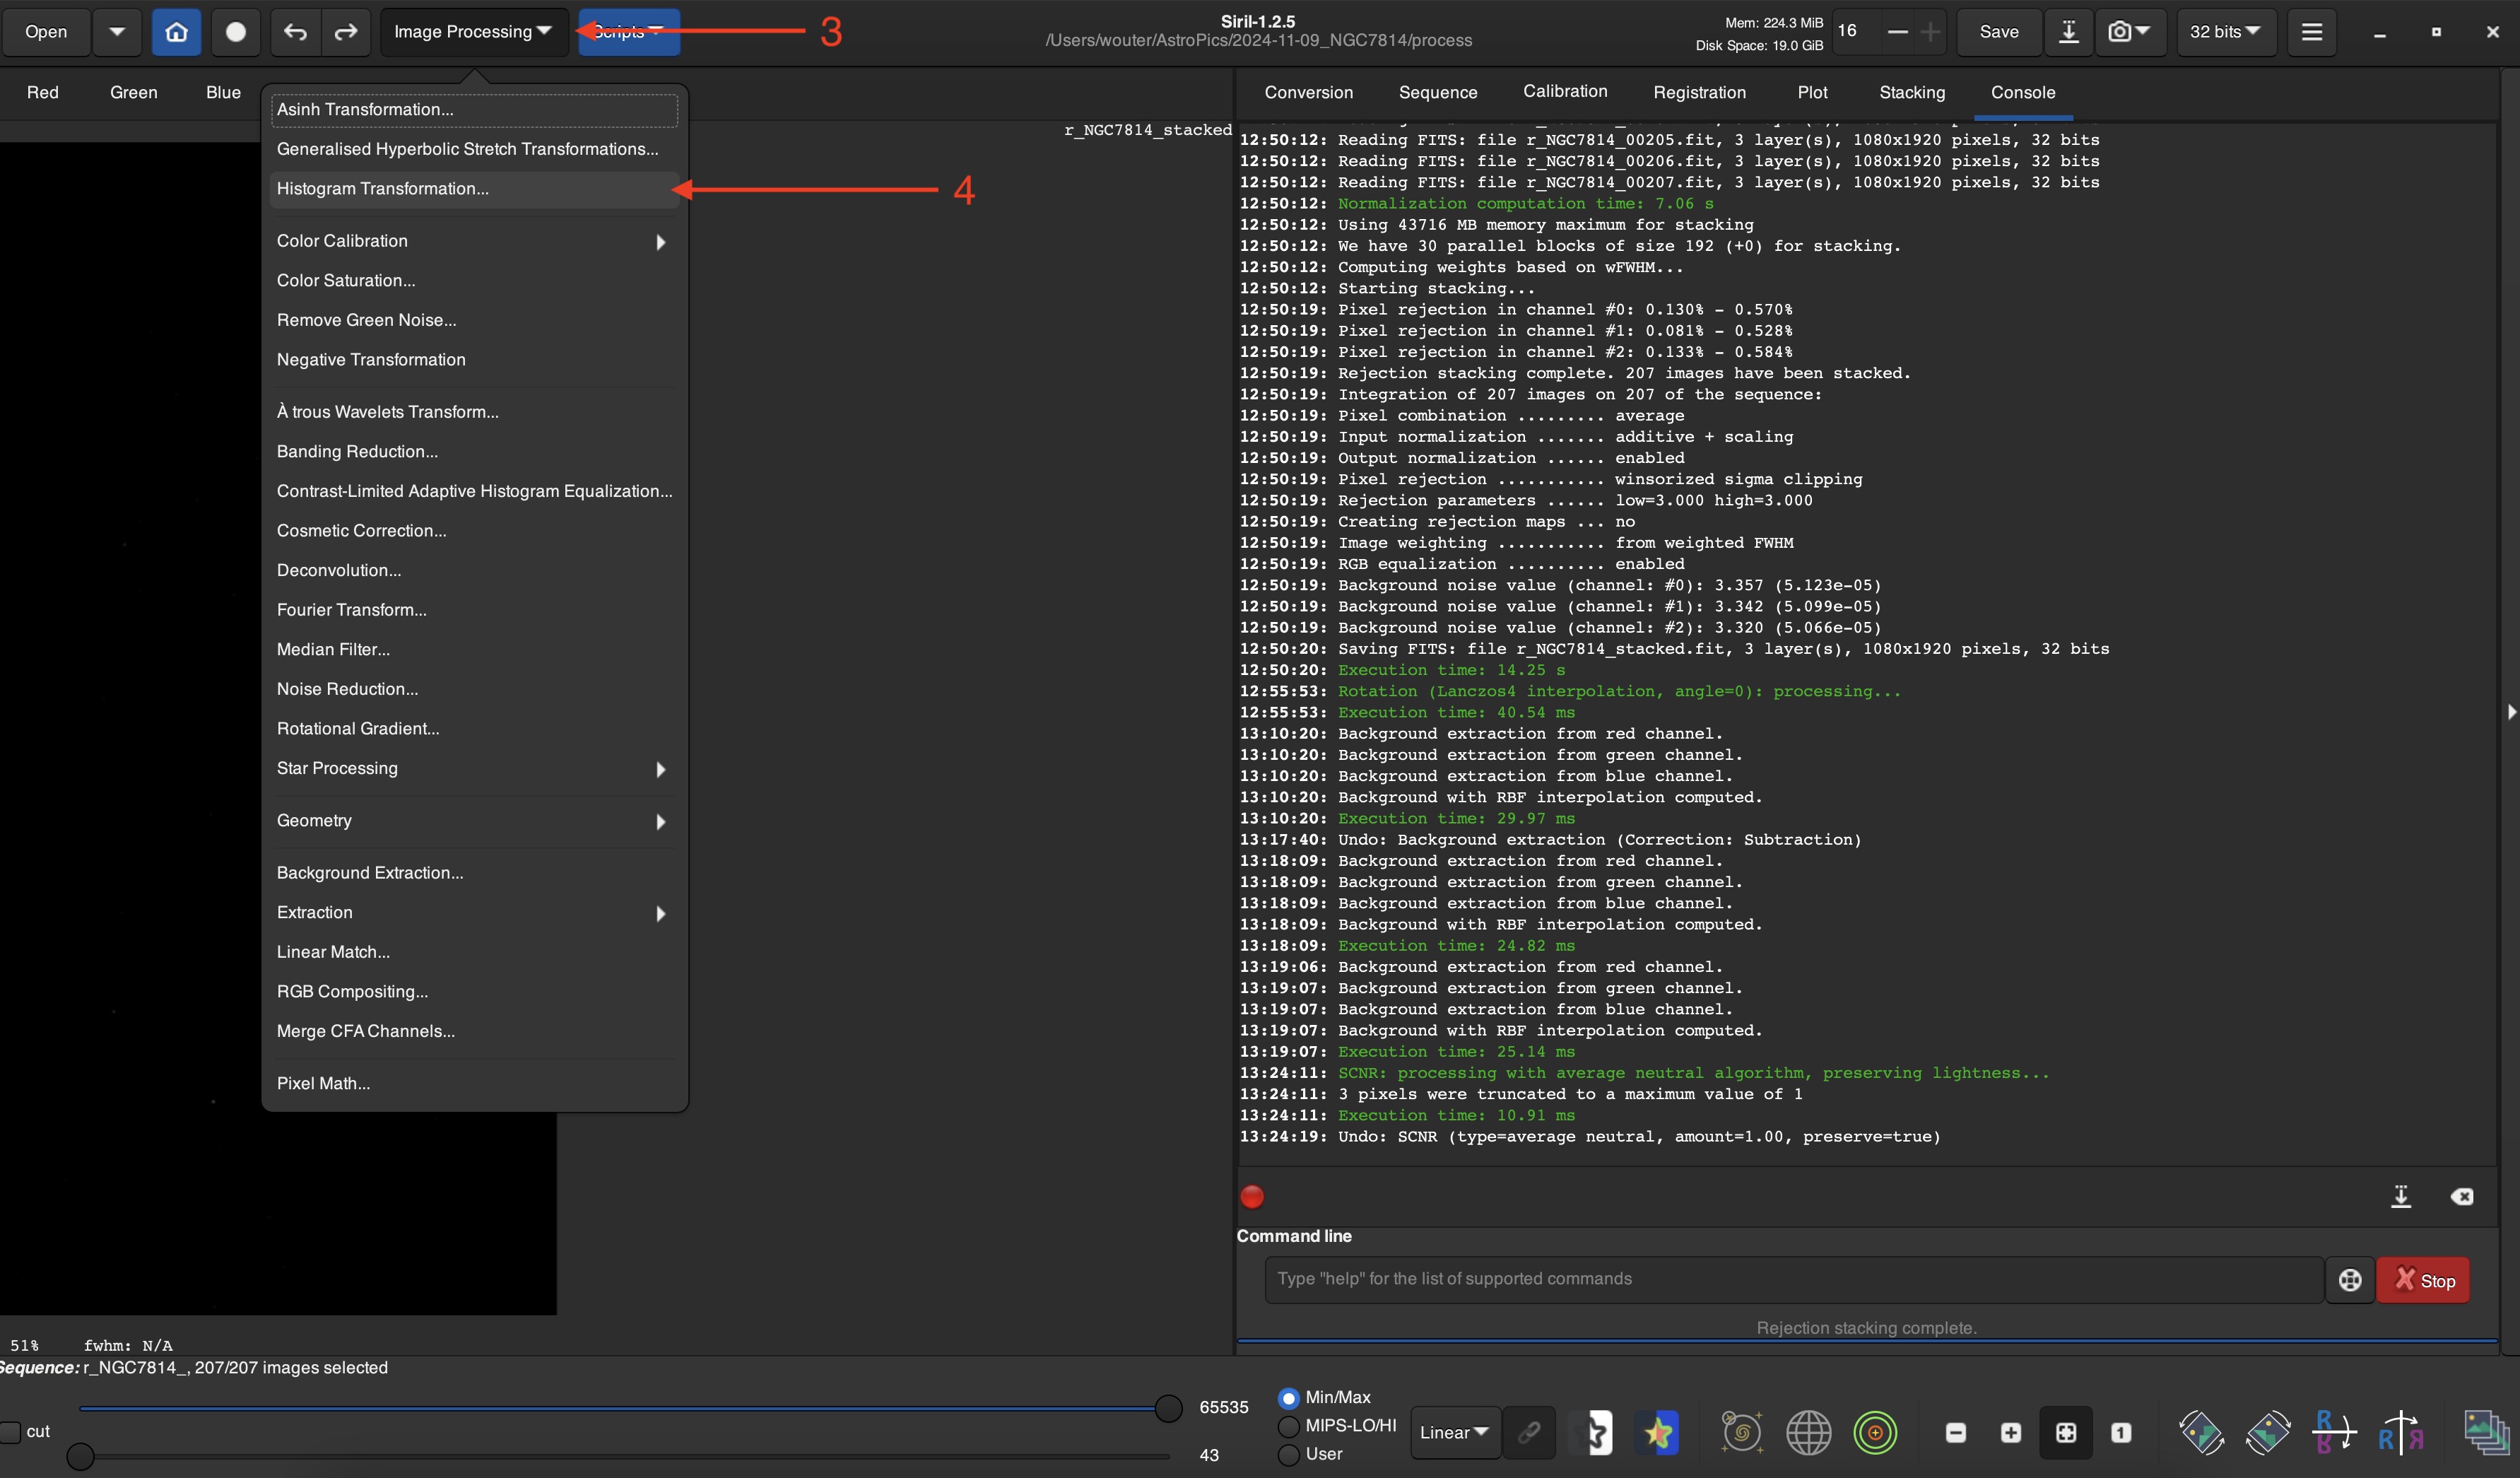
There are several ways to stretch the image and we will use the simplest one.
Click the Image Processing drop-down ( 3 ) and then Histogram Transformation... ( 4 ).
Click the Apply autostretch button ( 5 ) and then Apply ( 6 ).
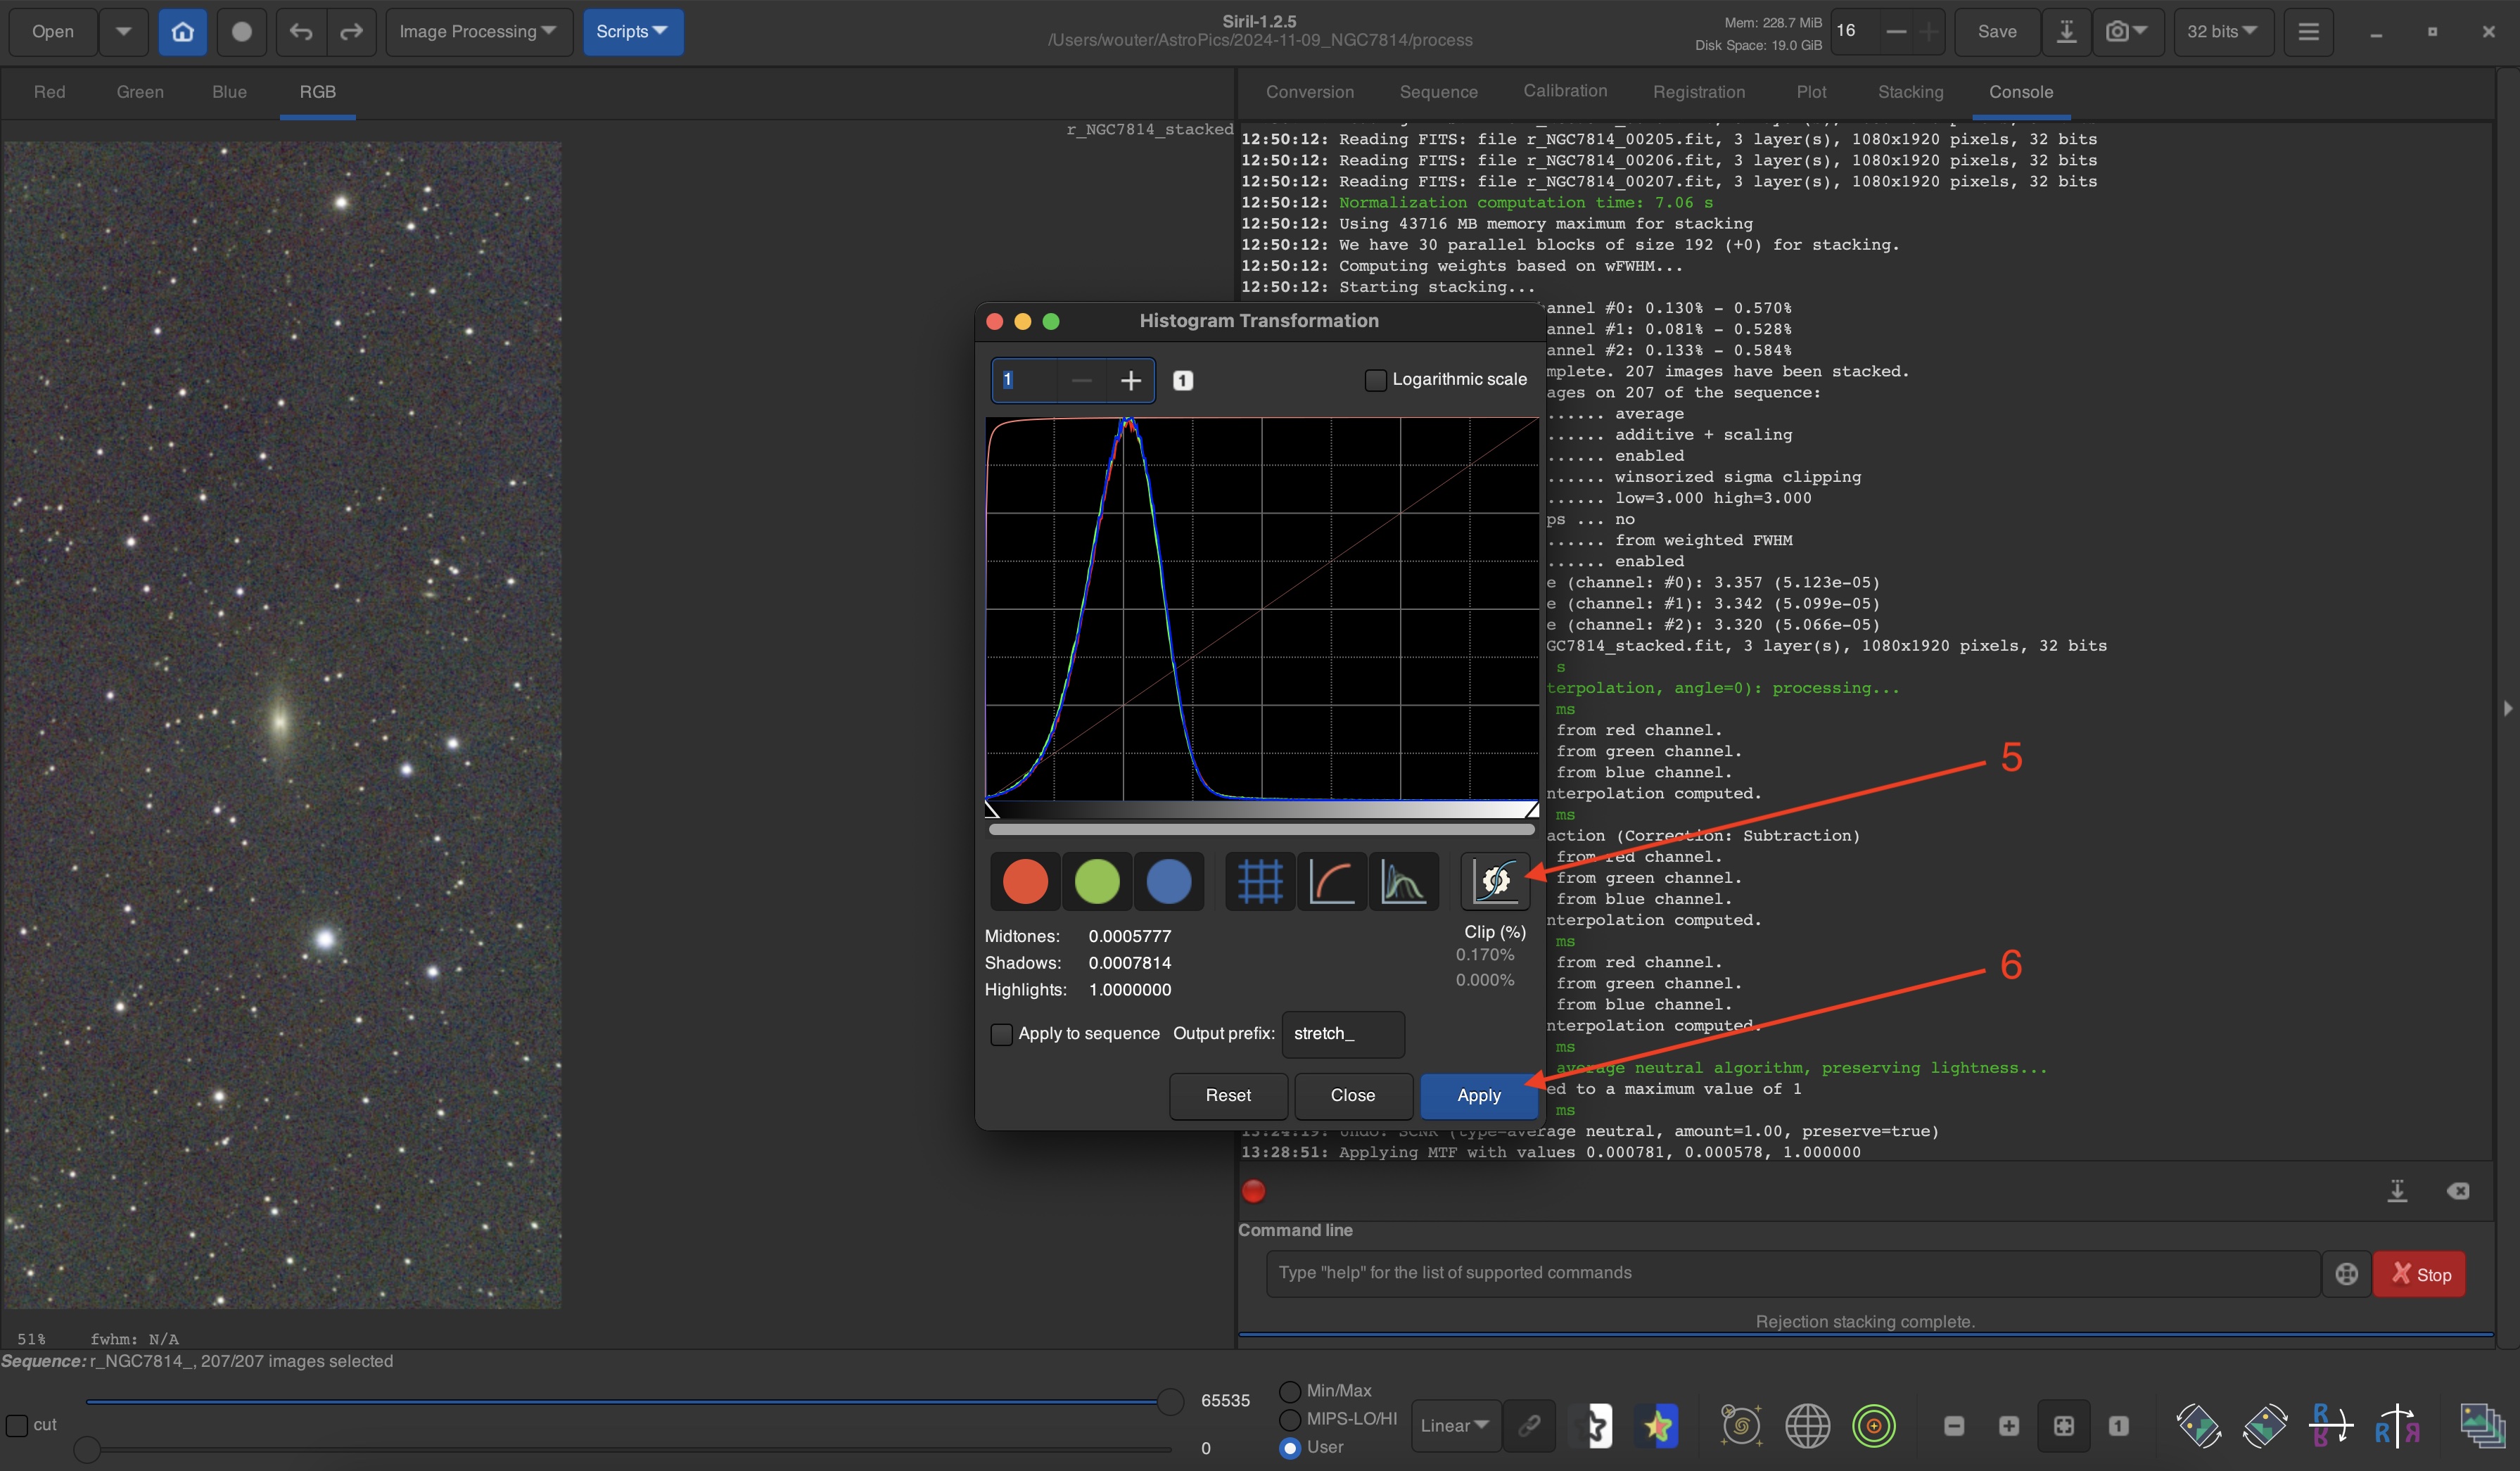
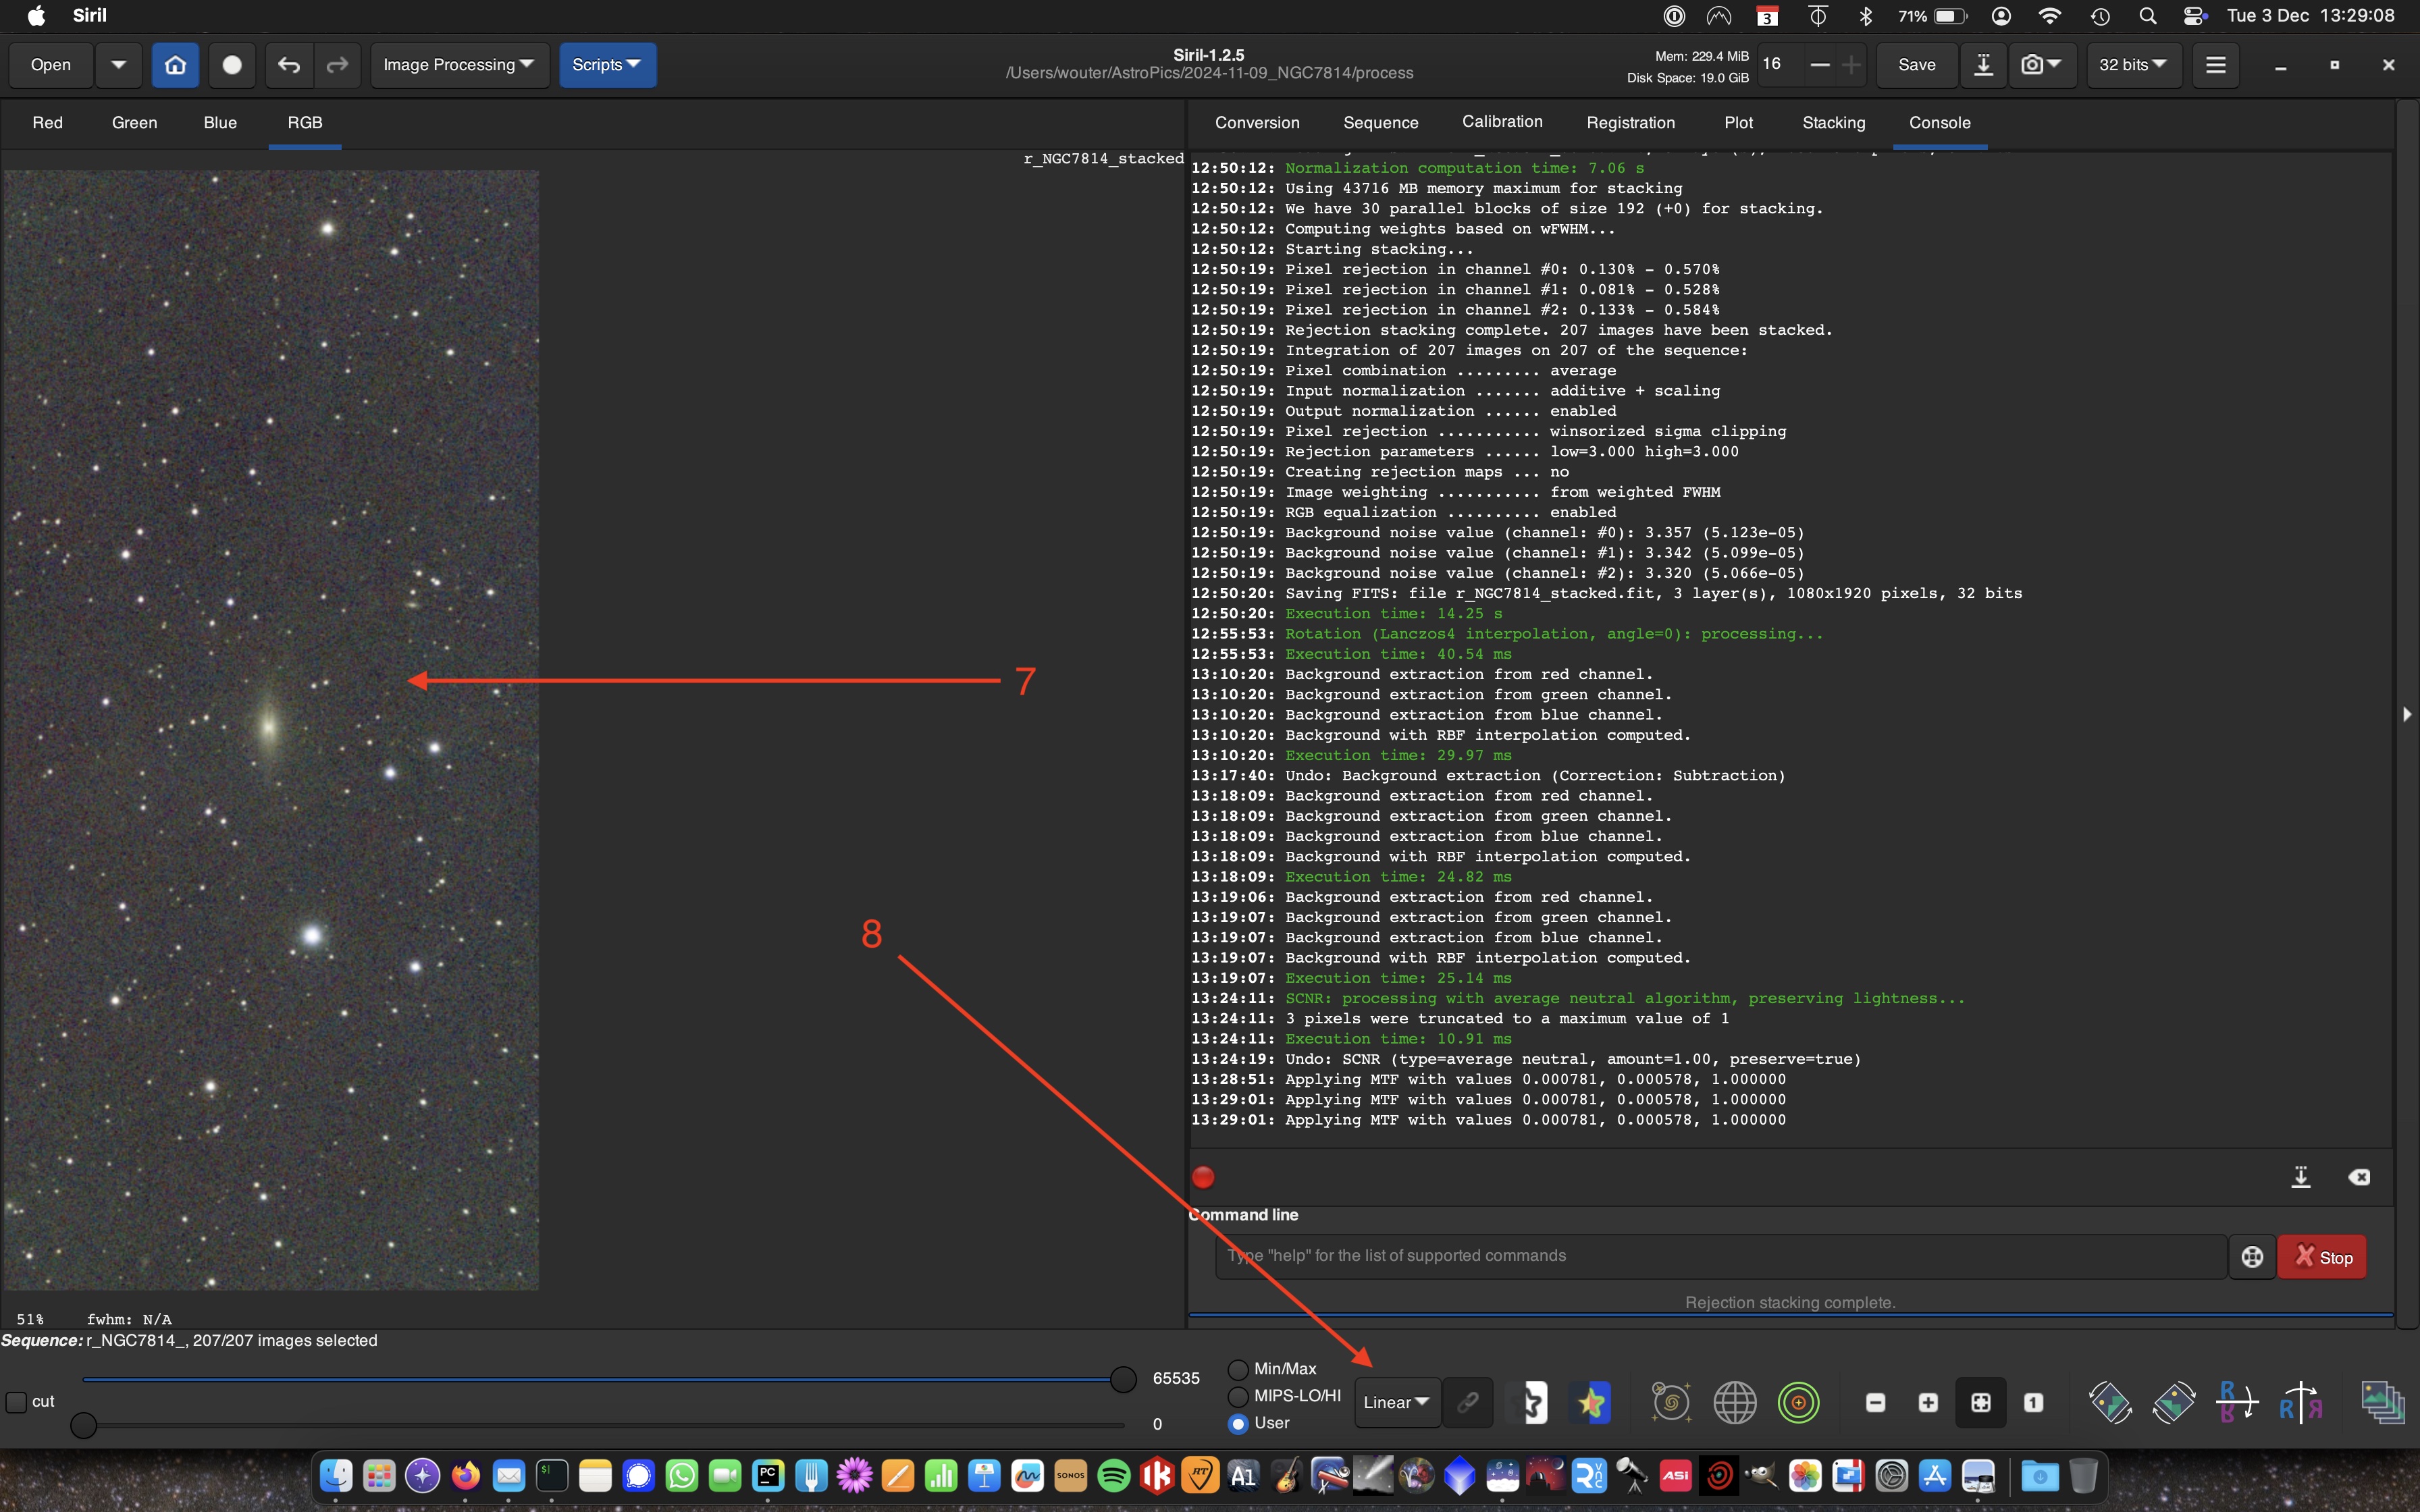
The stretched image now is shown in the image viewer ( 7 ).
Note that the image viewer is in linear mode ( 8 ).
Now the image can be exported to be further processed in a different application.
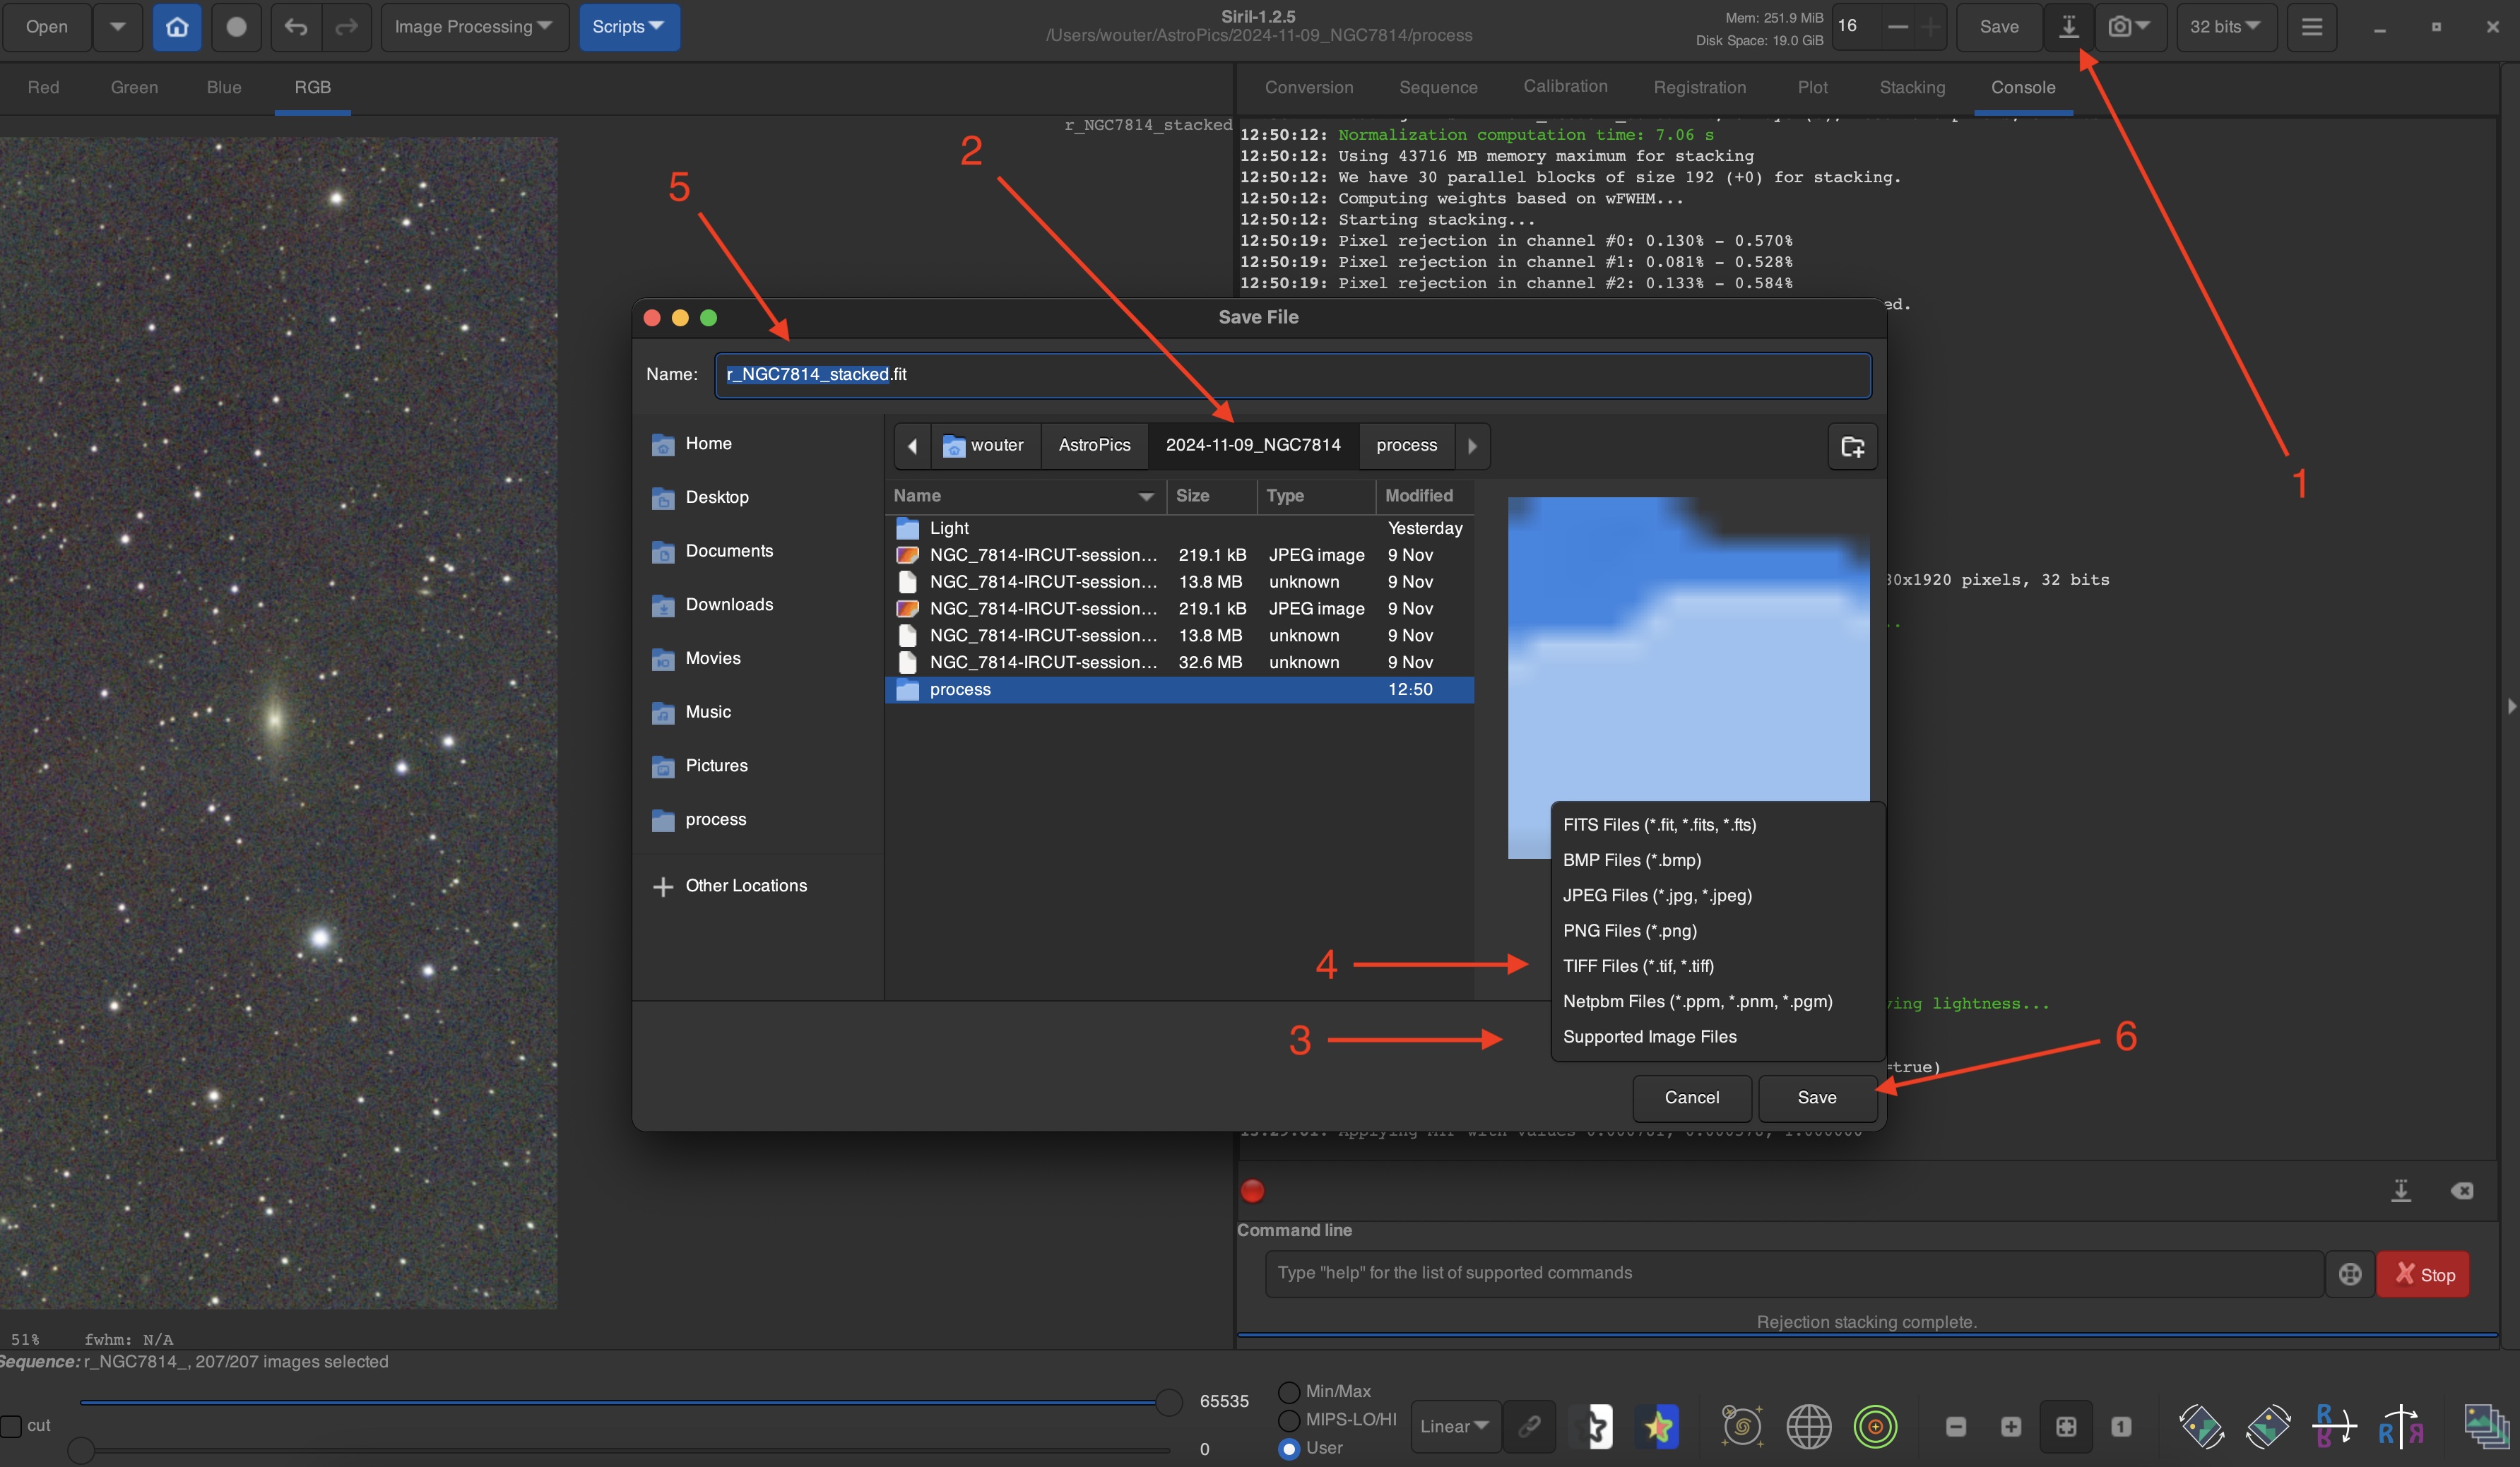
Click the Save As button ( 1 ) and select the folder in which you want to save the image ( 2 ).
Click the Supported Image Files drop-down ( 3 ) to see which file formats are supported.
Note that for further processing a lossless image format like TIFF ( 4 ) is the best option.
After selecting TIFF, type the filename ( 5 ) and click the Save button ( 6 ).
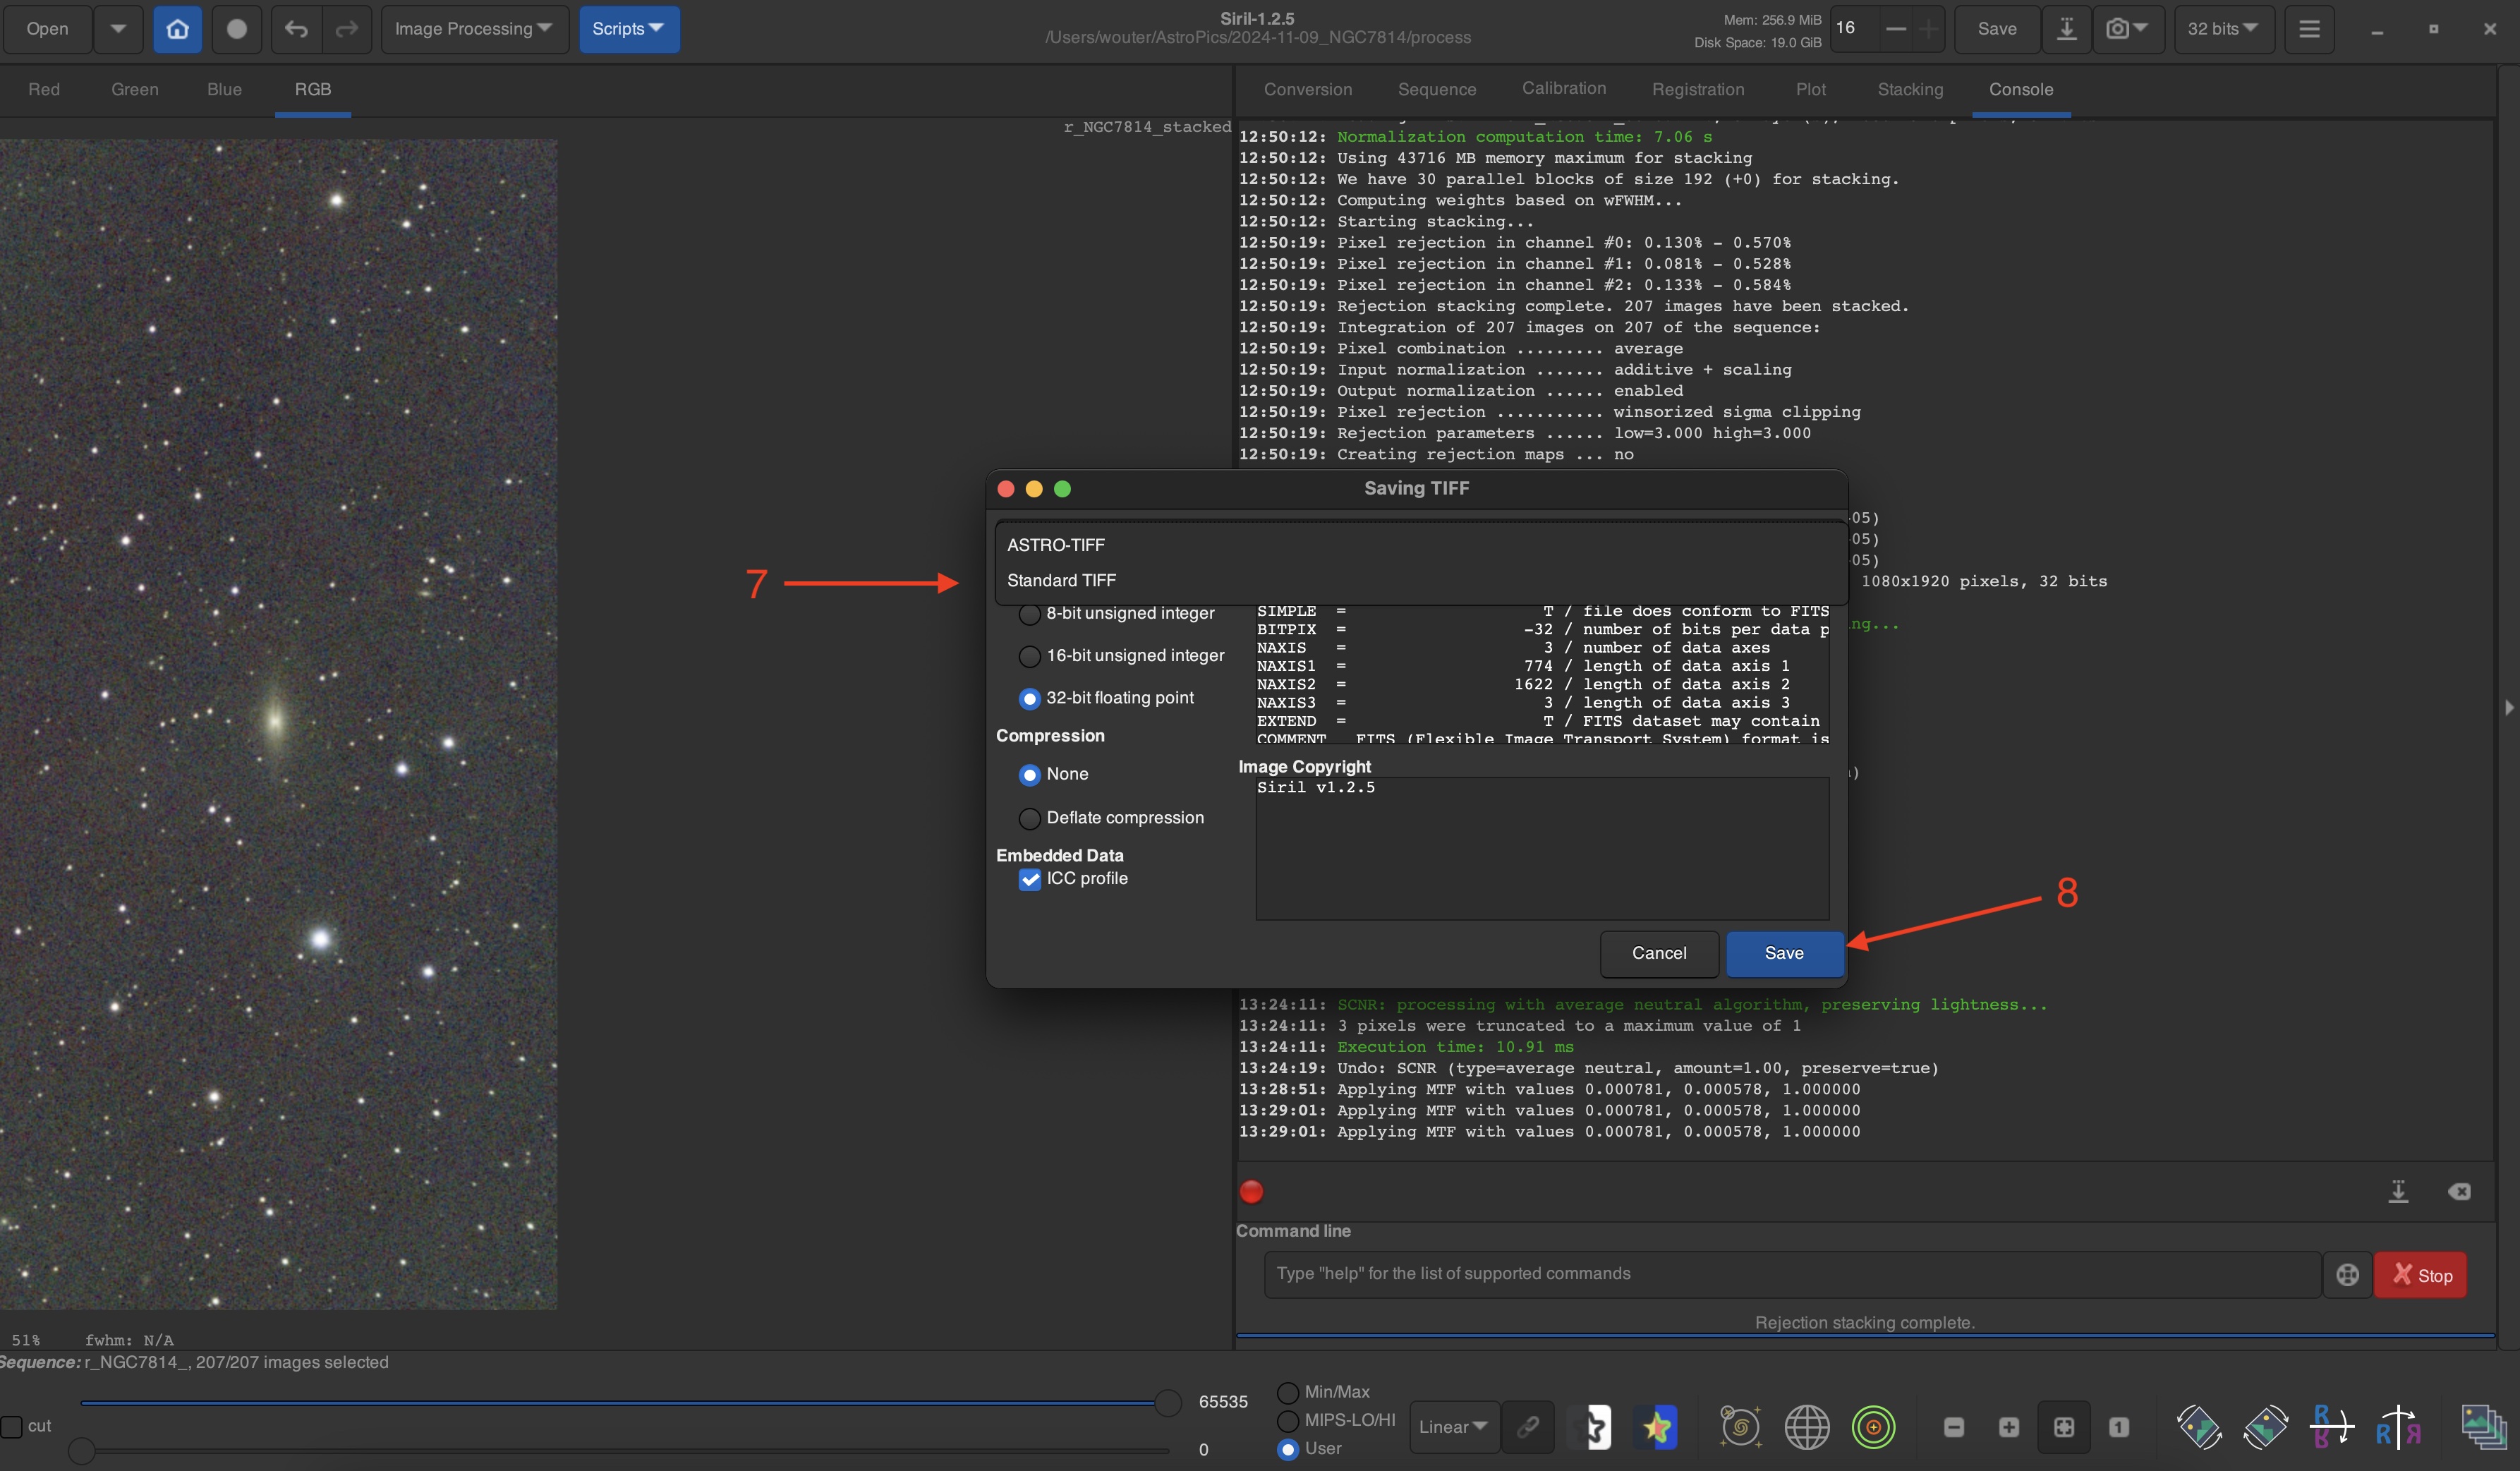
You will get another popup that lets you choose between ASTRO-TIFF and Standard TIFF ( 7 ).
For most purposes the difference doesn't matter and you can choose Standard TIFF.
Click Save ( 8 ) again.
As explained several times in this tutorial, this only explains a basic way of image processing with Siril. There really are many more possibilities like noise reduction, deconvulution, processing stars separately from the rest of the image and much more advanced ways of stretching images. And of course Siril can also be used to process bias, dark and flat frames! With this basic tutorial, however, you get a simple and powerful way to process your SeeStar images. I hope that it has helped you on your way and that it encourages you to explore the many great possibilities that Siril has to offer.